Build Backyard Garden Bridges
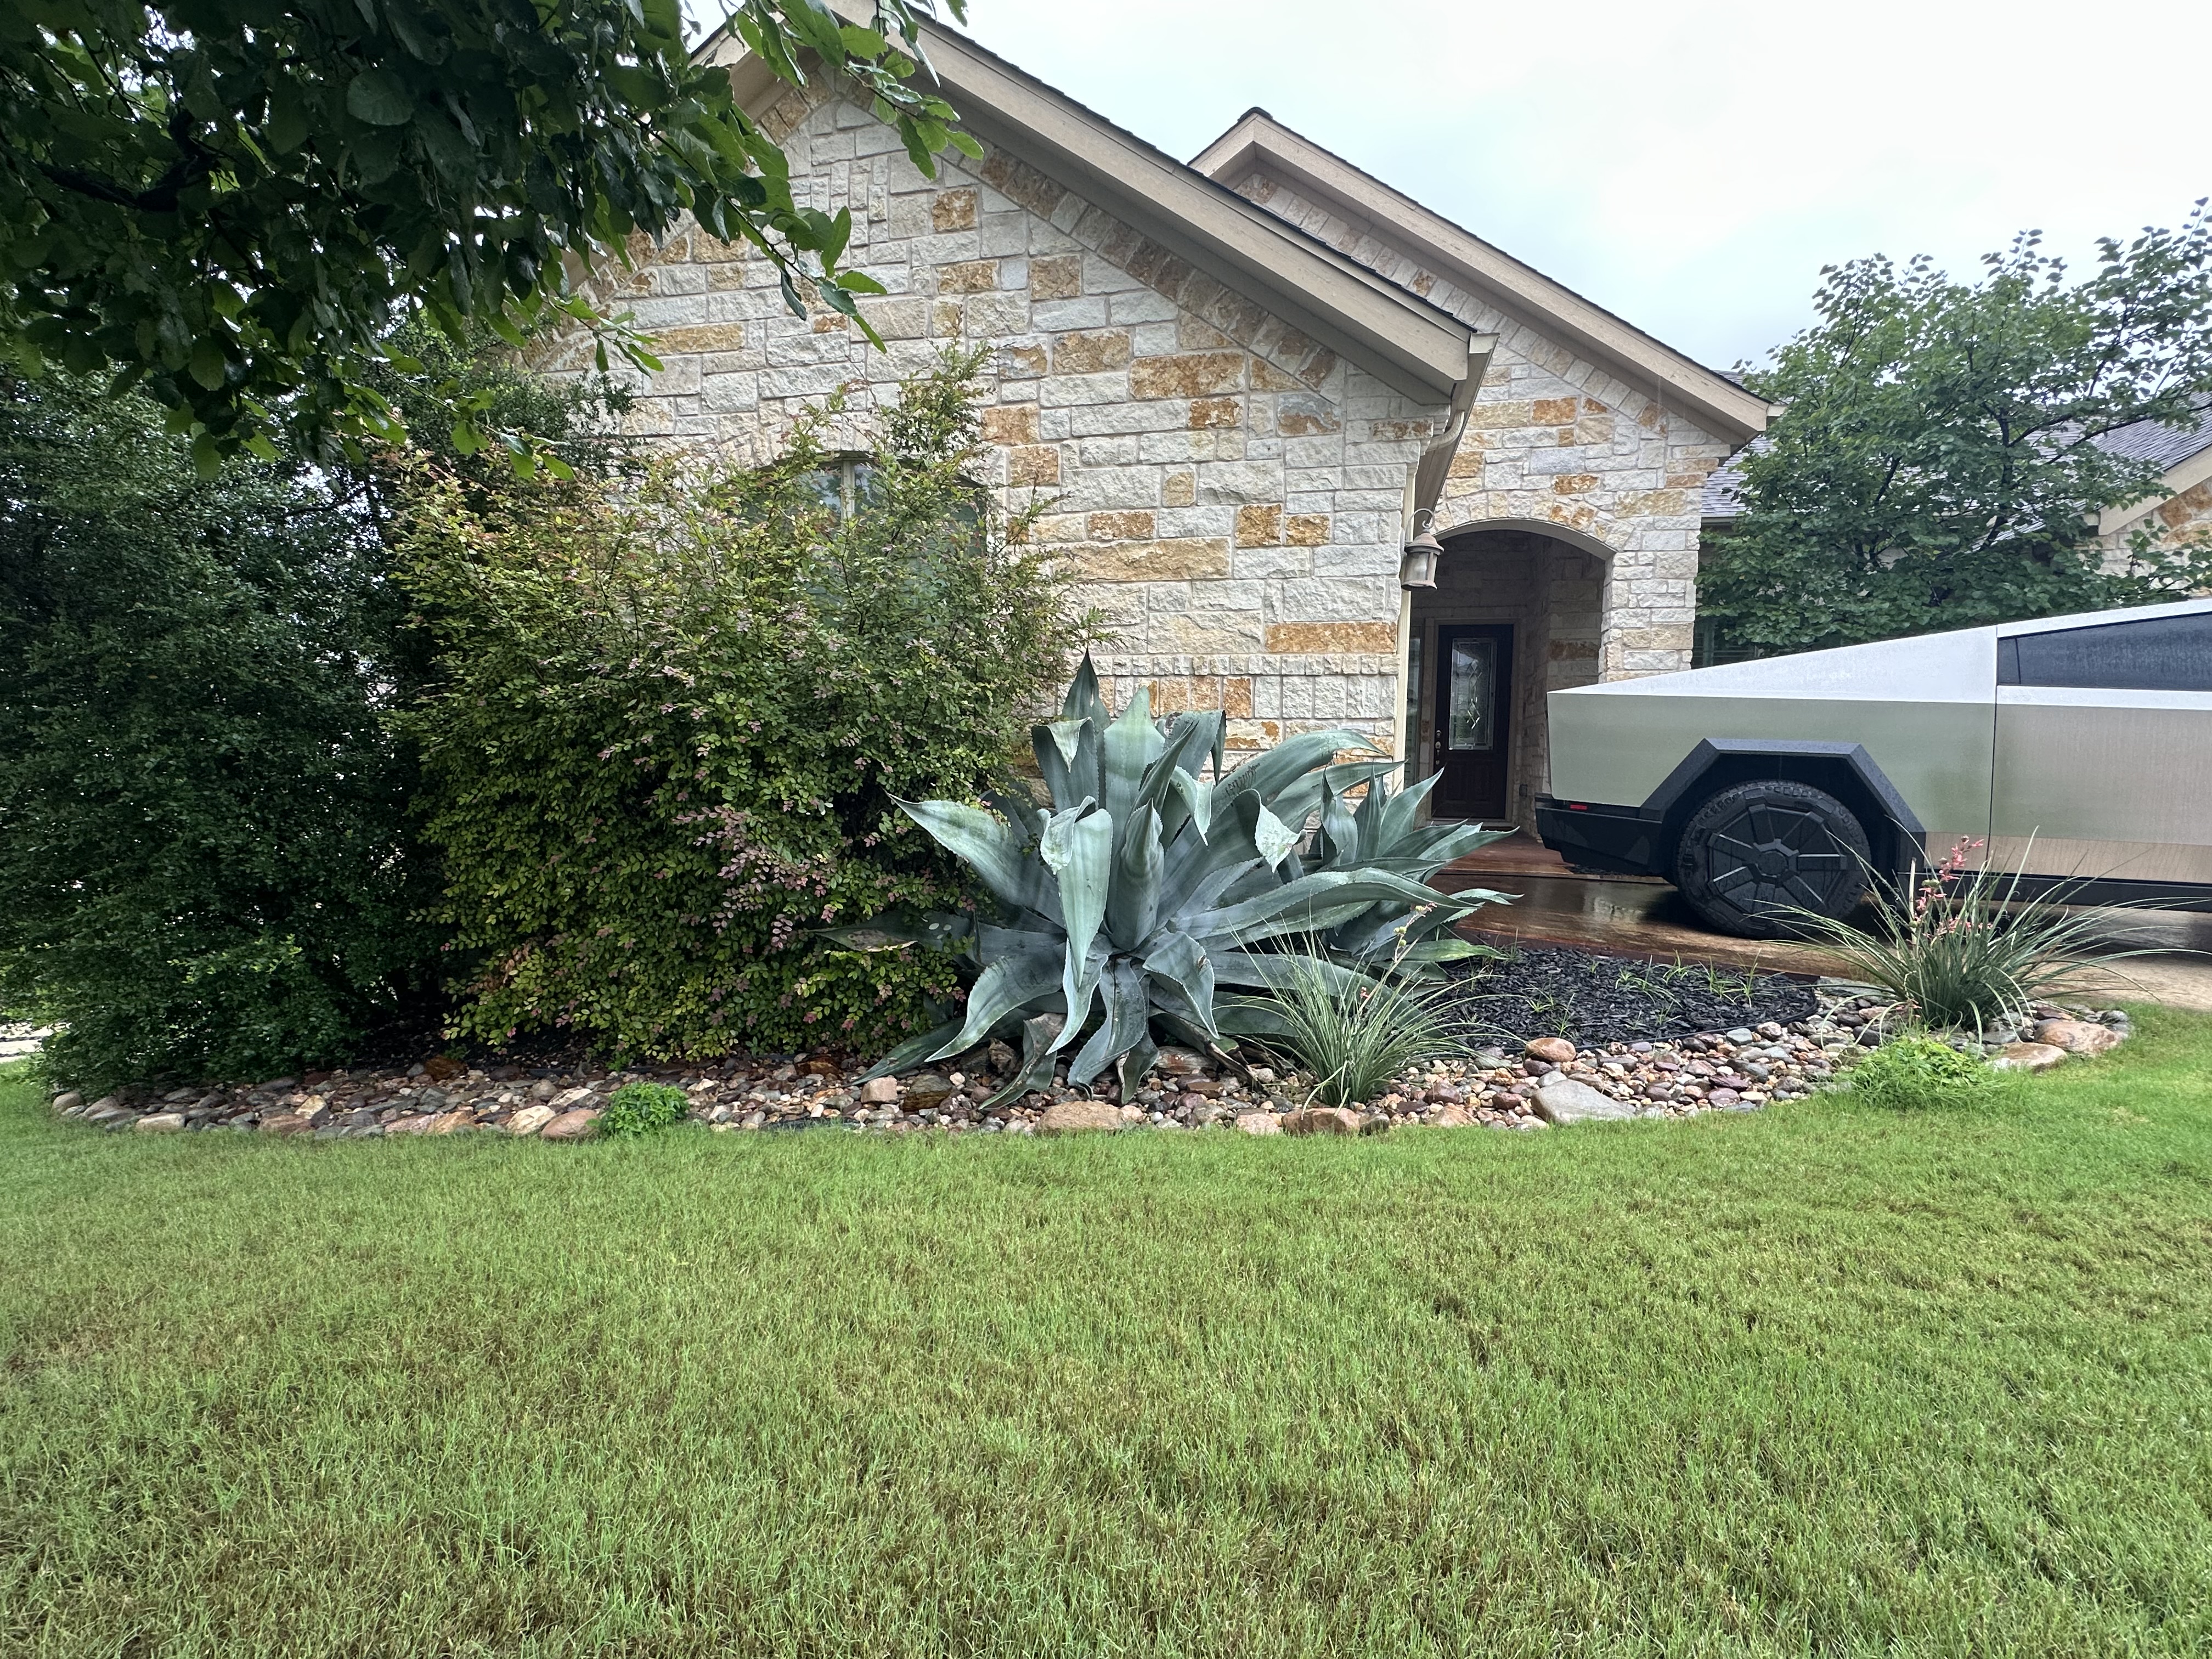
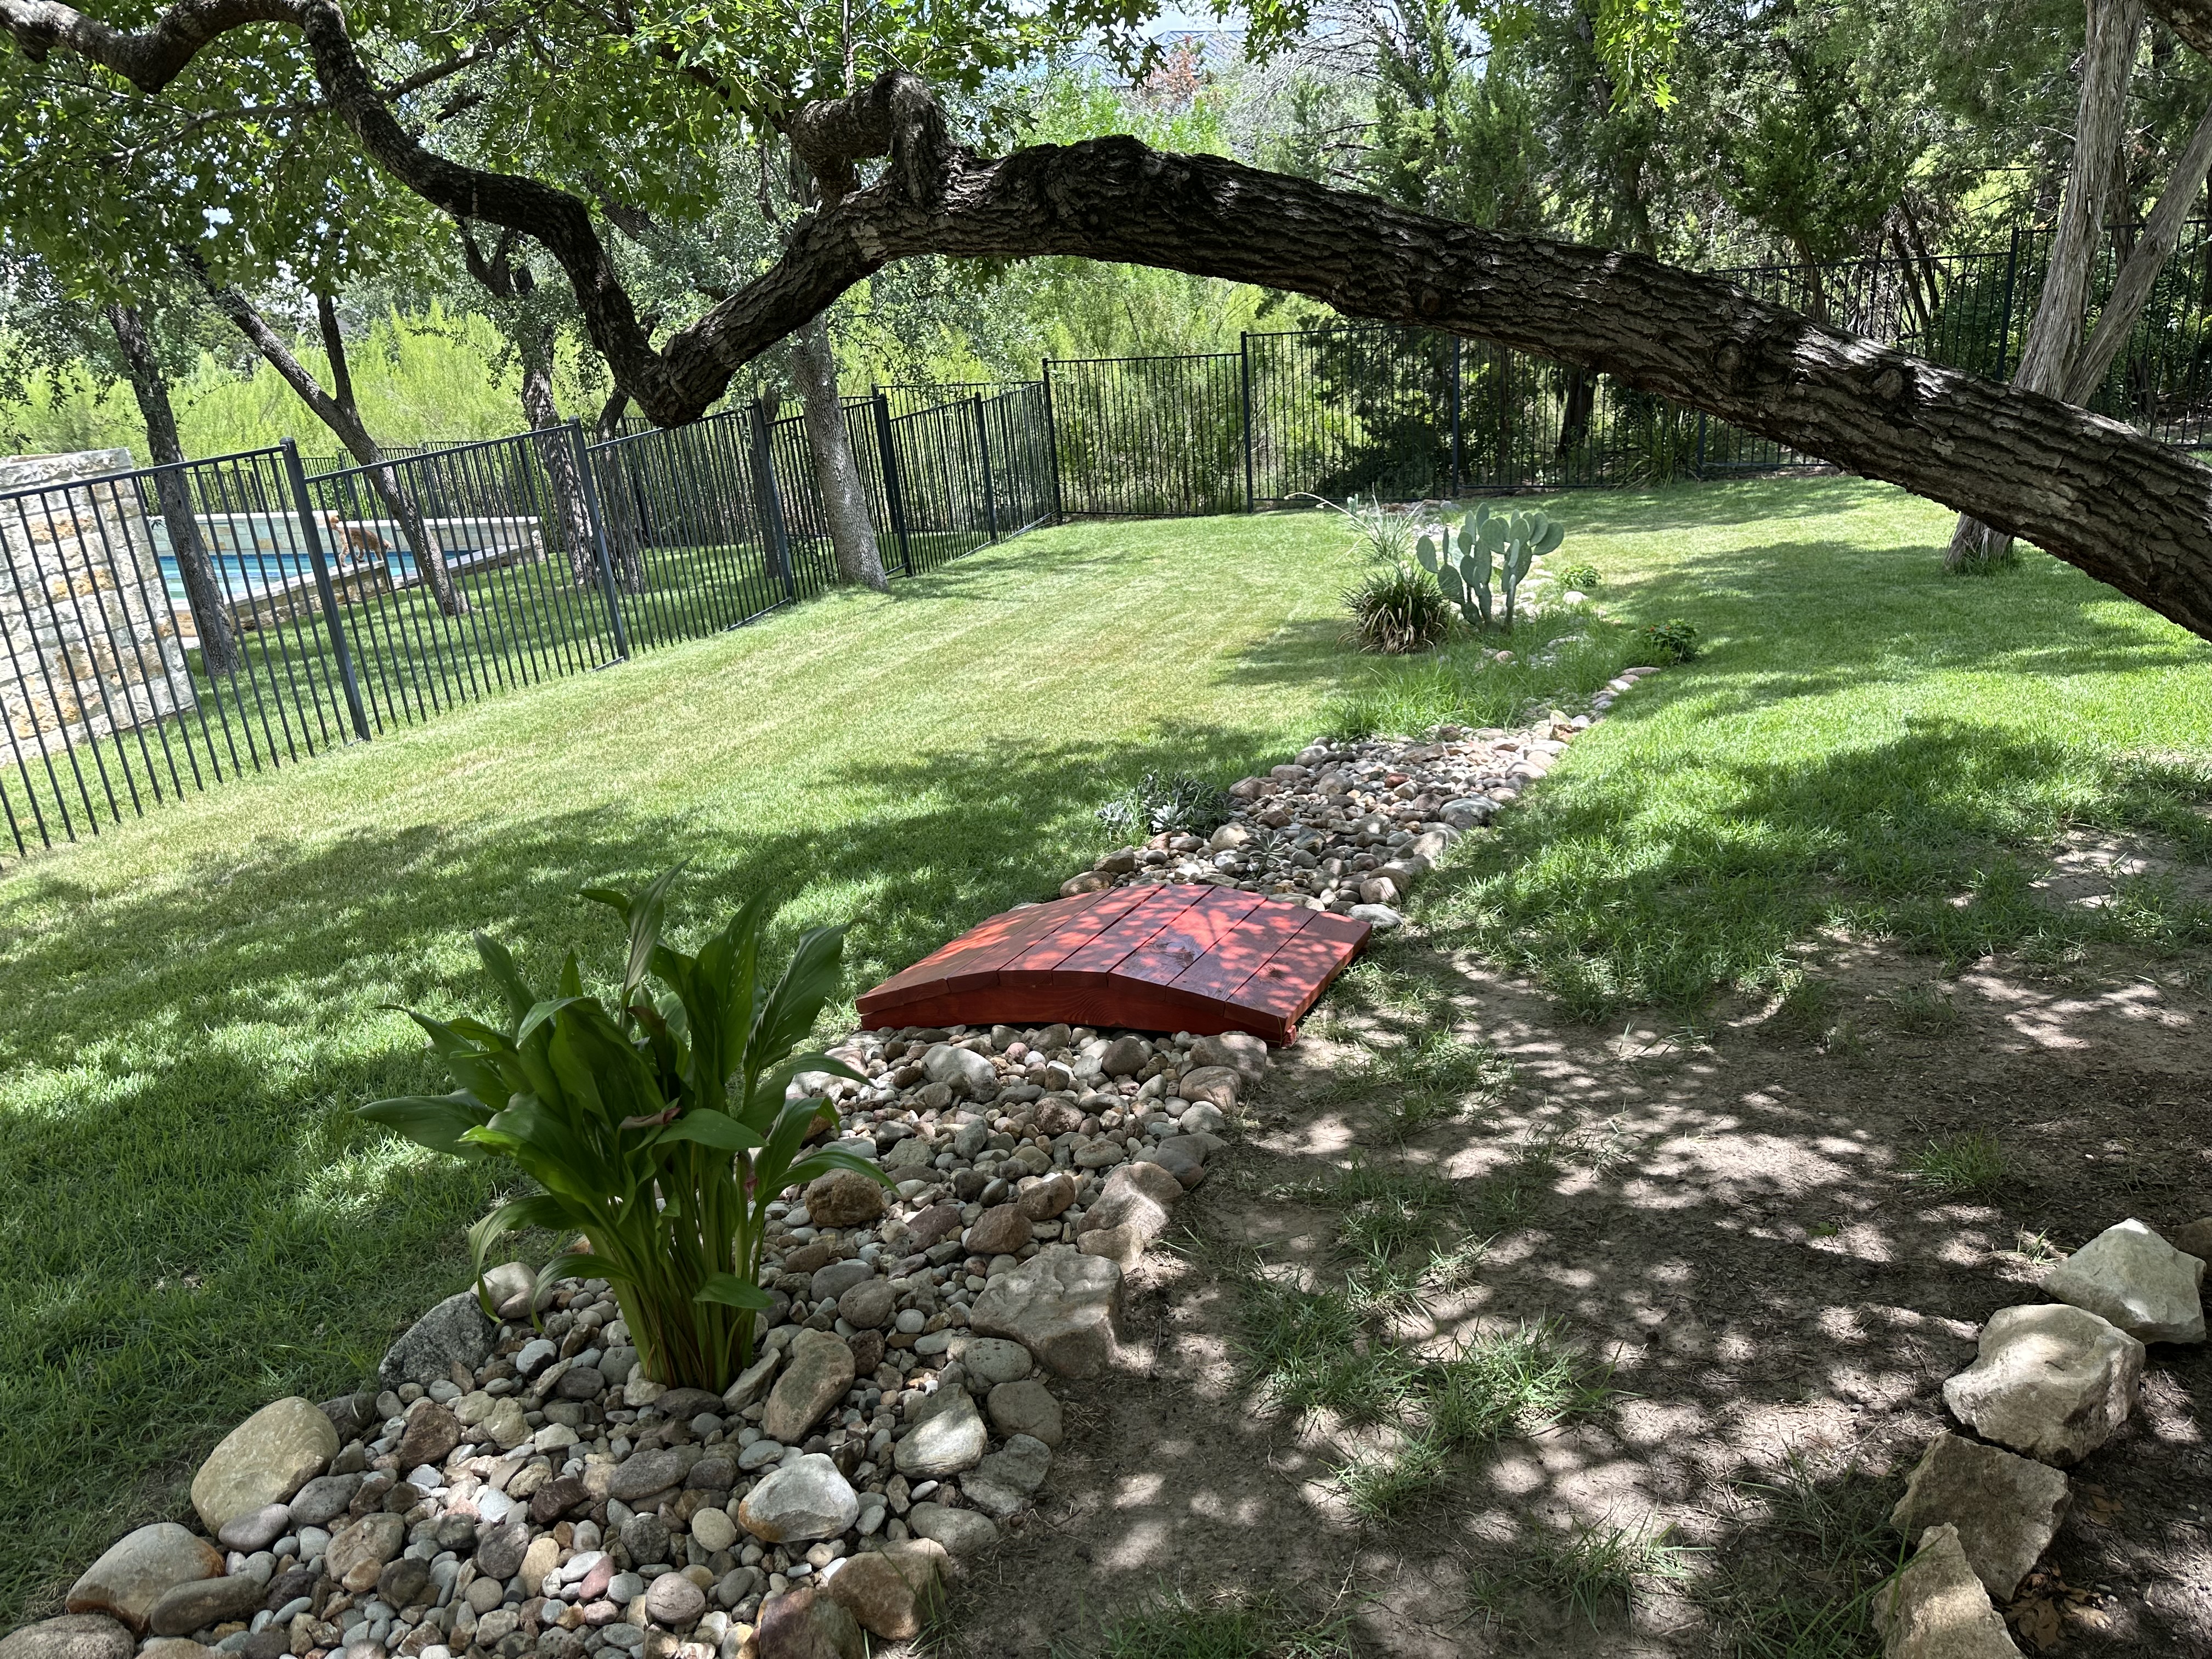
I live in the Hill Country of Austin, Texas. The weather here can be dry, but we experience thunderstorms throughout the year. When the storms hit, rainwater rushes down from the roof, flowing toward the lawn. Since the house is built on a hill, there is a consistent path that the rainwater travels on the lawn. Over time, the grass along this path is washed away, leaving bare soil, which doesn’t look appealing during sunny days.
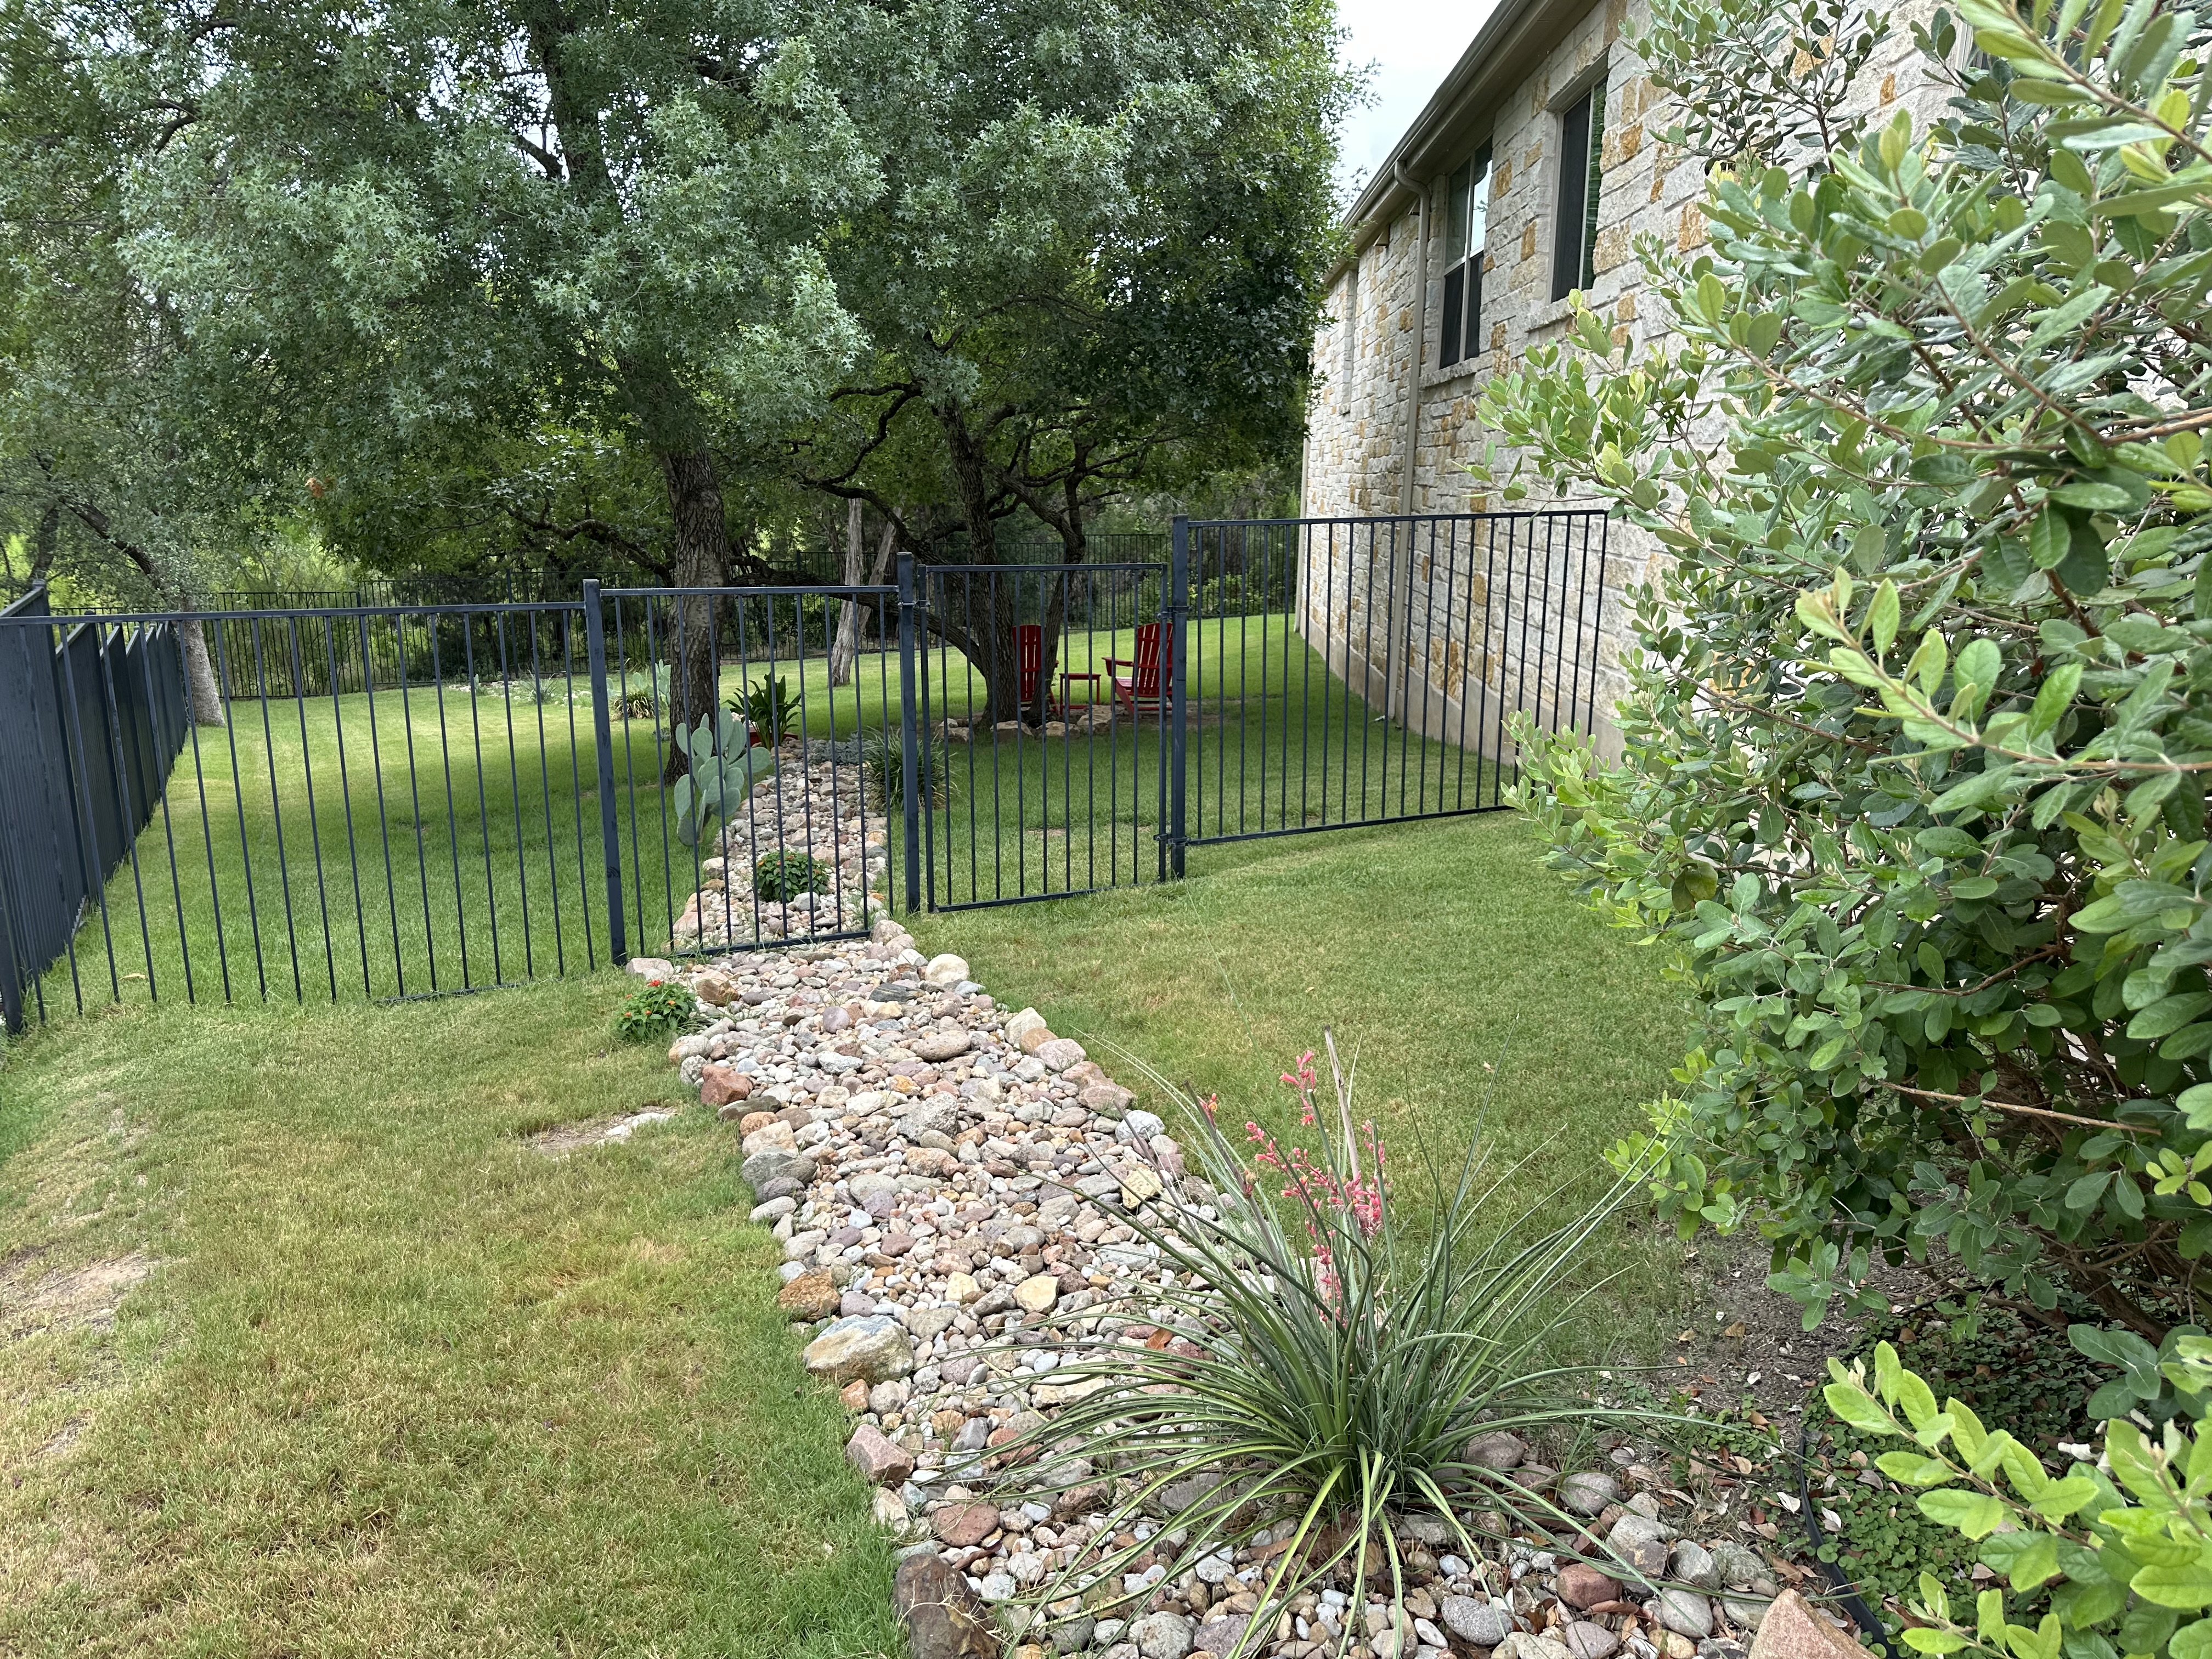
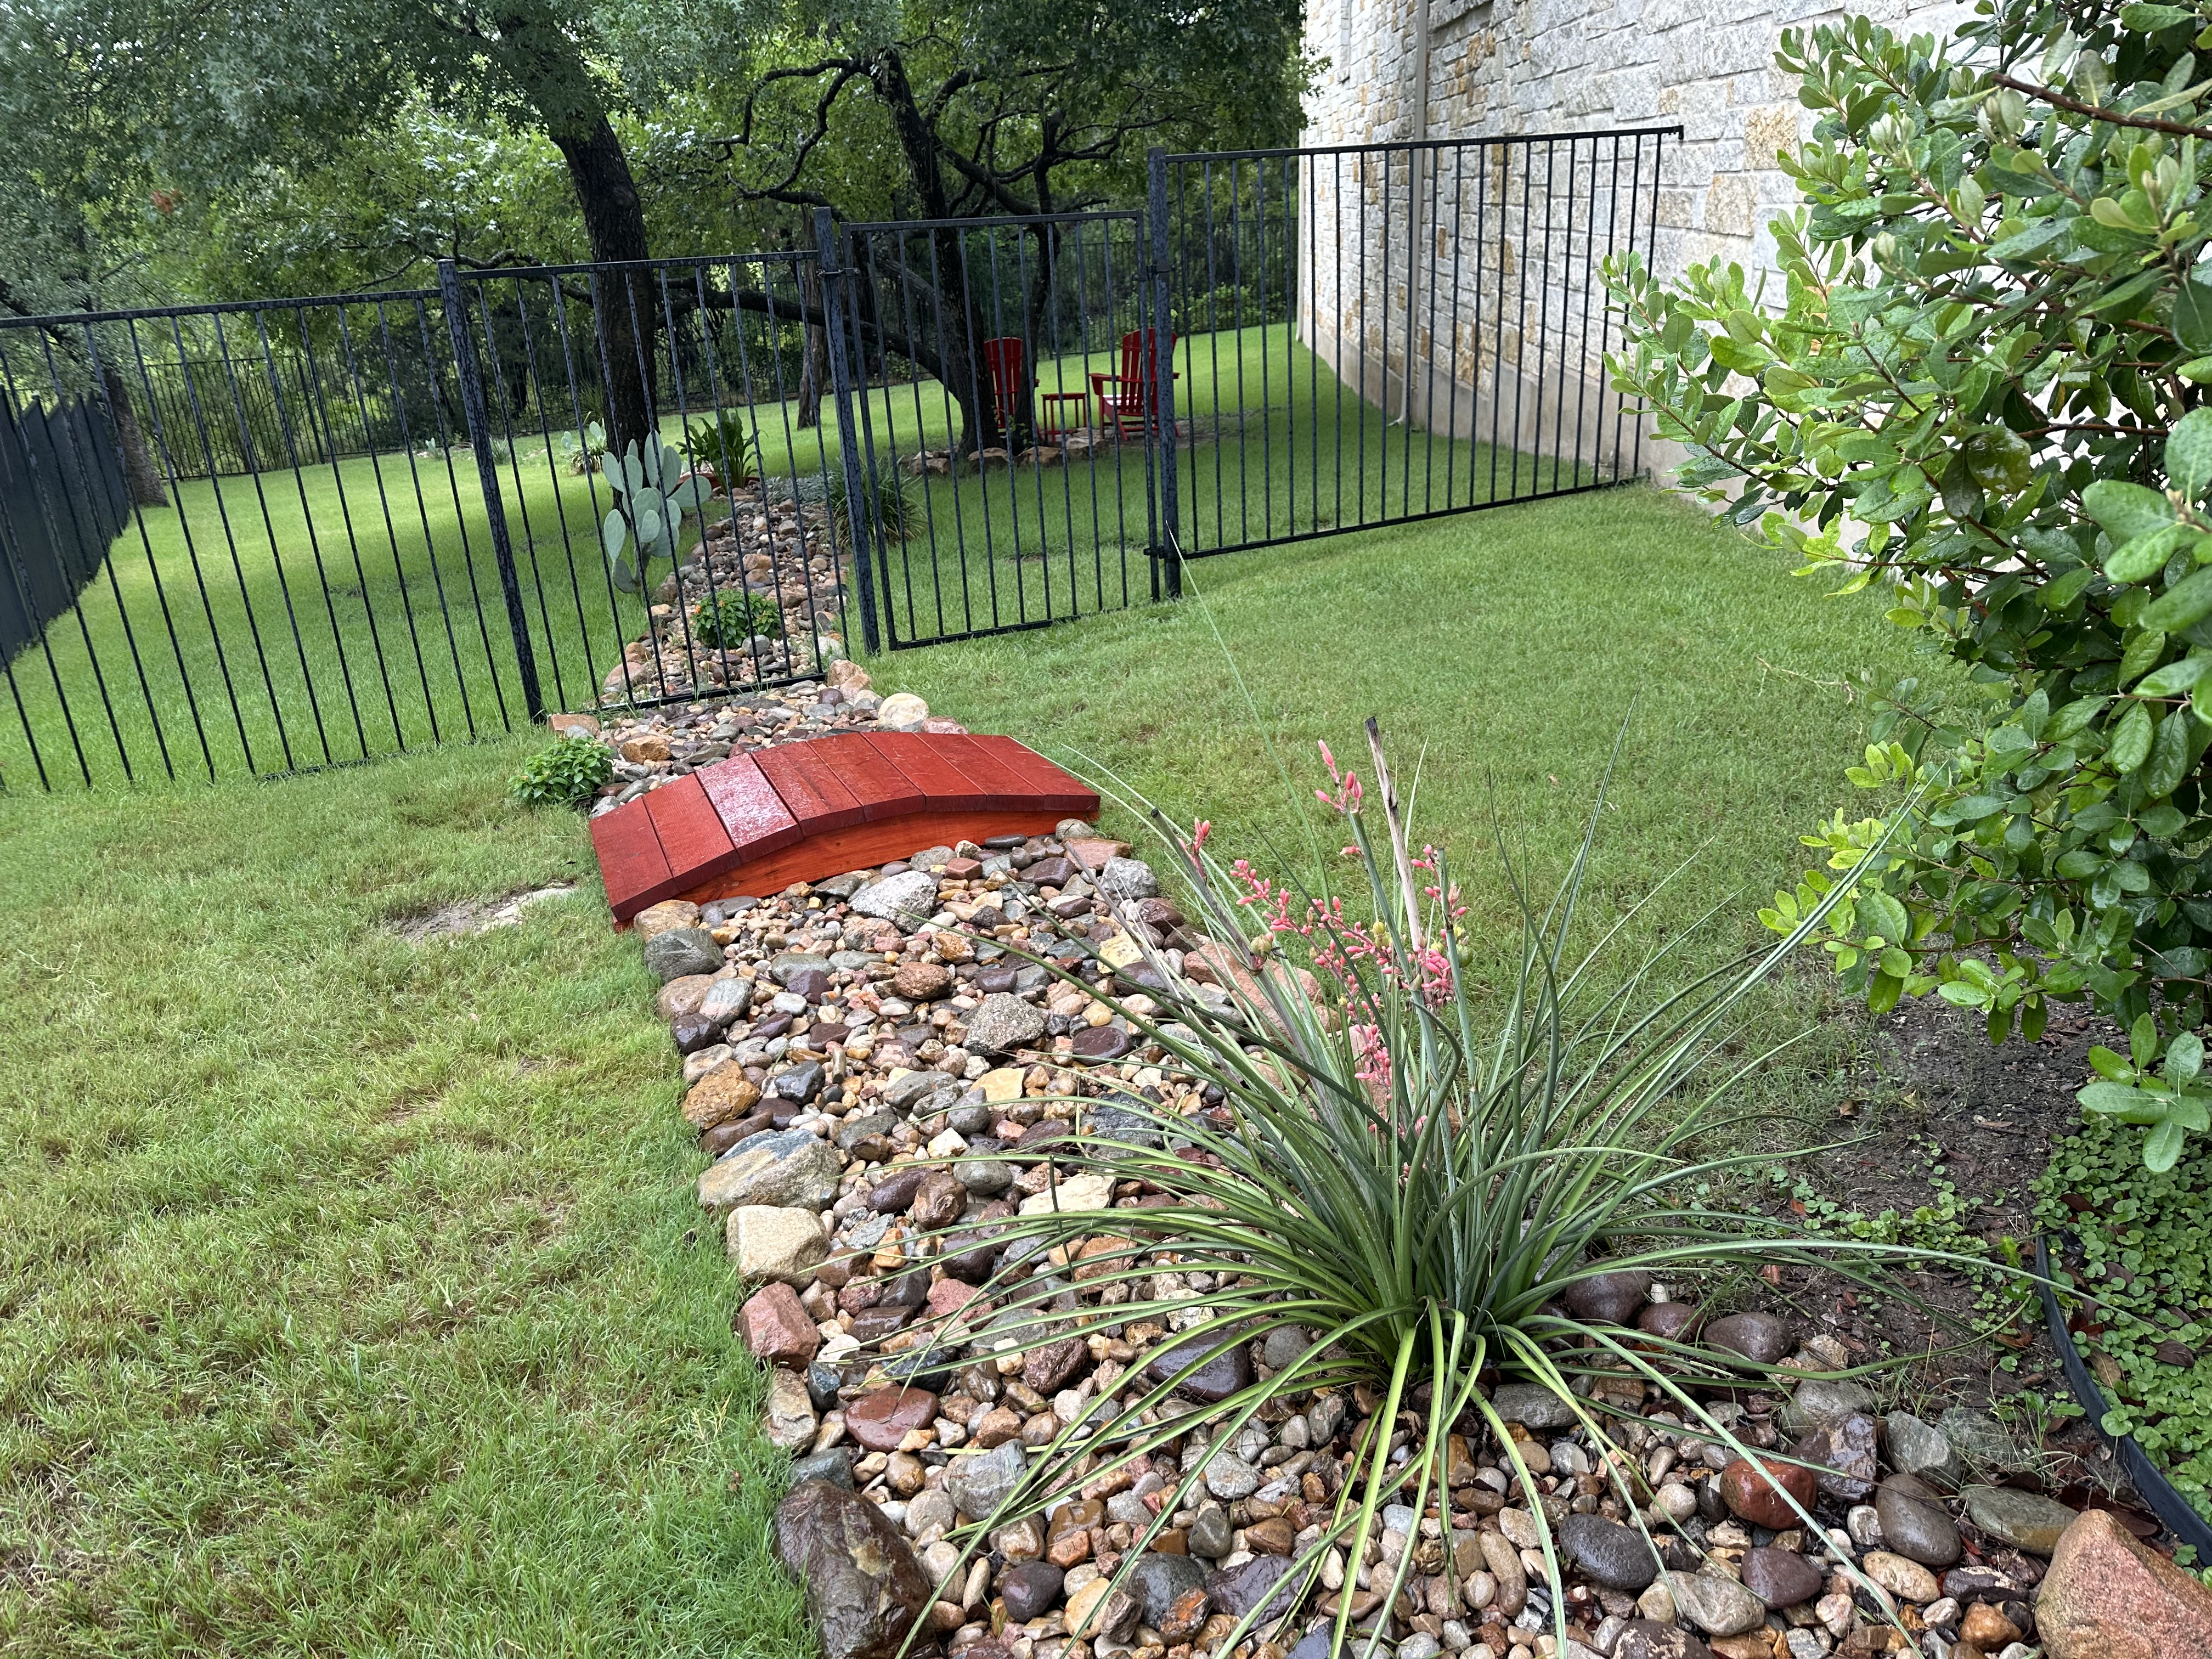
A year ago, I had someone install a dry riverbed along the water path to help manage rainwater. The riverbed is made of rocks of different kinds and colors. It loops around the house and directs the water to the backyard and down the hill. Besides its practical use, the riverbed also adds visual interest to the backyard.
Garden Bridges
The drainage problem has been solved, but it introduced a new issue. The yard is now split into two sections. To open the backyard gate, we must walk on the rocks, which disrupts the layered structure of the riverbed. To mow the lawn, my husband has to lift the lawnmower over the rocks. This makes me want to build a garden bridge that is large enough for a lawnmower and a person to cross easily, but small enough to stay roughly within the bounds of the dry riverbed.
Tools and Materia
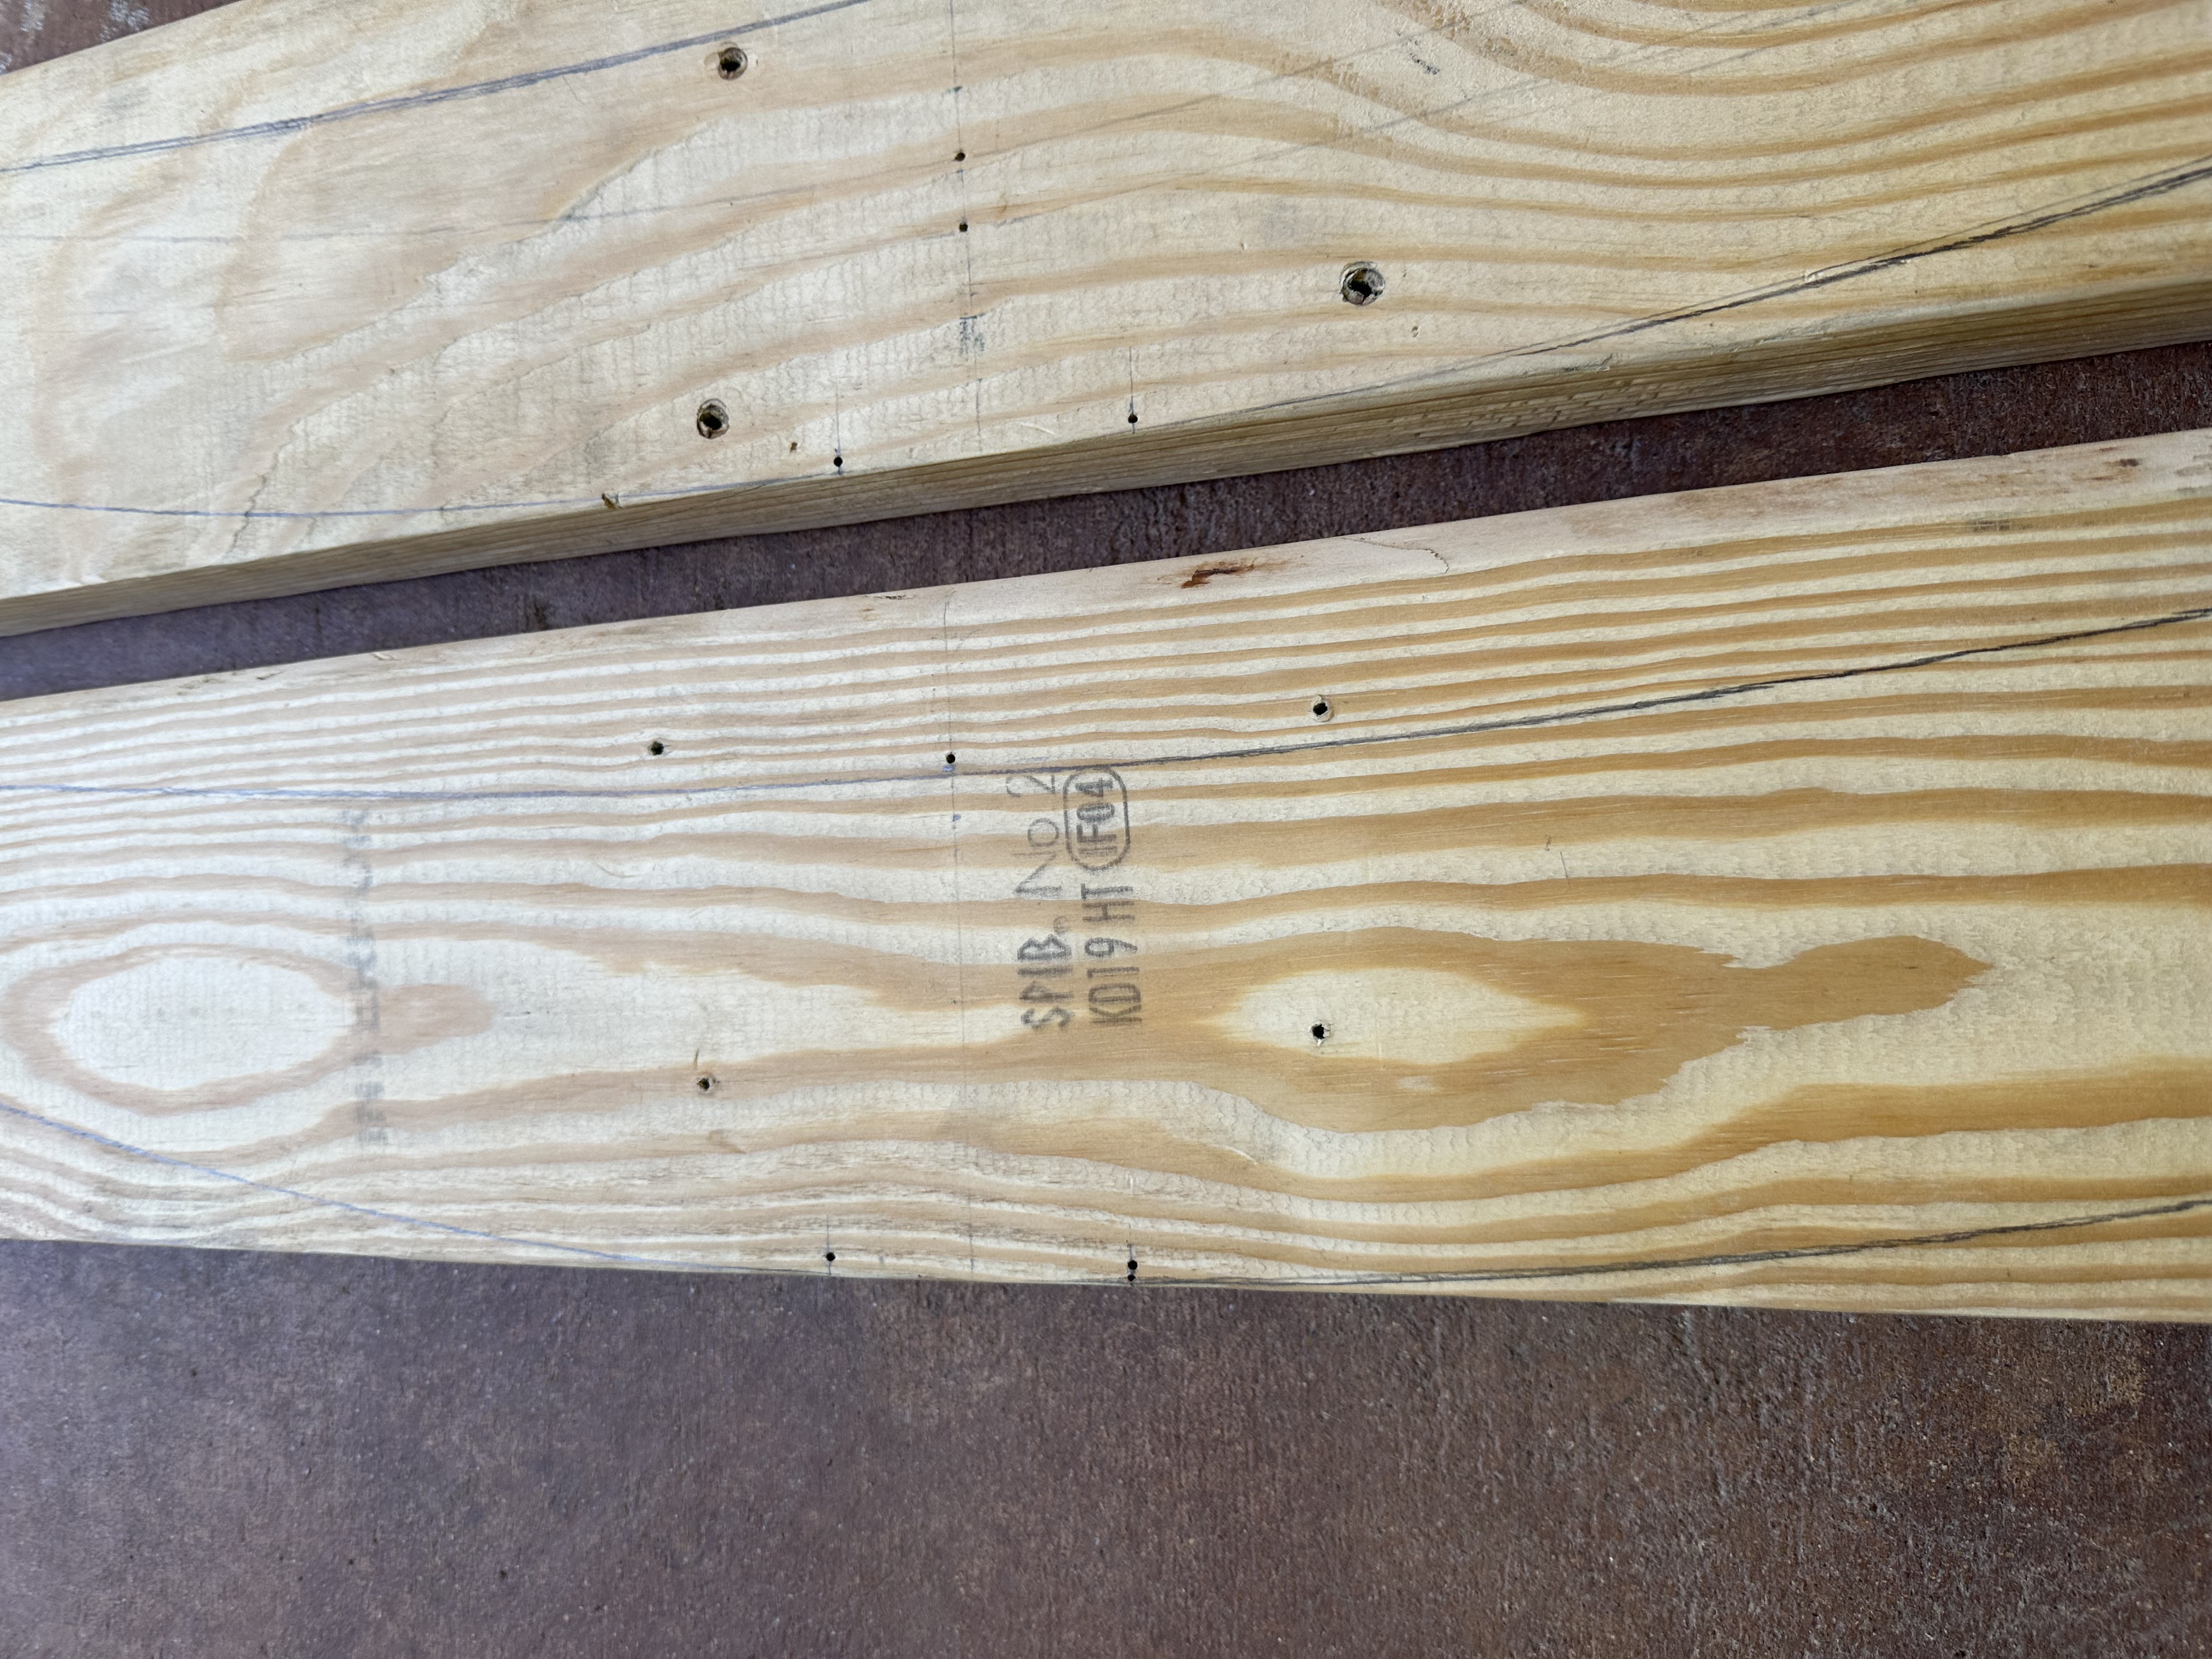
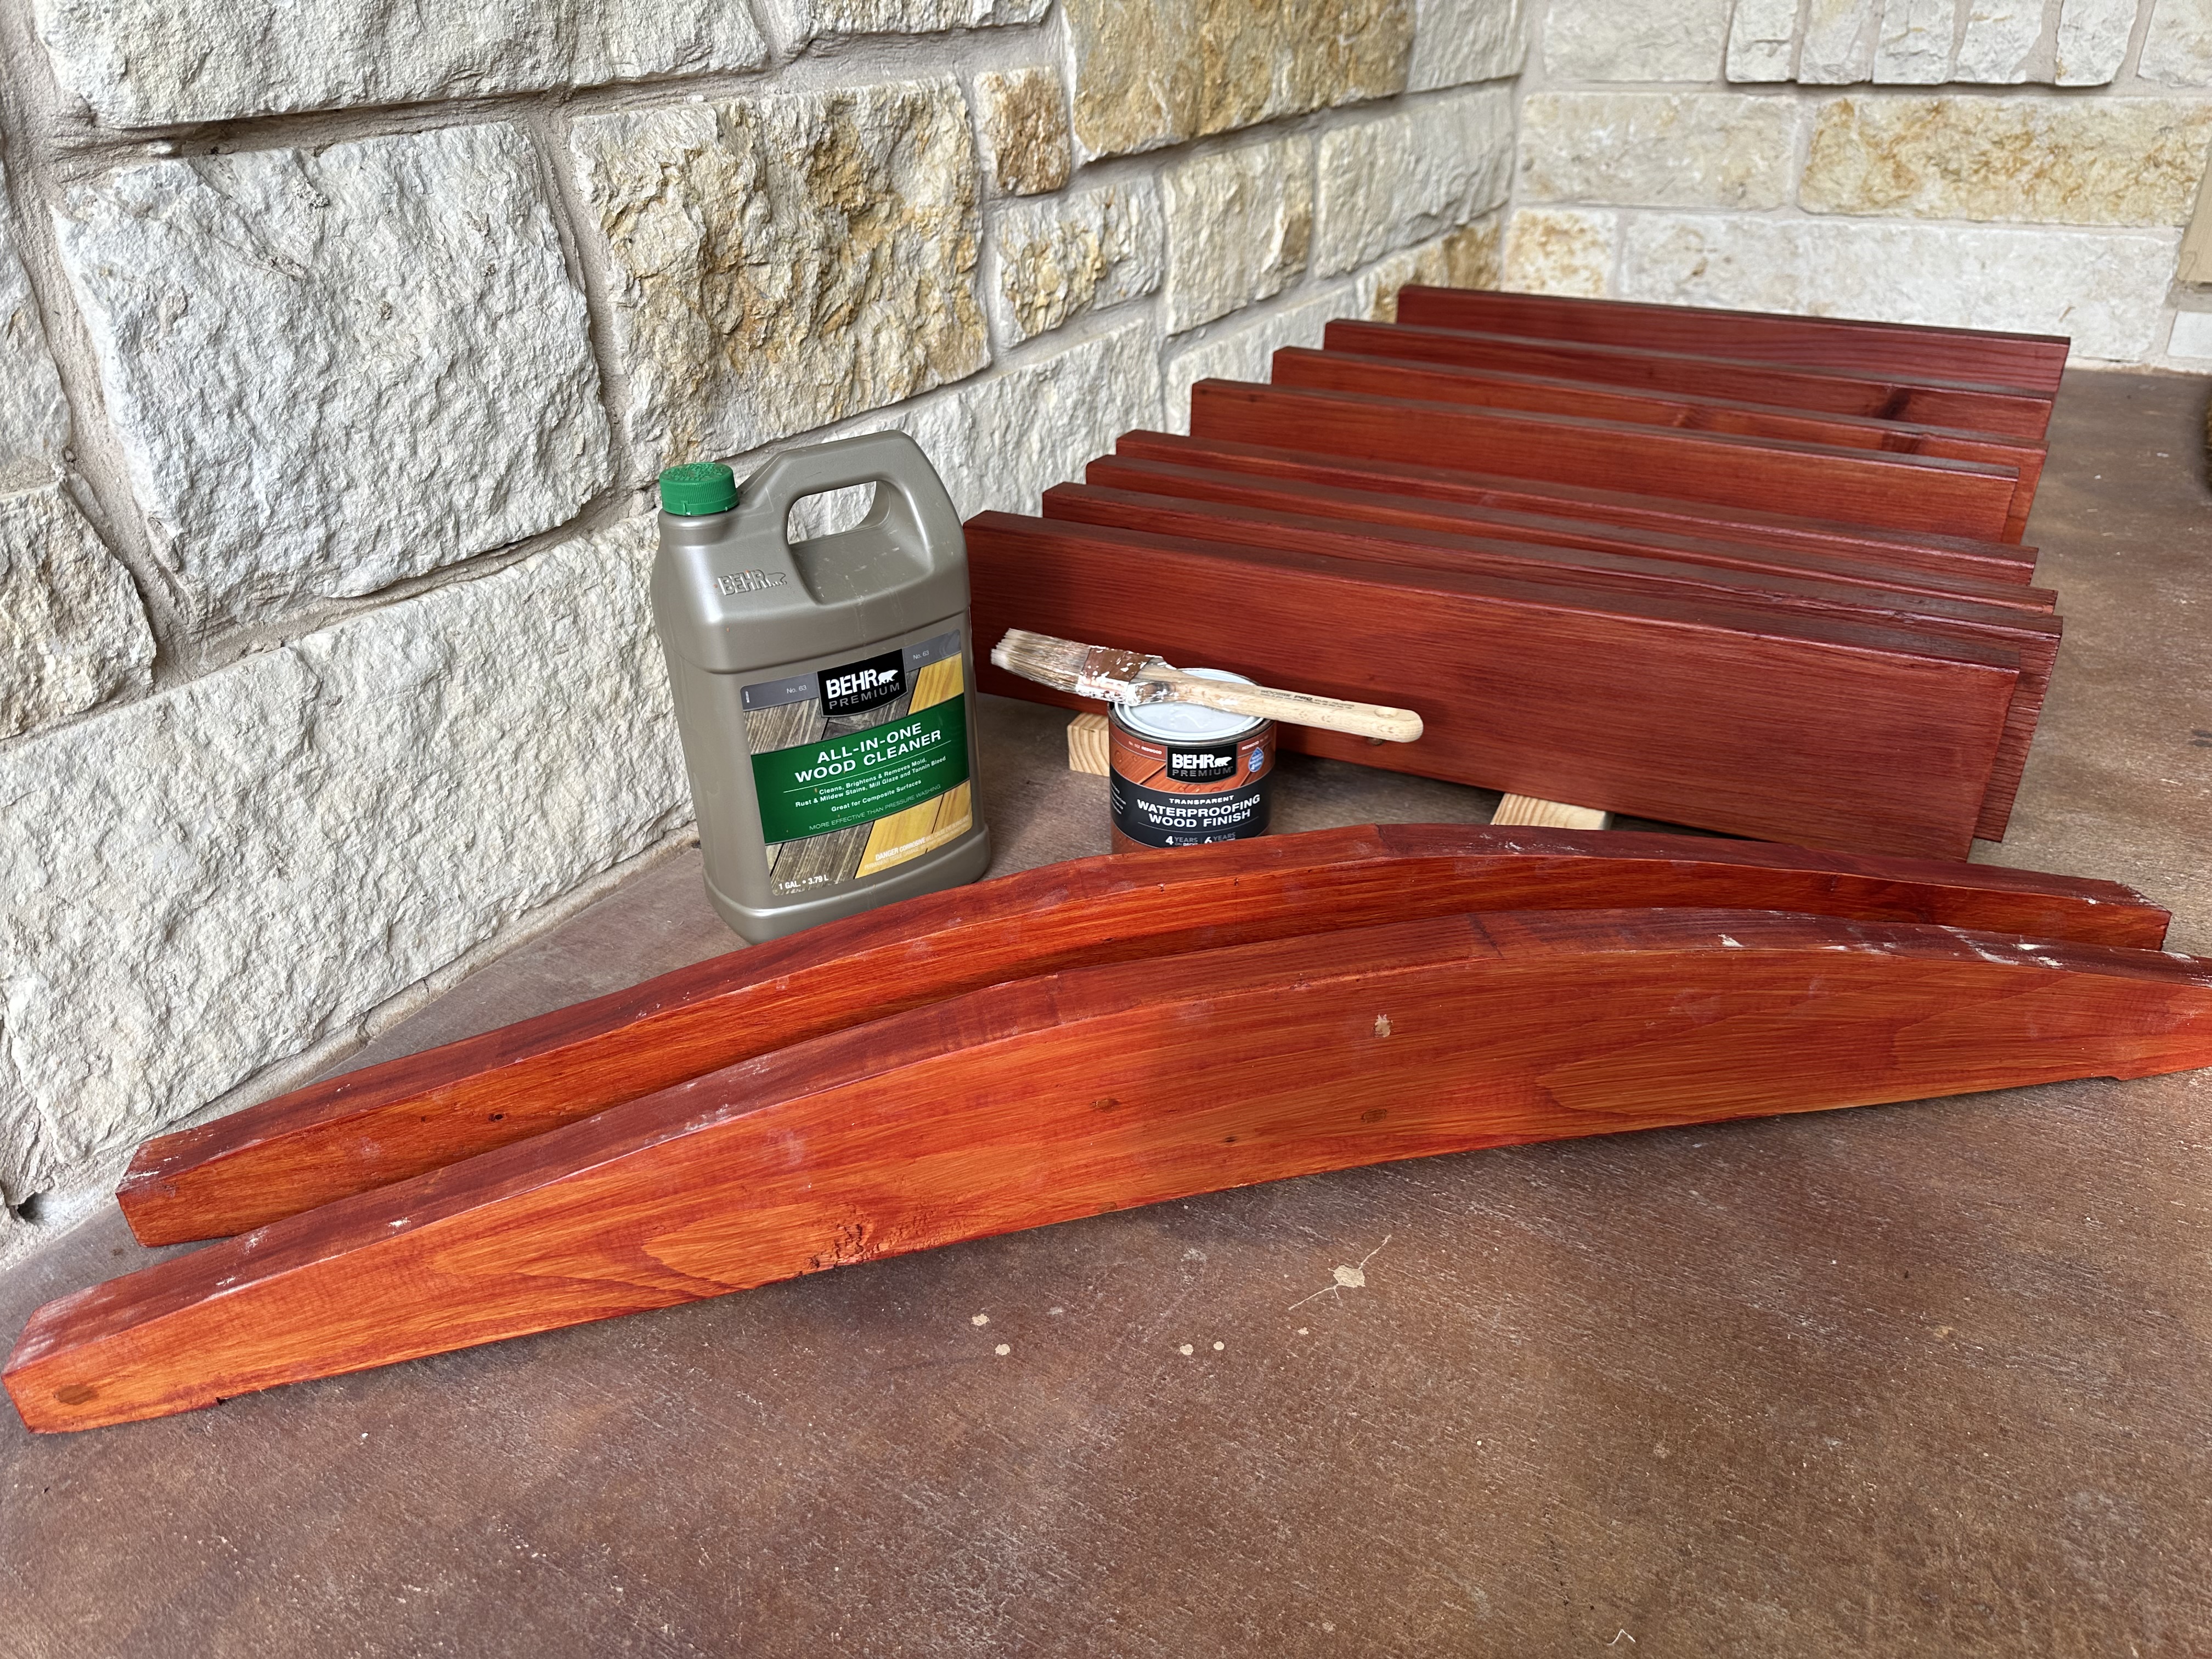
I have some 2x6 construction heart redwood lumber from the previous decking project. I also kept pallet boards from the Tesla Powerwall and solar panels. The pallet wood is treated and sturdy, making it perfect for the bridge’s foundation. The California redwood is beautiful and unique in this Texas Hill Country since the coastal redwood is exclusive to the American West Coast and has to be transported to Texas. I also have galvanized nails and decking screws from the earlier project. So, I have most of the materials needed to build the garden bridge. I only need to buy the paint and brackets.
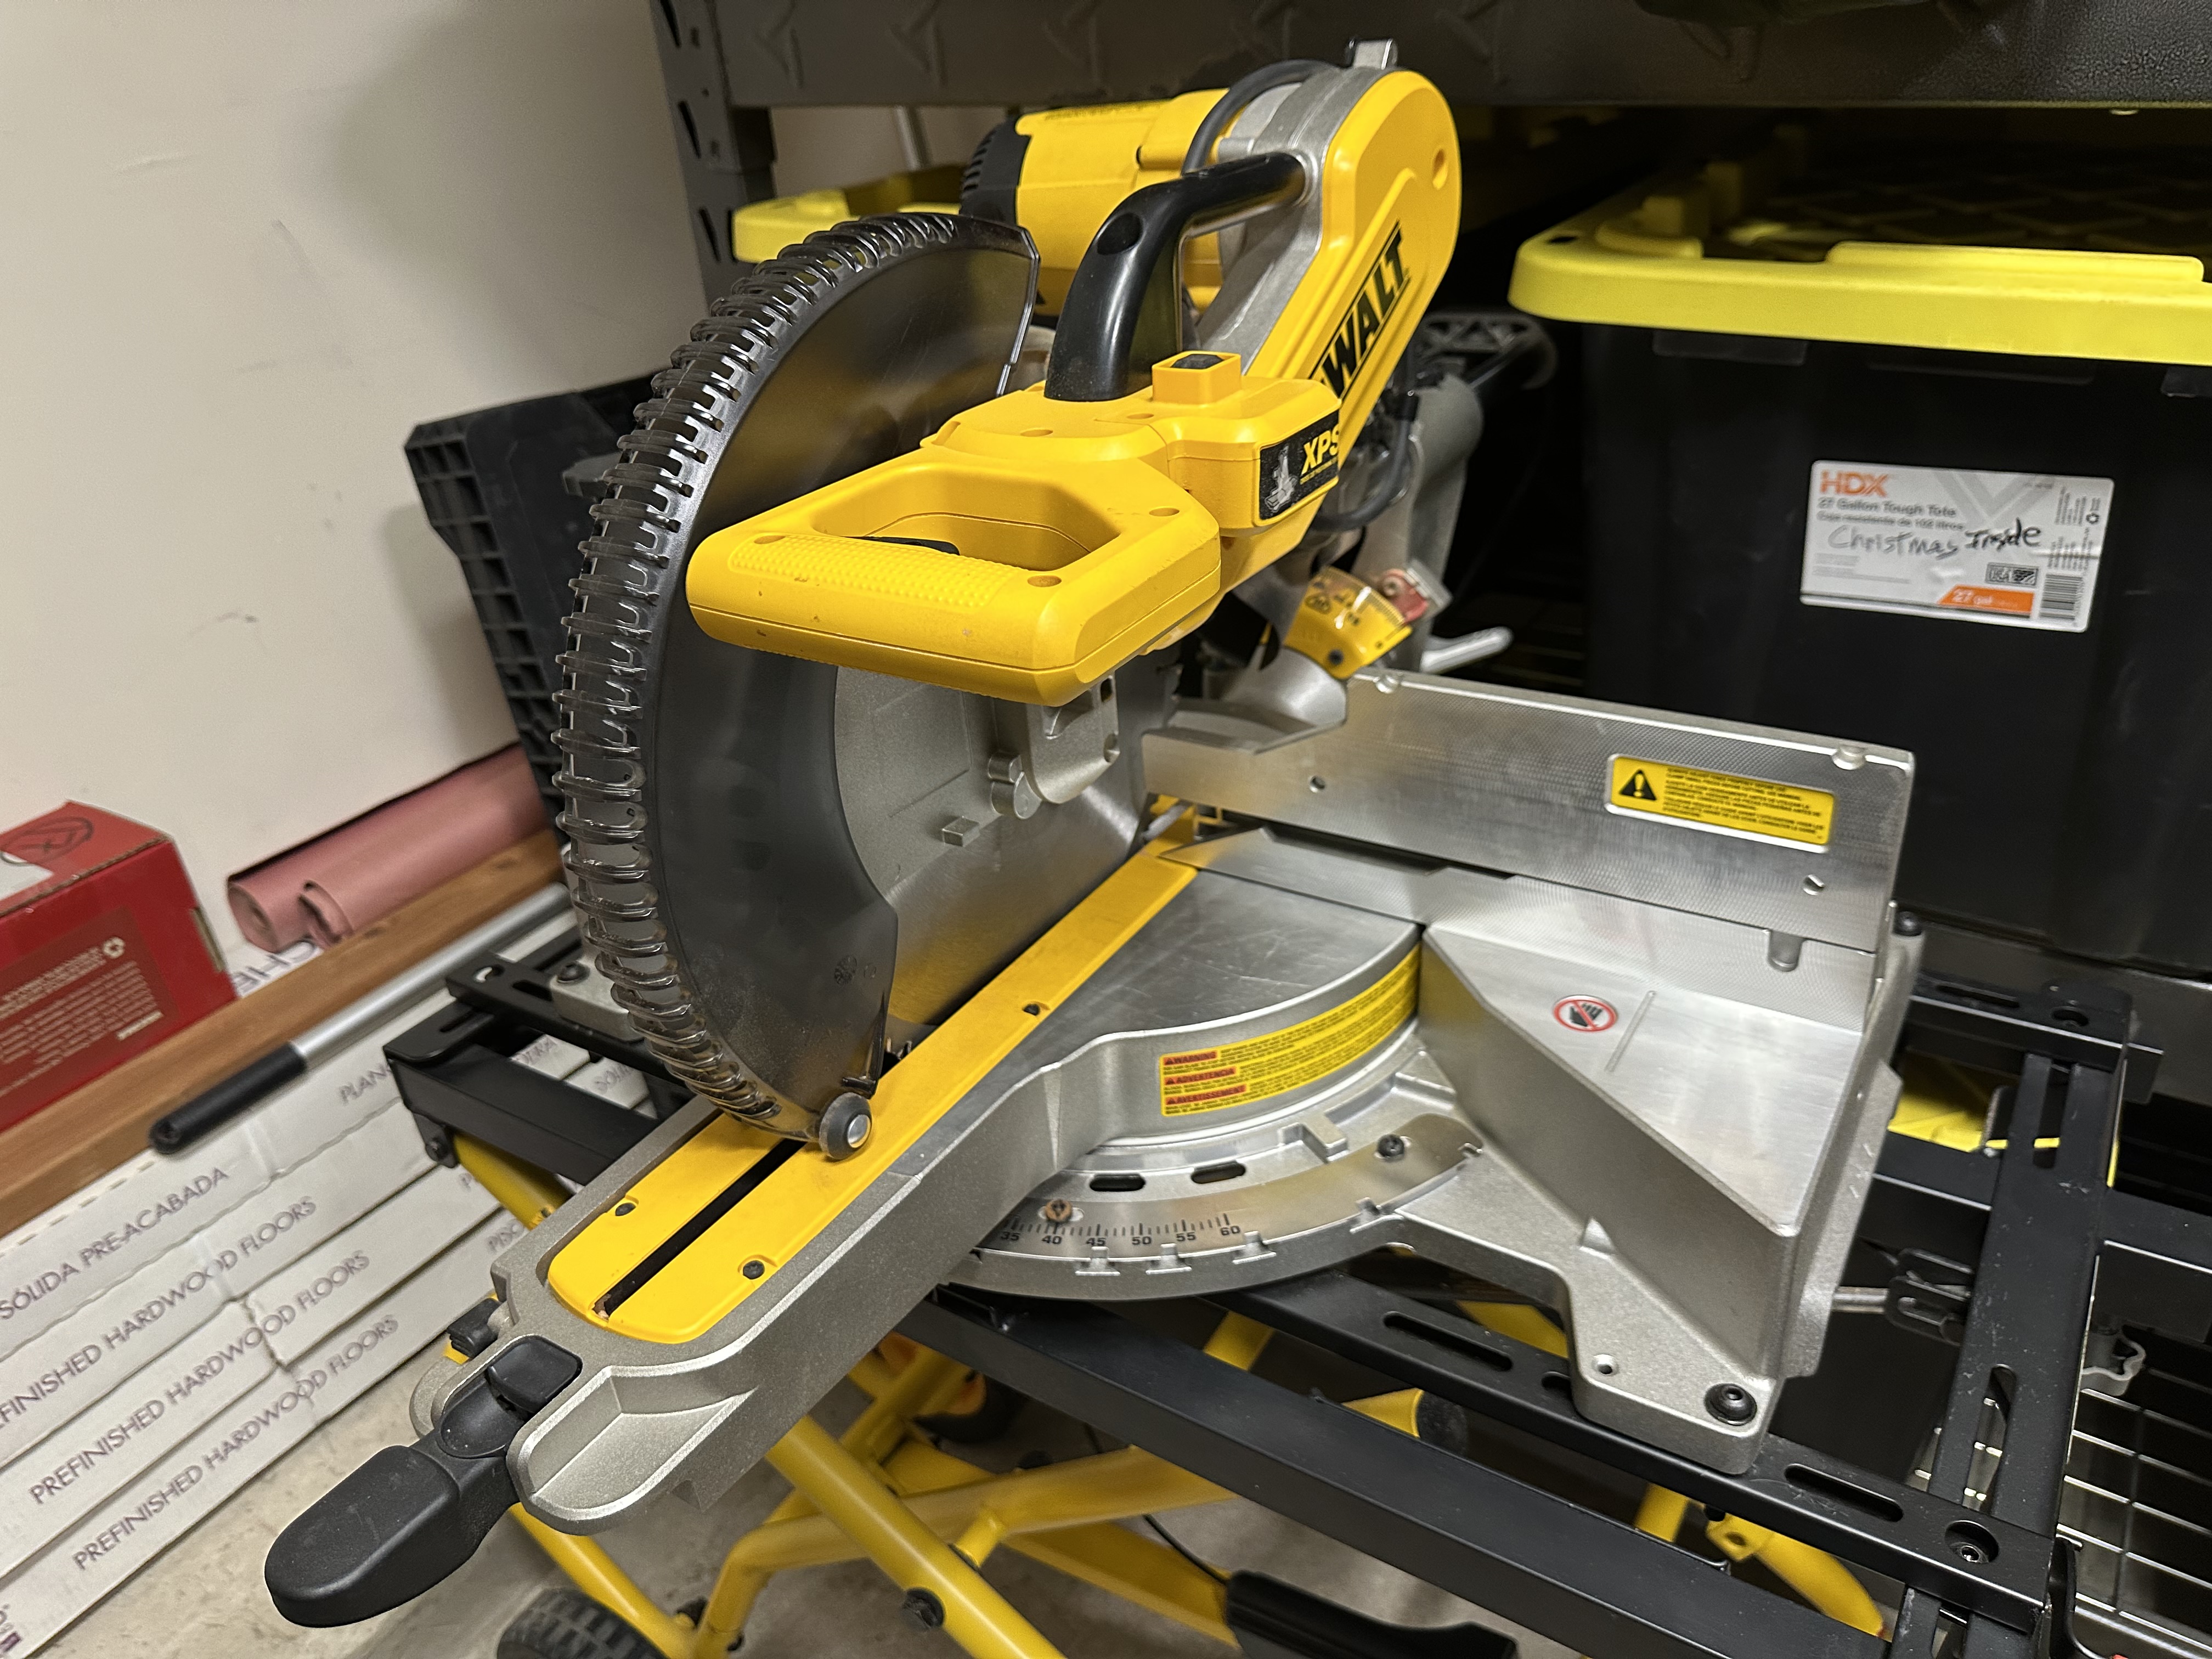
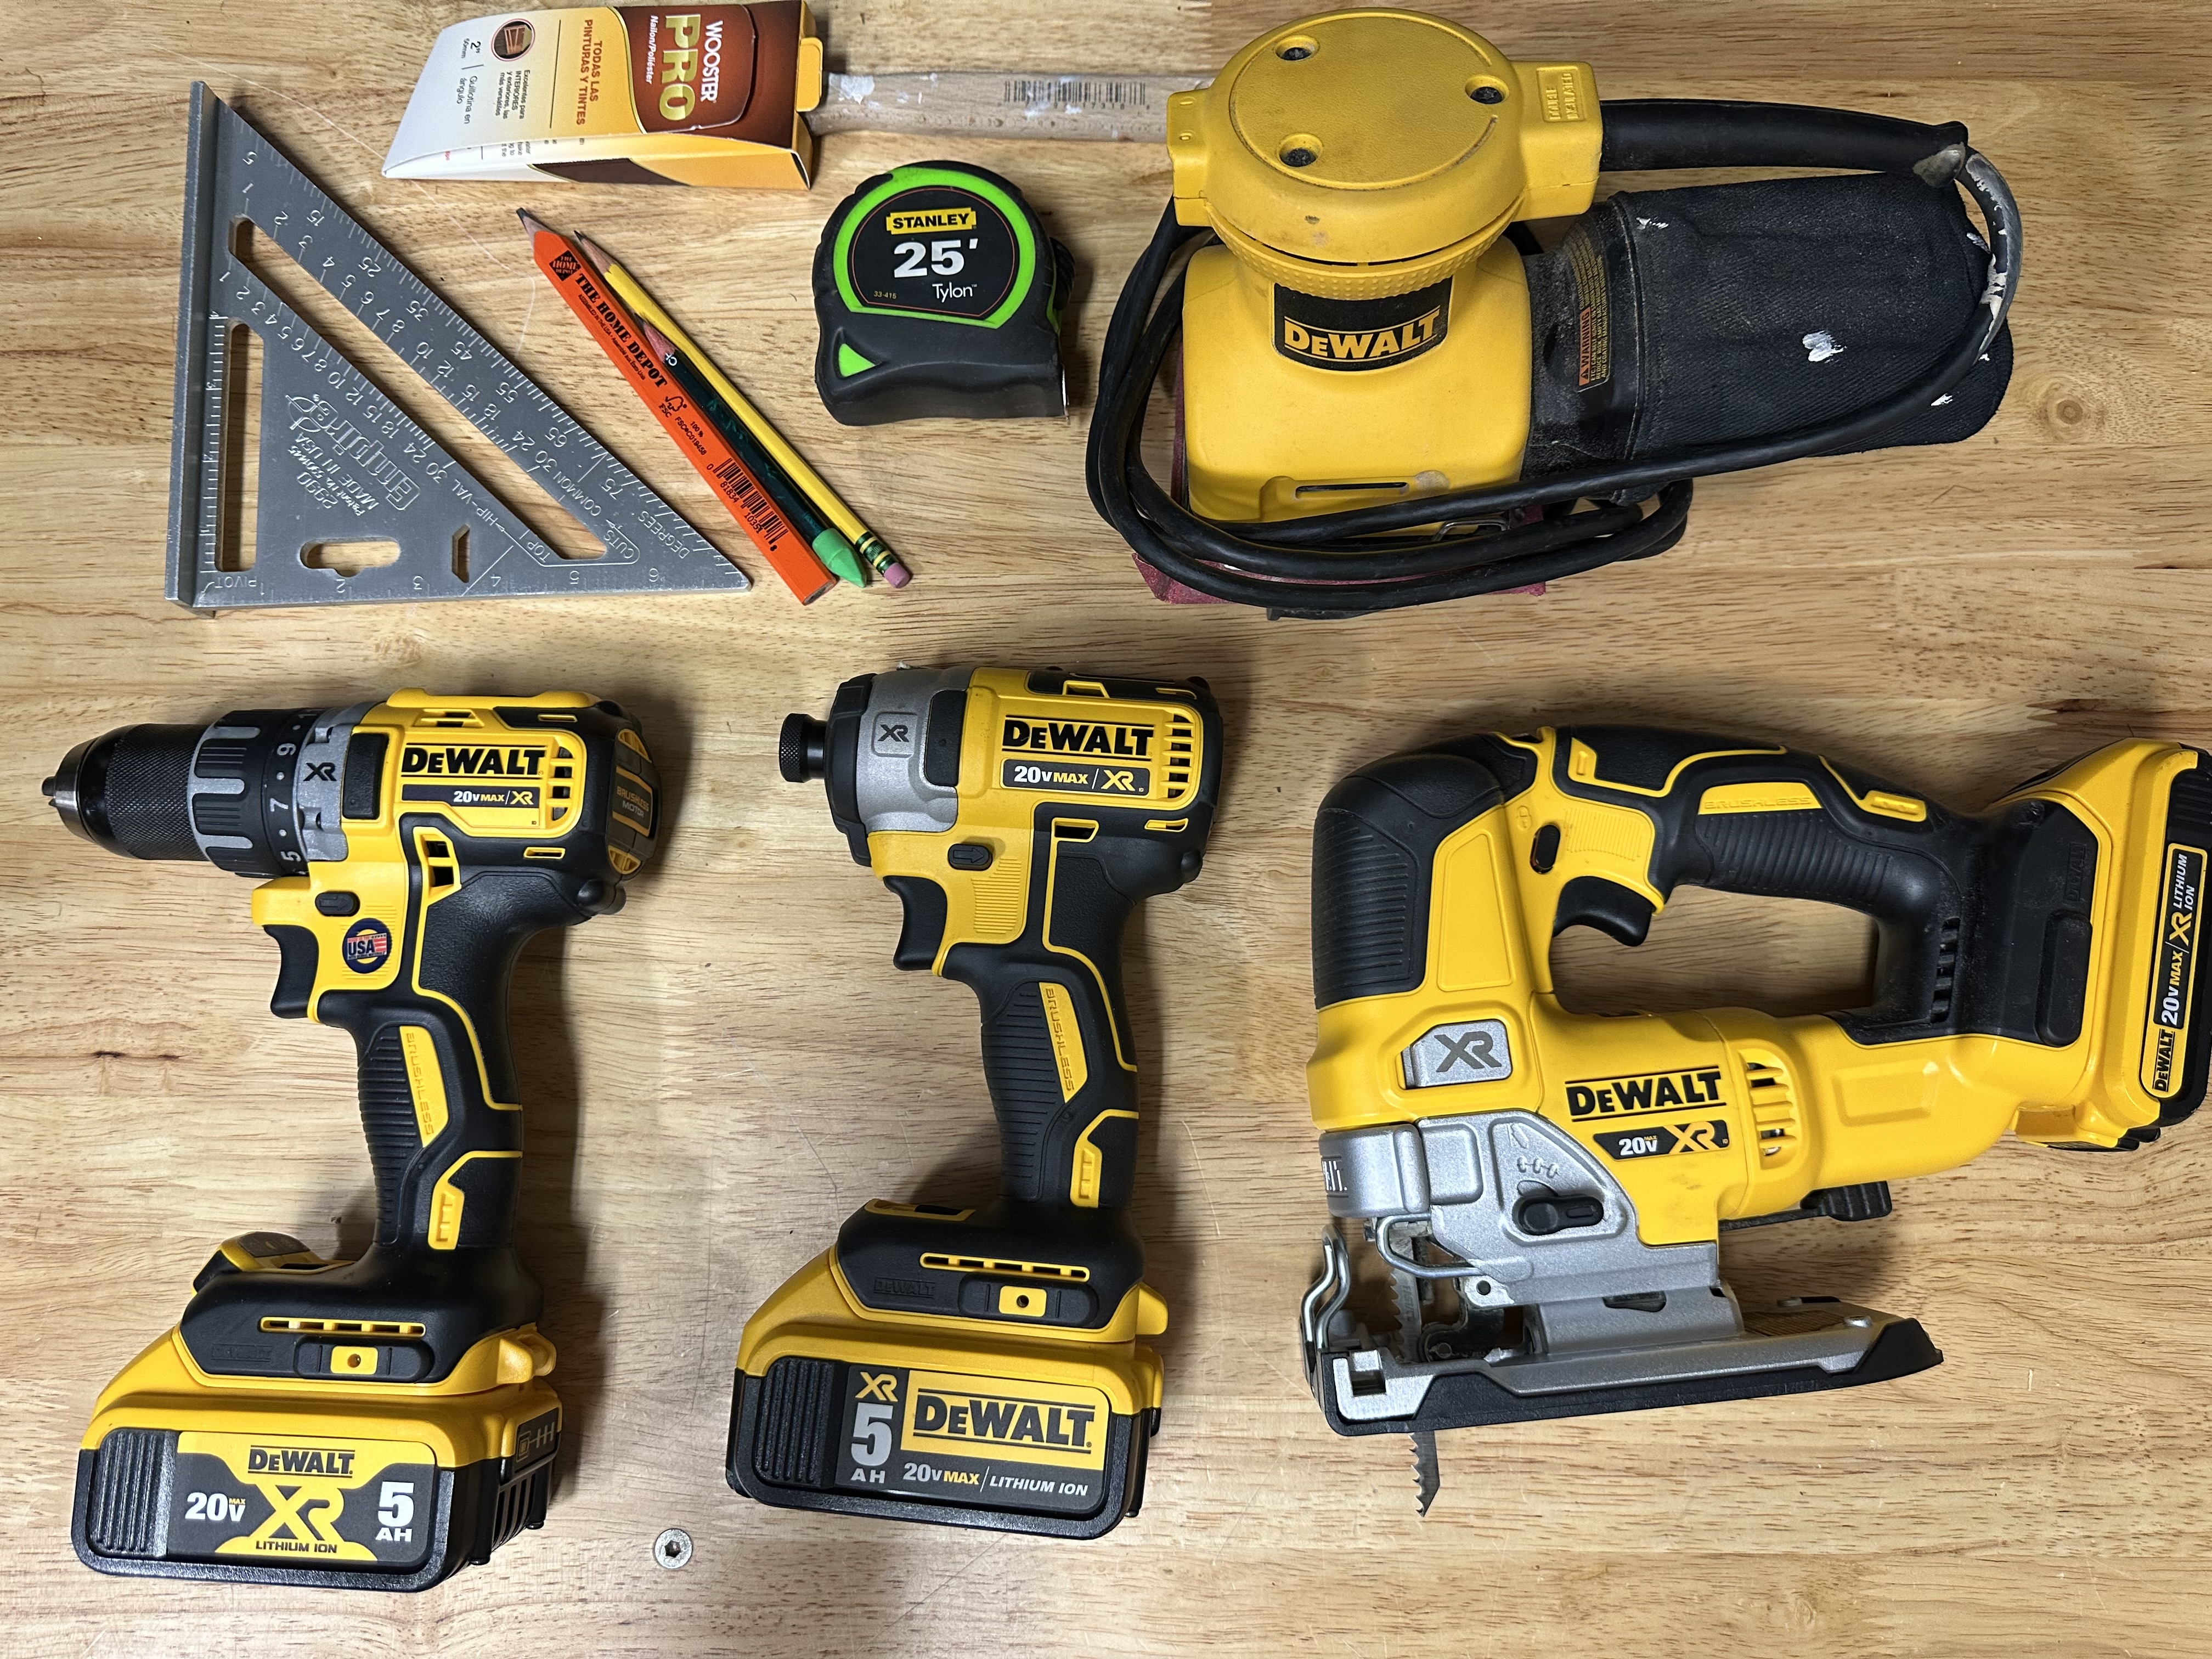
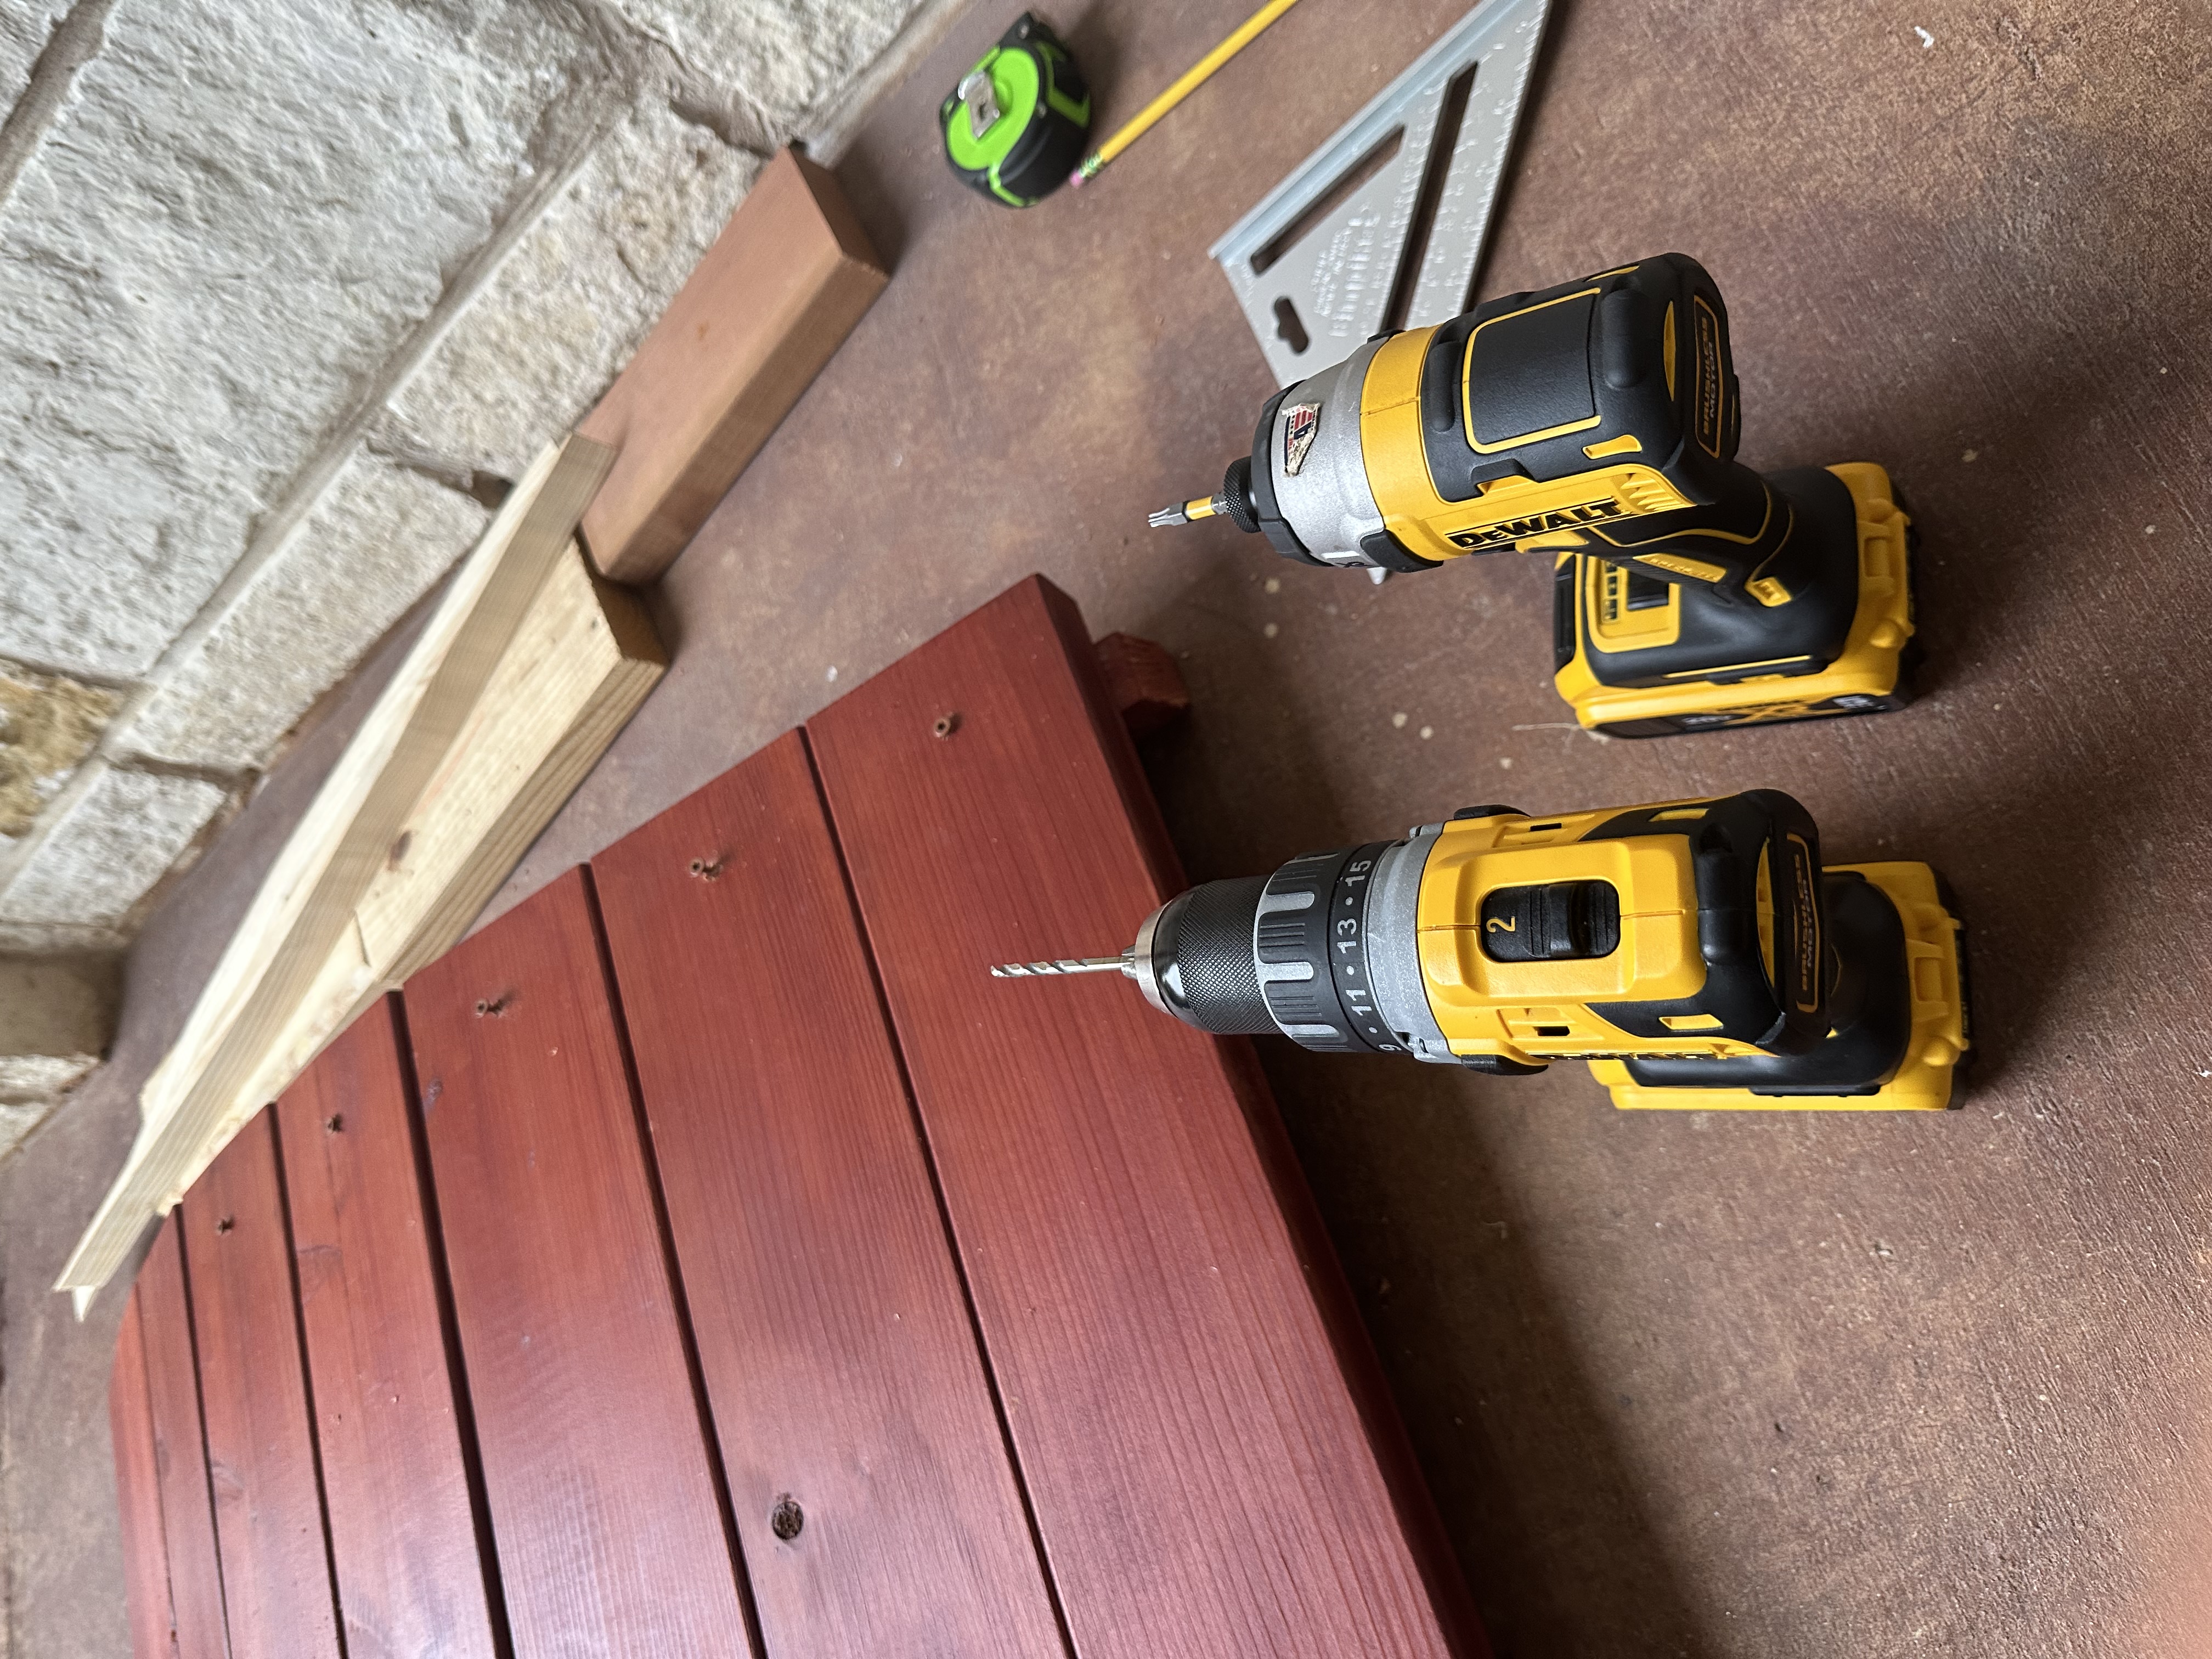
Regarding the tools, I need a miter saw to cut lumber to specific lengths. I also need a jigsaw for making curves, along with a drill, impact driver, sander, hammer, rafter square, tape measure, pencils, and a paintbrush. I purchased these tools during the decking project and plan to reuse them for future woodworking. I enjoy woodworking because it requires creativity, artistry, and engineering precision.
Design and Measurement
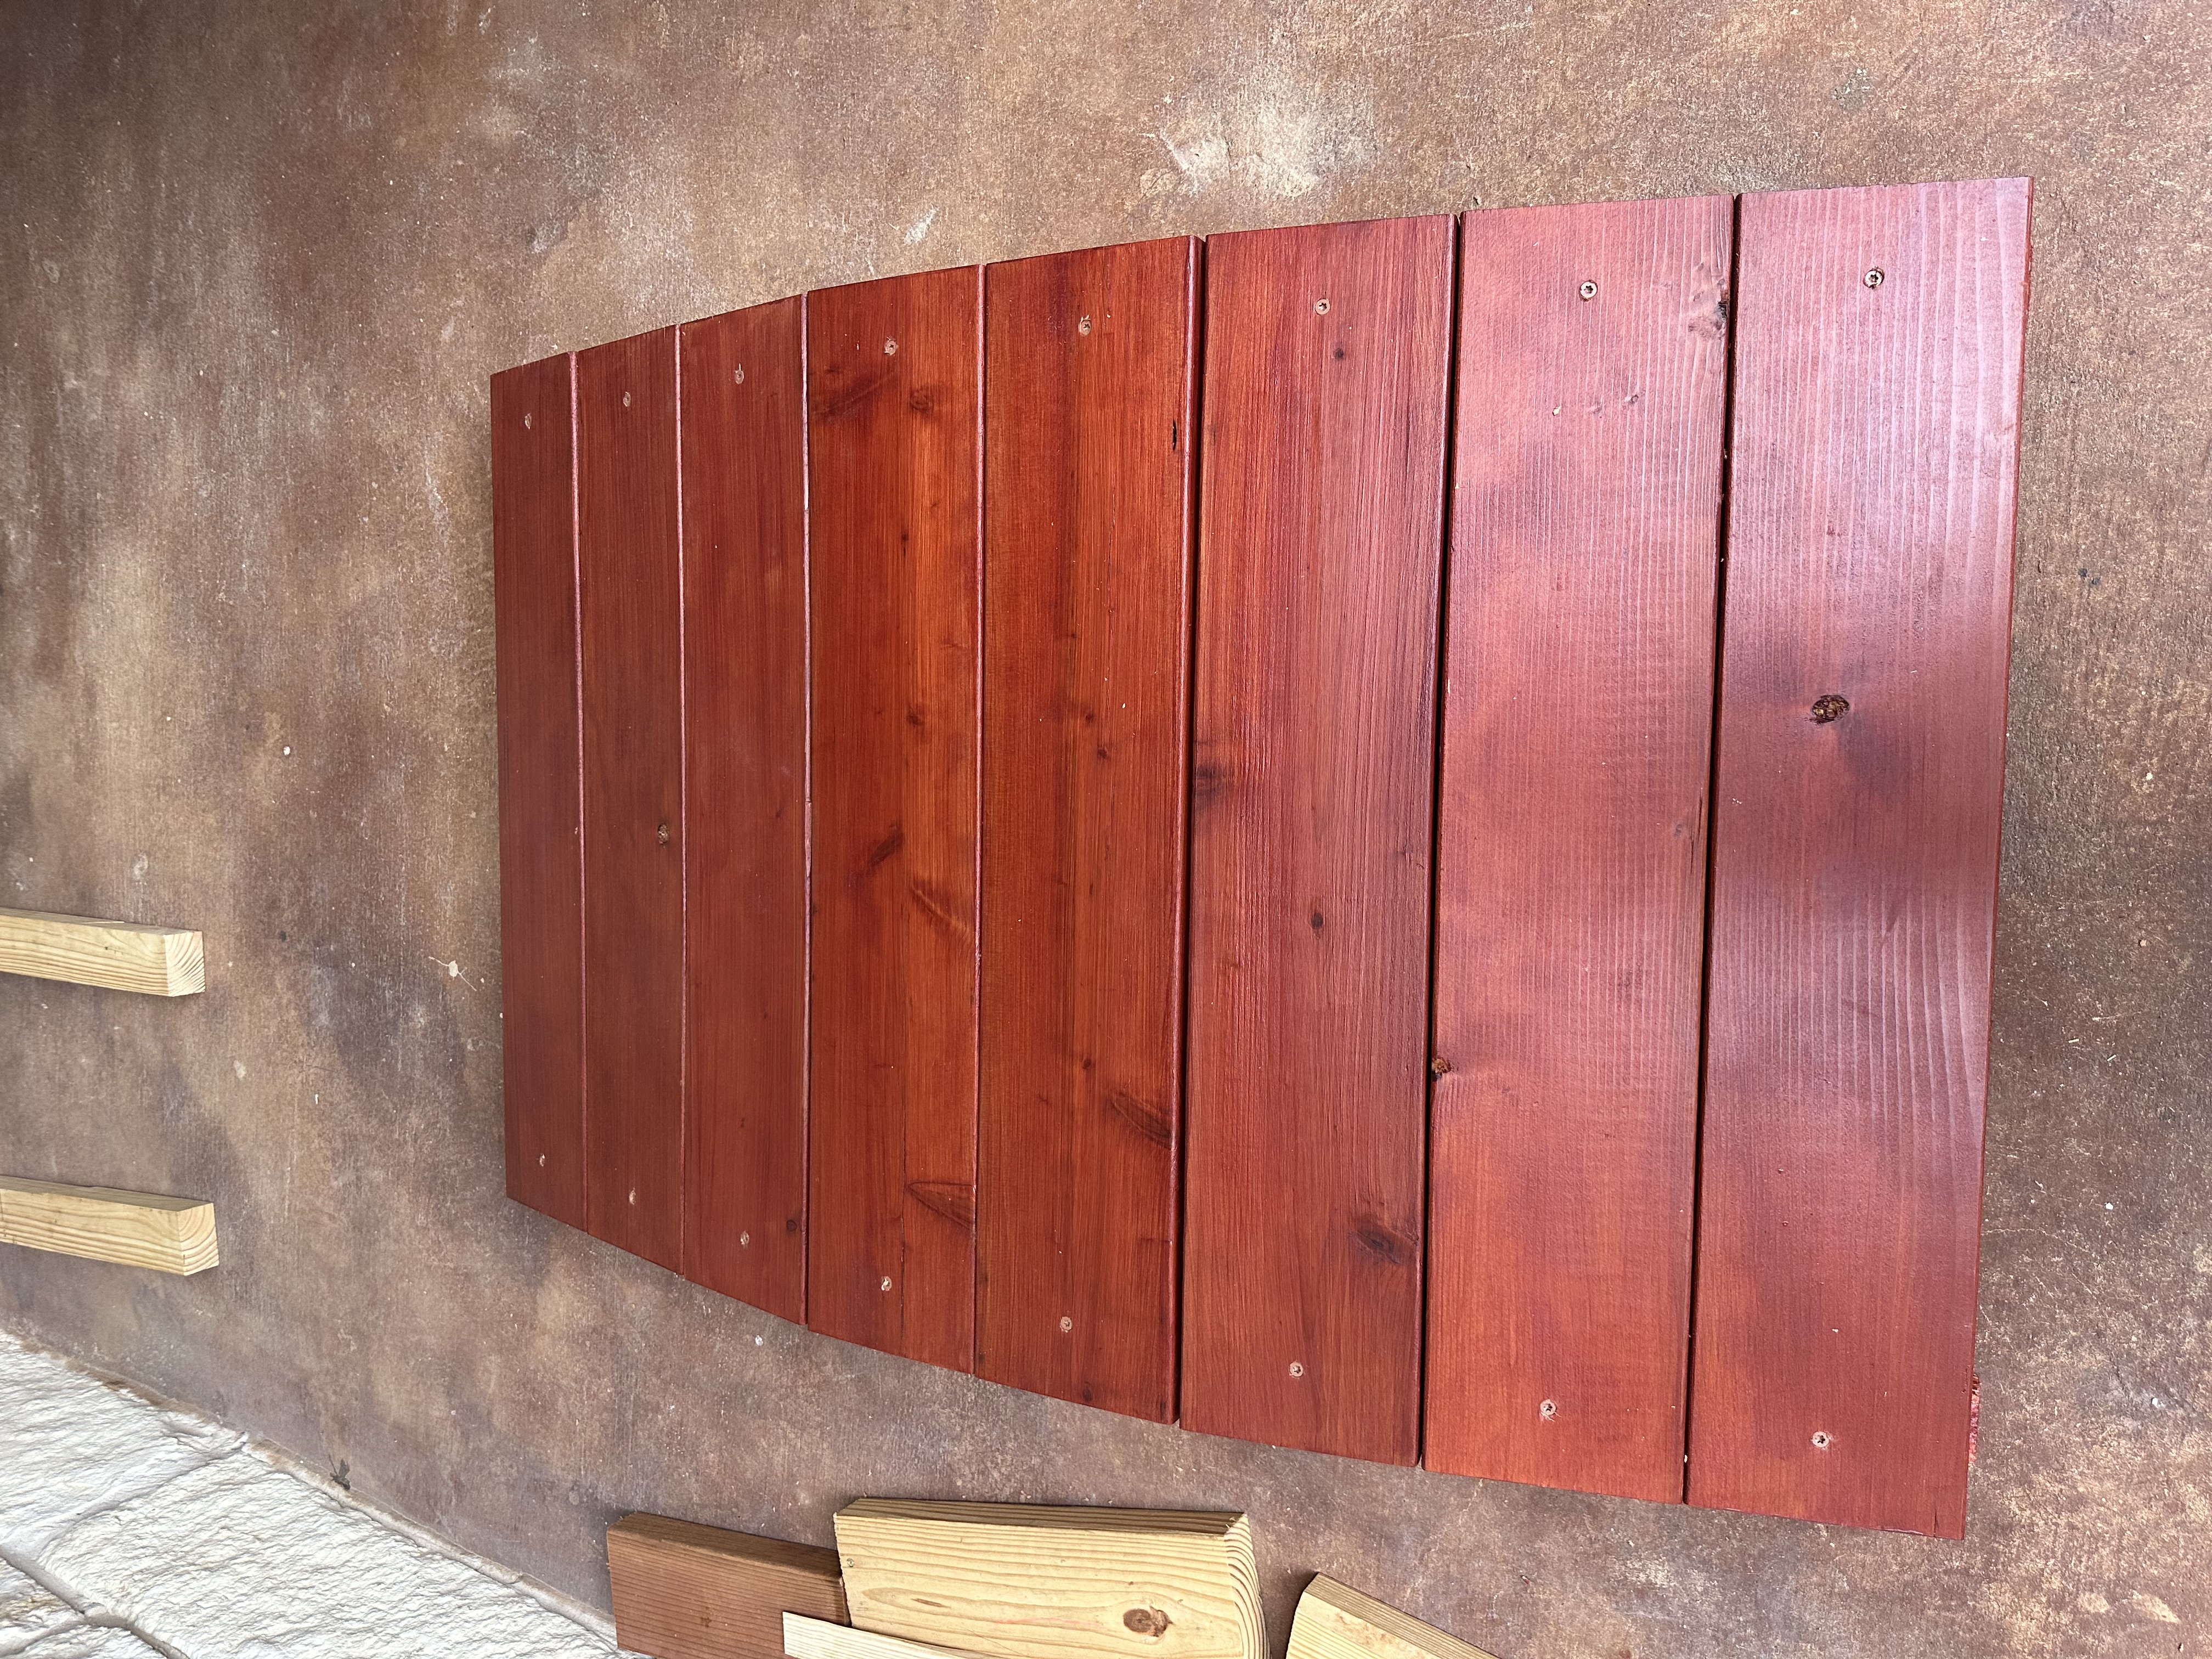
A flat bridge is easy to build, but an arched one is much more visually appealing. To create an arch on the wood, I used a thin, flexible piece of metal and traced along it. I use small nails to hold the metal piece on the board, making it easy for me to trace. The 3B drawing pencil is best for marking on wood because of its darkness and precise lead.
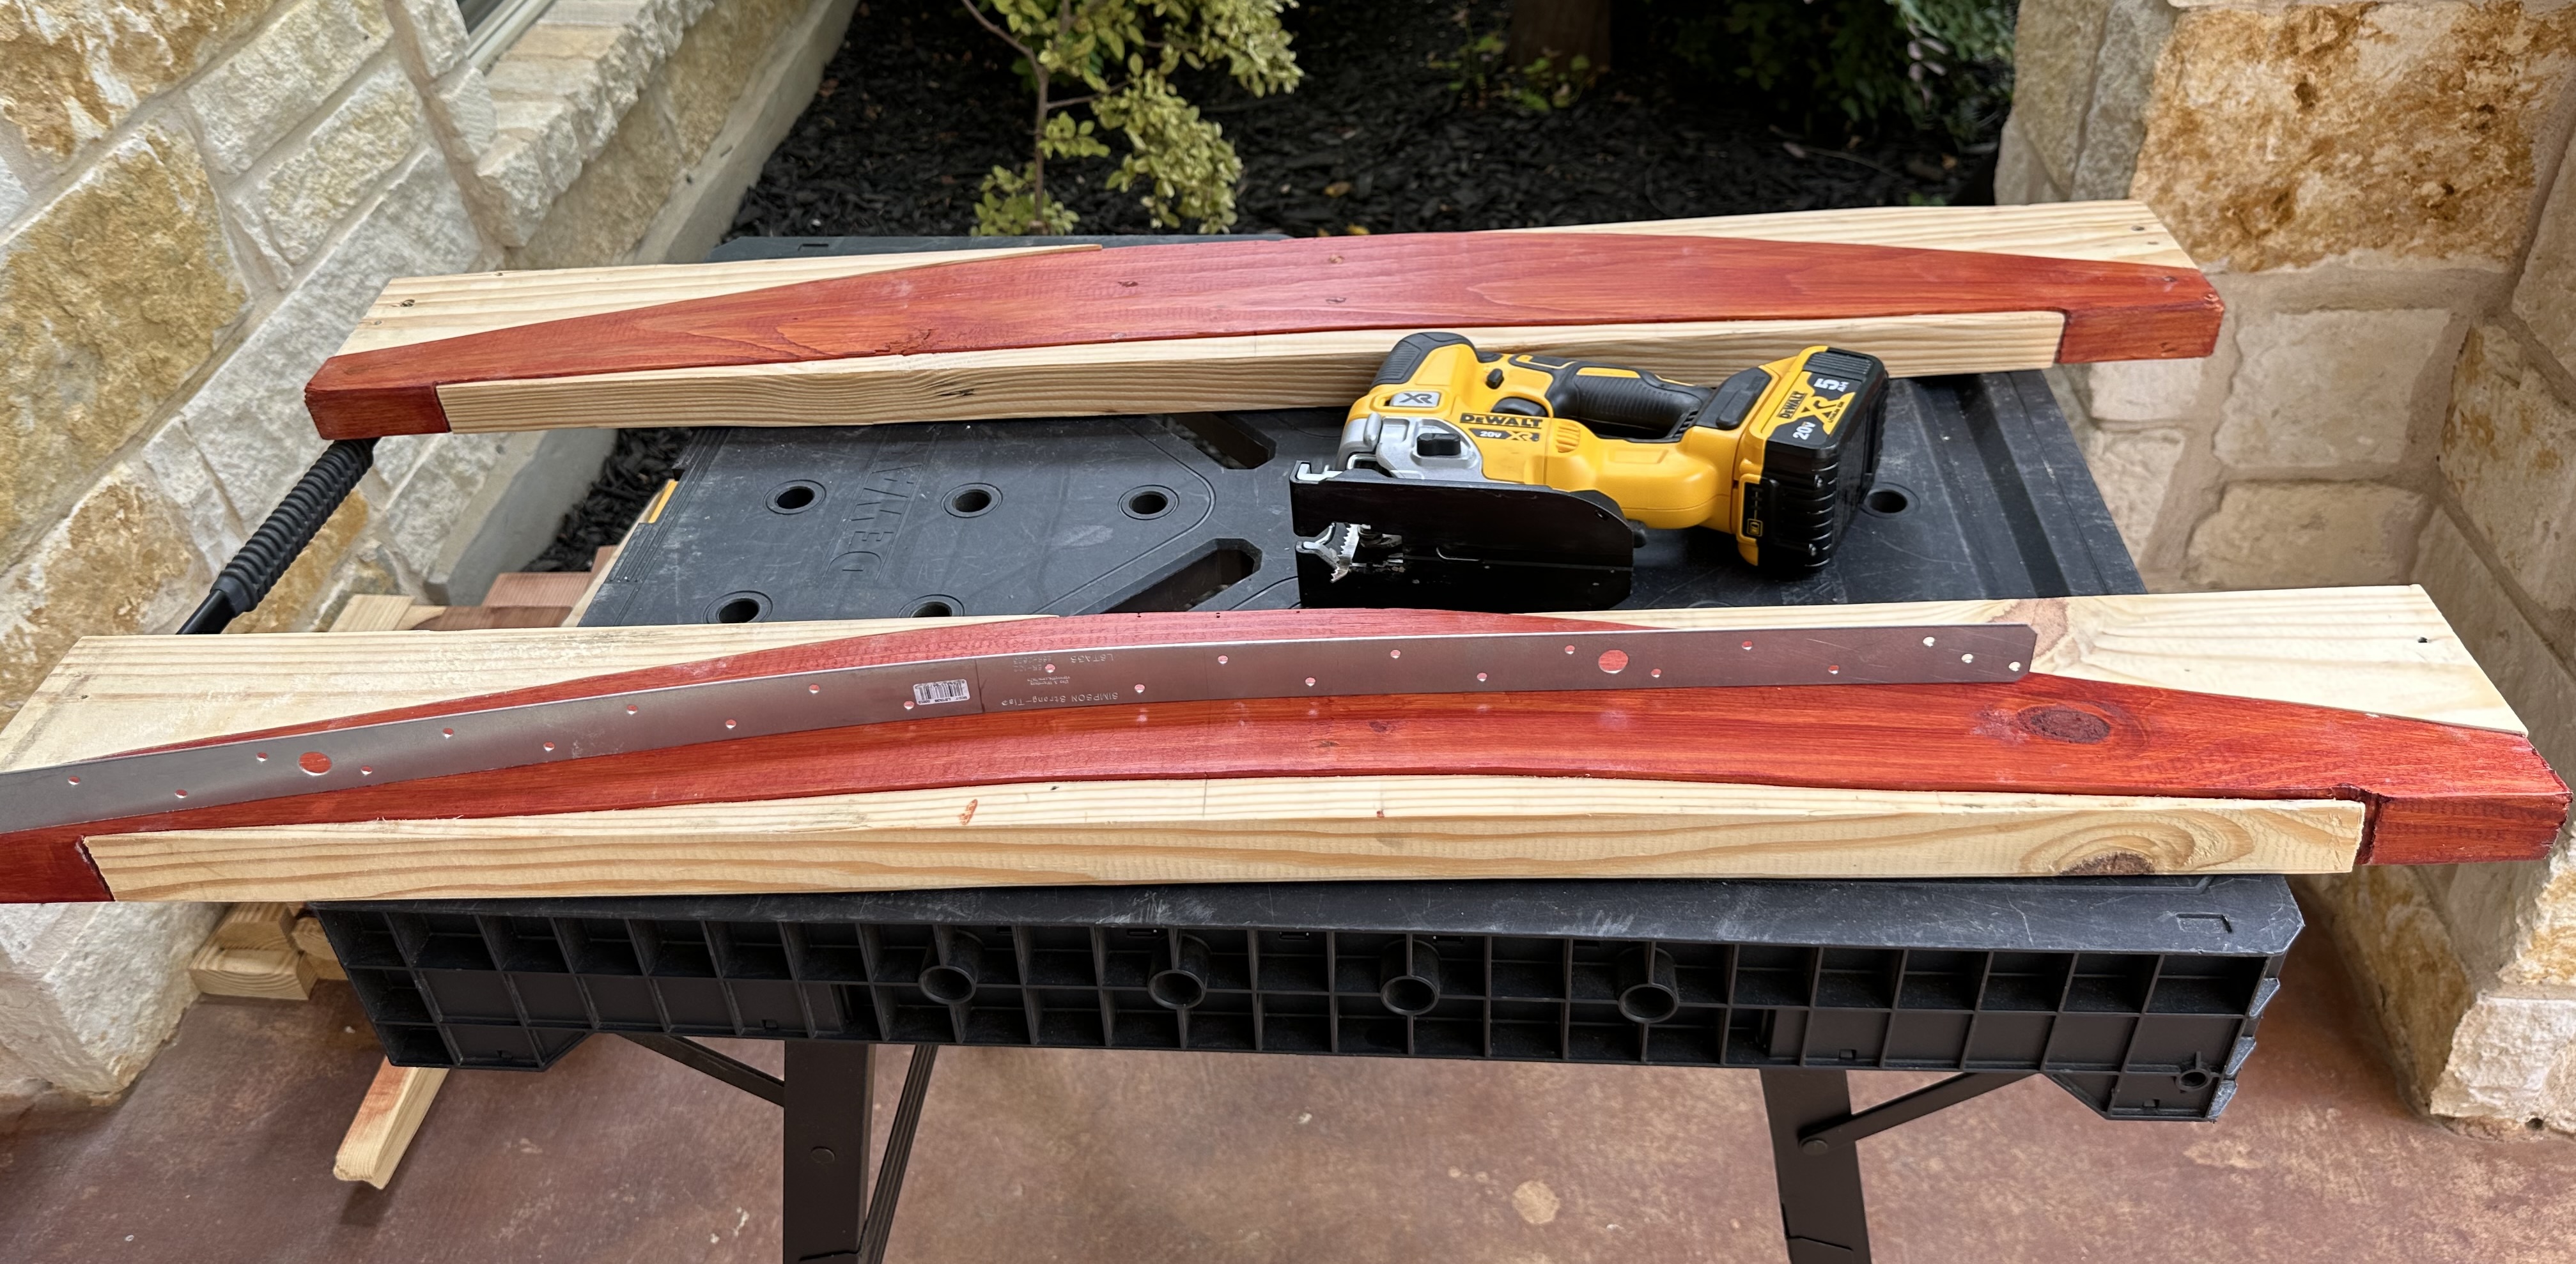
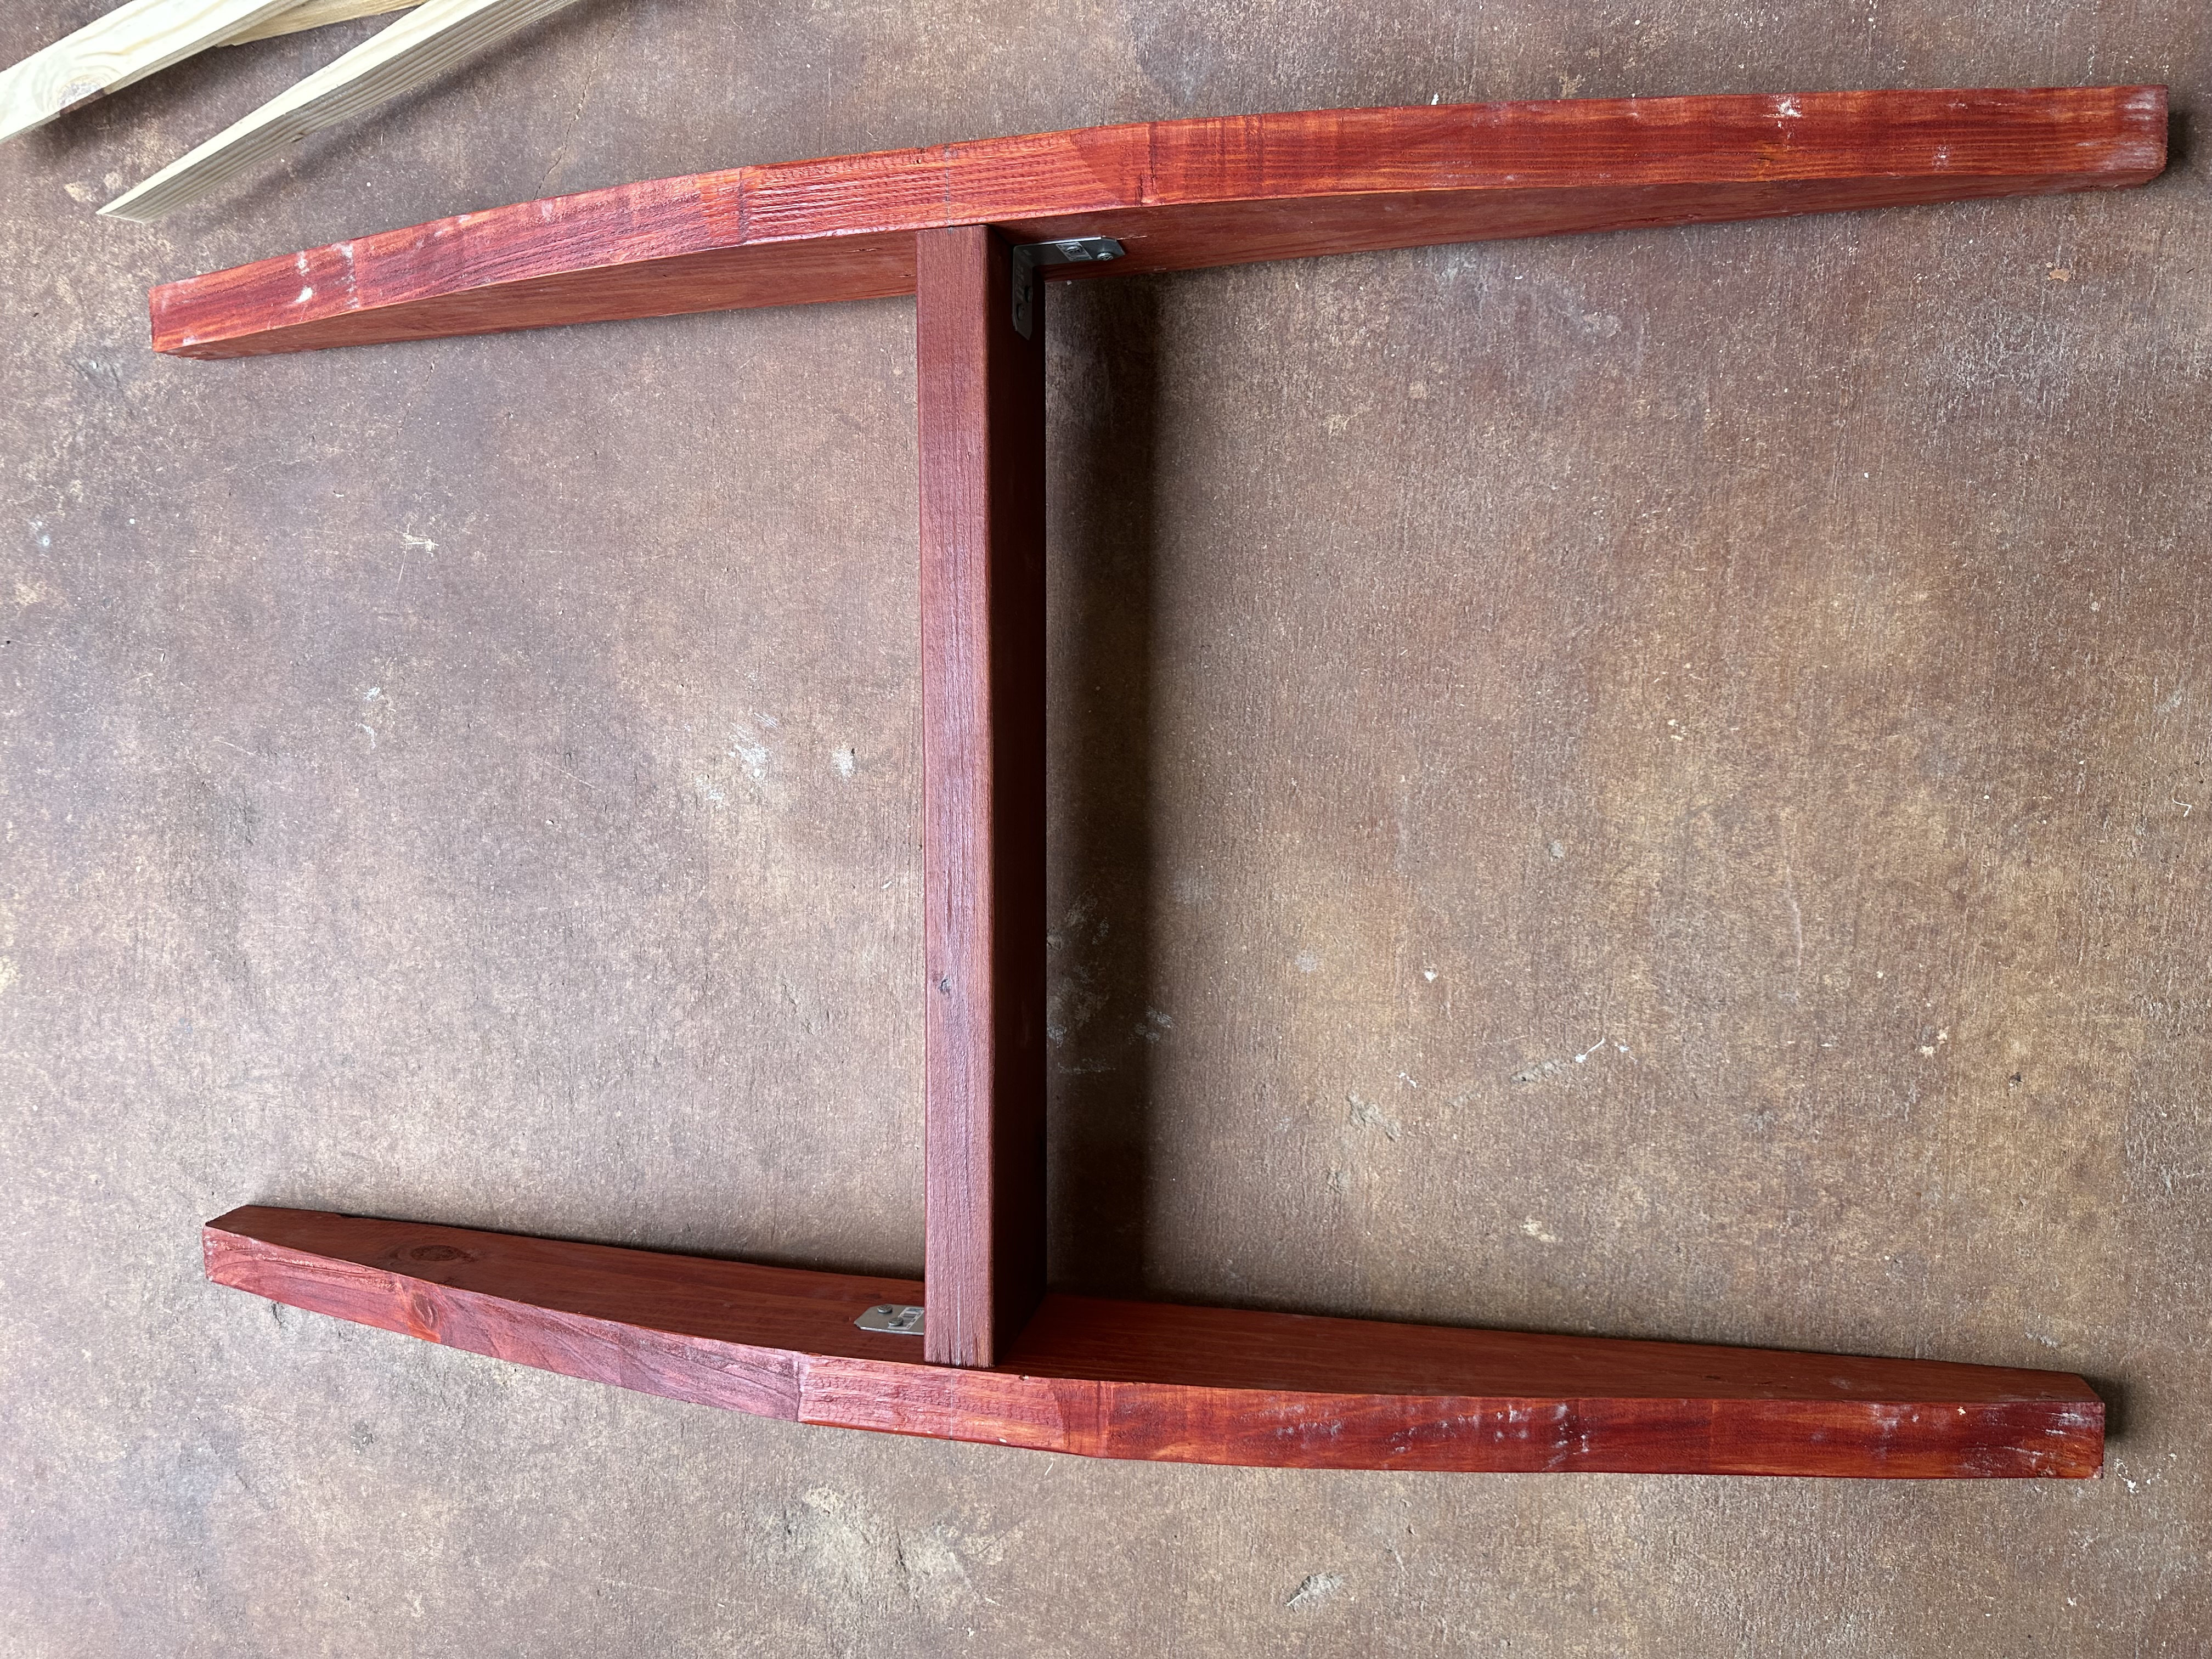
I use a board to connect the two arched boards to create an H-shaped base for the bridge. My lawnmower is 23 inches wide, so I designed the surface area of the bridge to be 27 inches wide, with an inch overhang on each side of the bridge. Since the board is 1.5 inches thick, the cross board must be 22 inches long - 27 - 1*2 - 1.5*2 = 22.
I cut the redwood boards to 27 inches, and one of the pallet boards to 22 inches long. Once cut, all boards need to be stained and sealed. I like to wash the boards before painting them because it removes dirt and mold and gives the wood a fresh, new look.
Installation
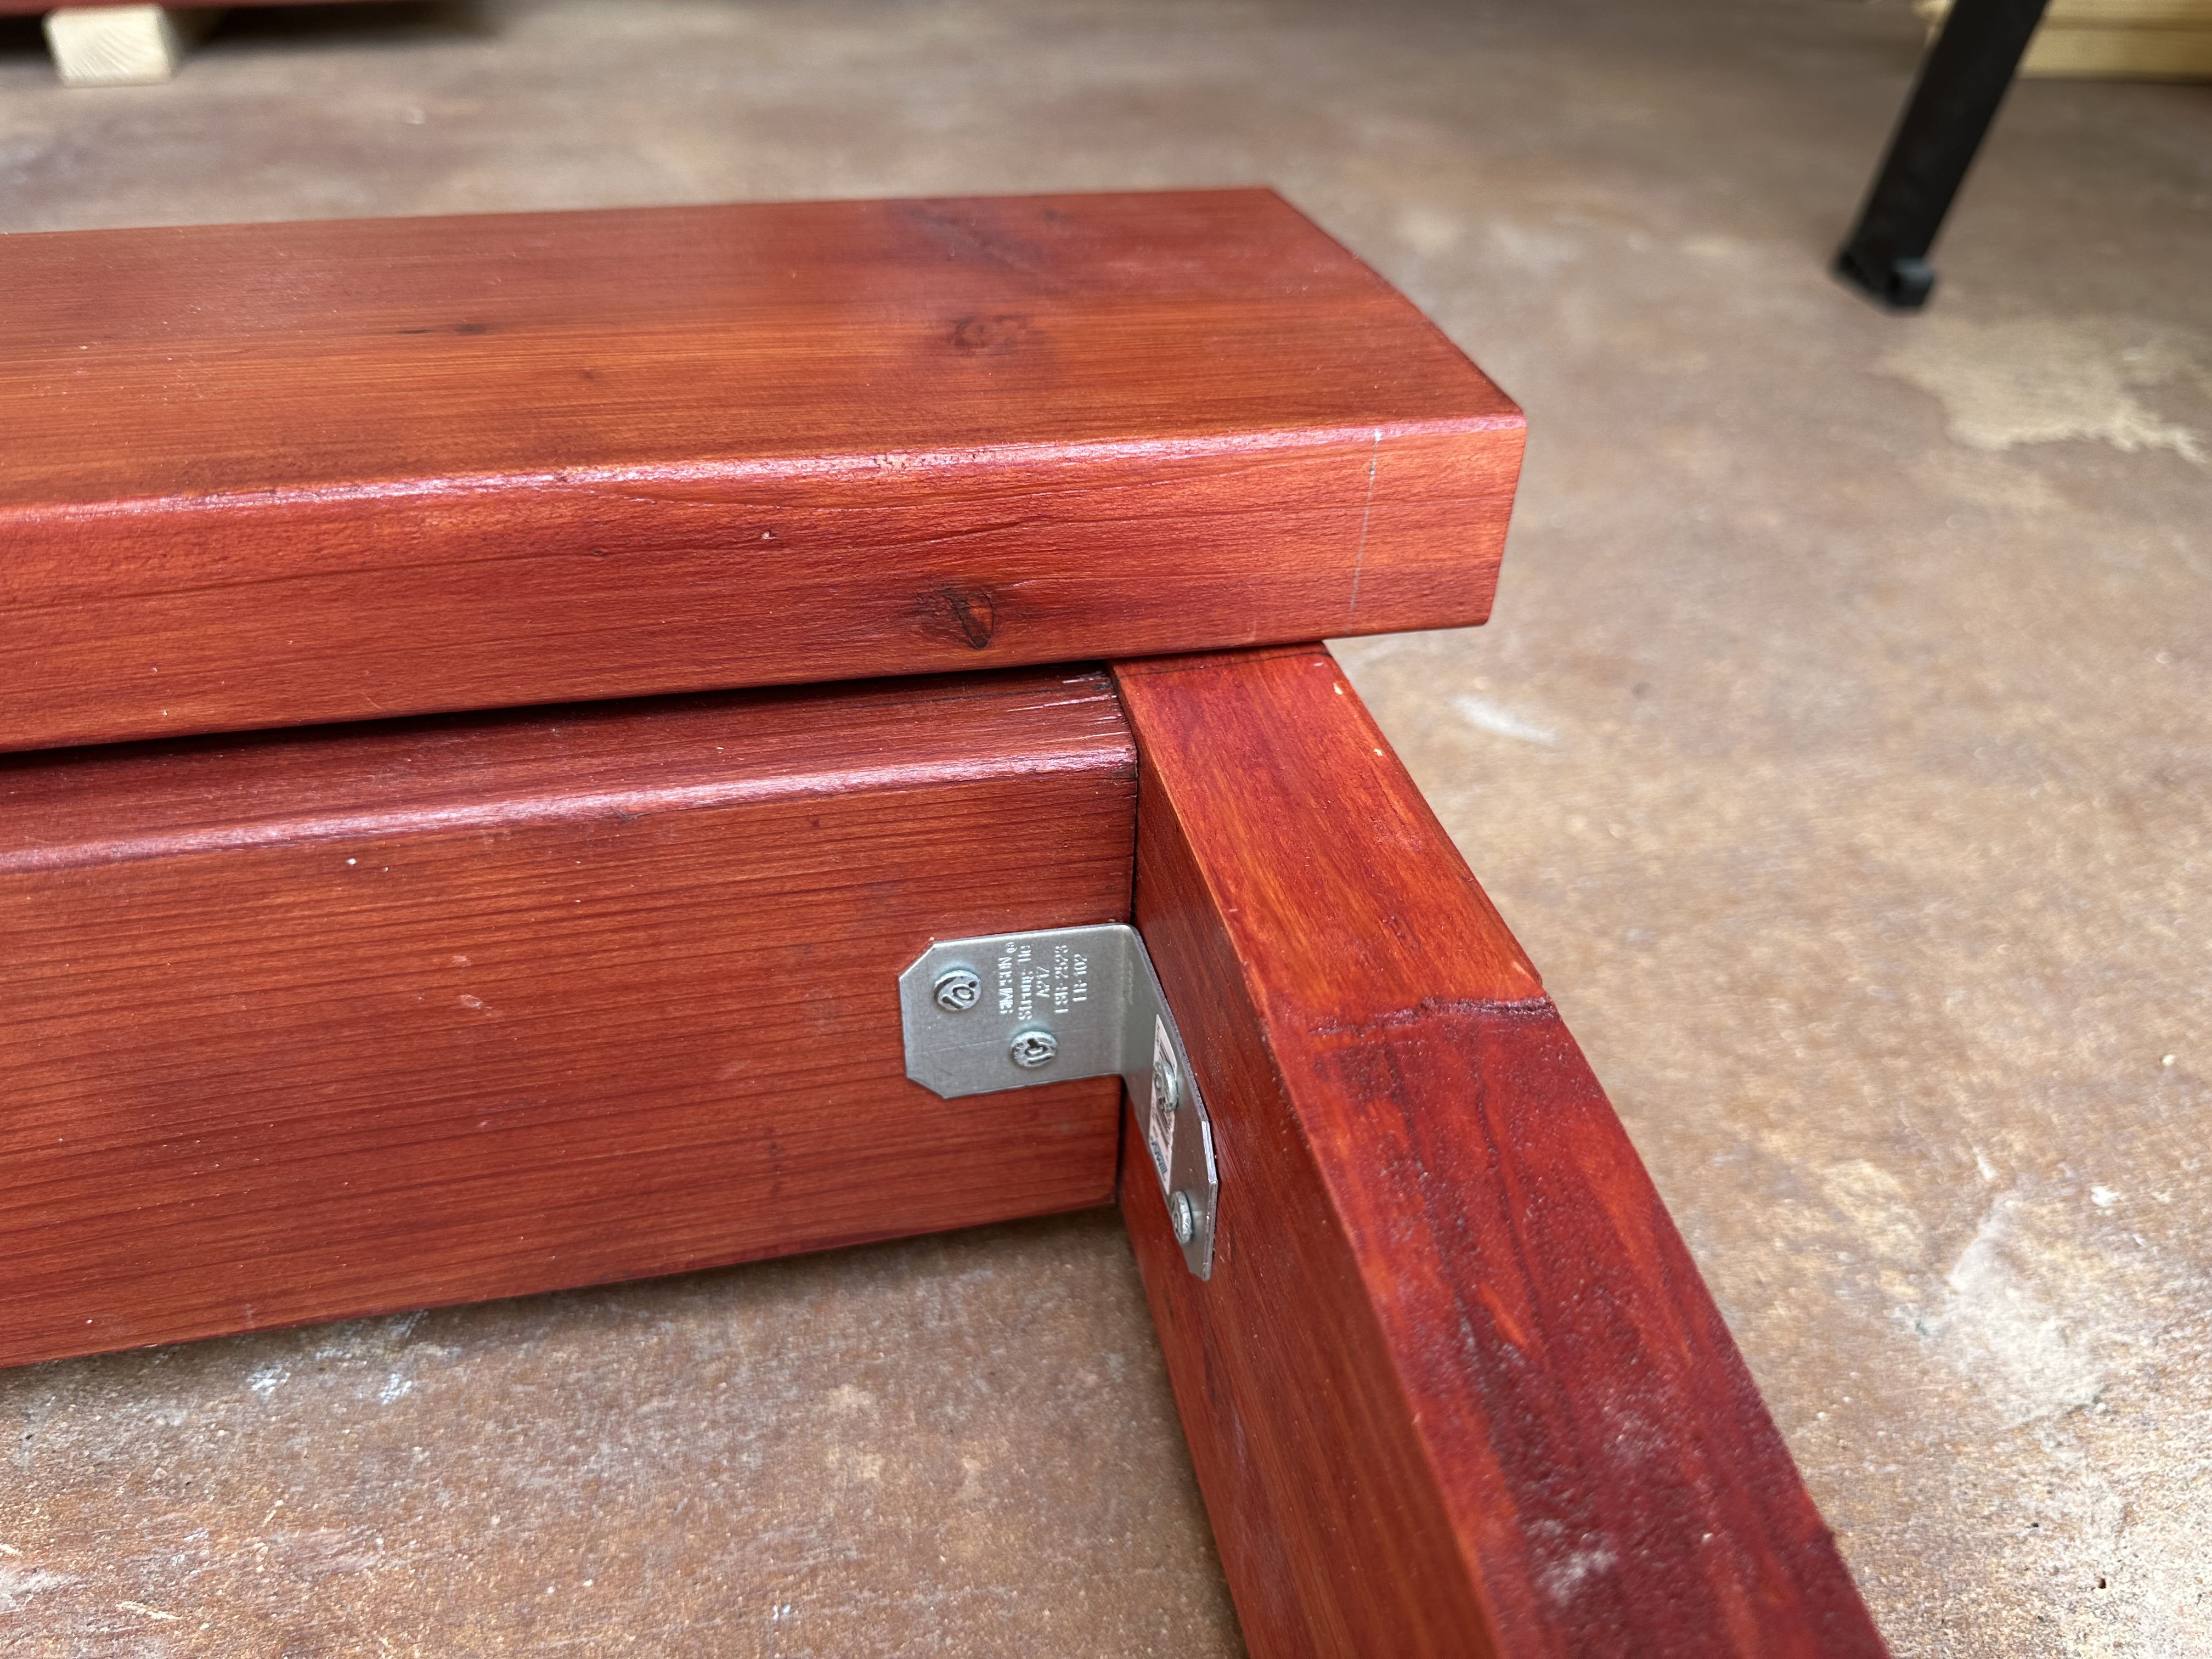
To connect the two arched boards, I use galvanized nails with metal brackets. I learned this from my decking project, where galvanized nails are used for all joist hangers and joints because they protect against corrosion and offer superior shear strength, supporting the weight and resisting movement. Before driving in the nails, I pre-drilled the holes to prevent the wood from splitting. It also makes the nails go in easier. I asked ChatGPT, and it suggested using a 1/8 drill bit for the 10D galvanized nails.
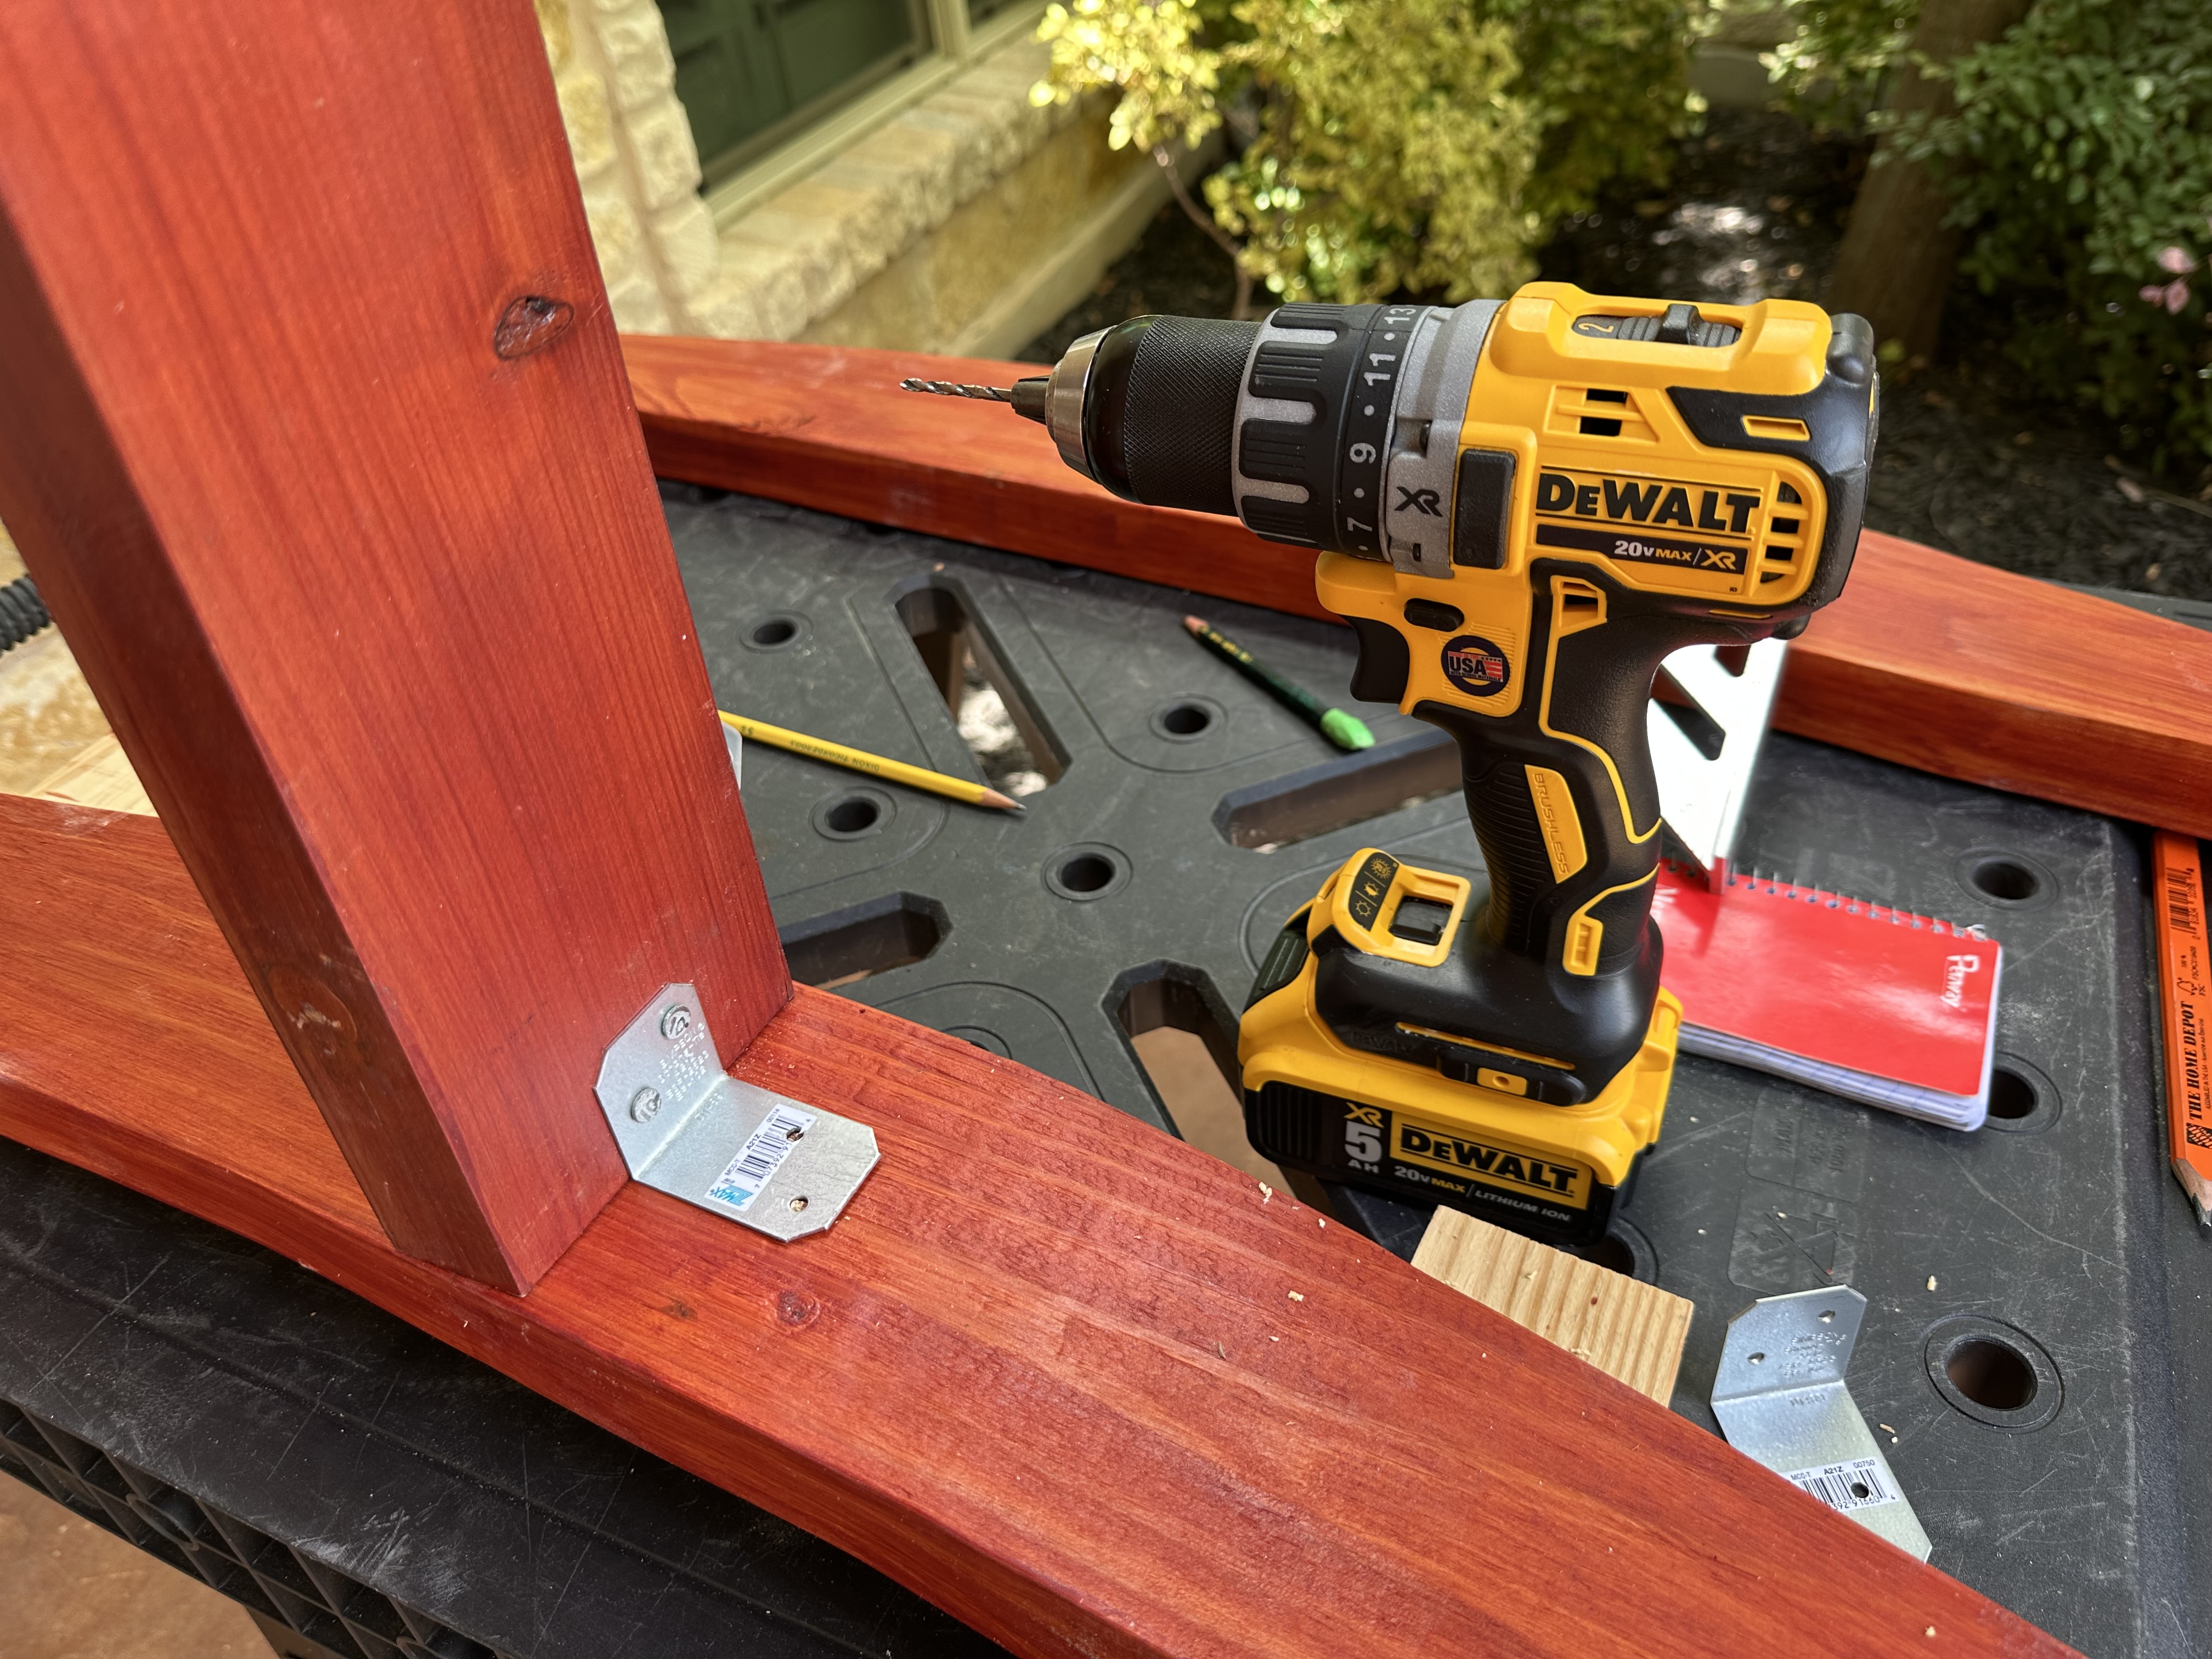
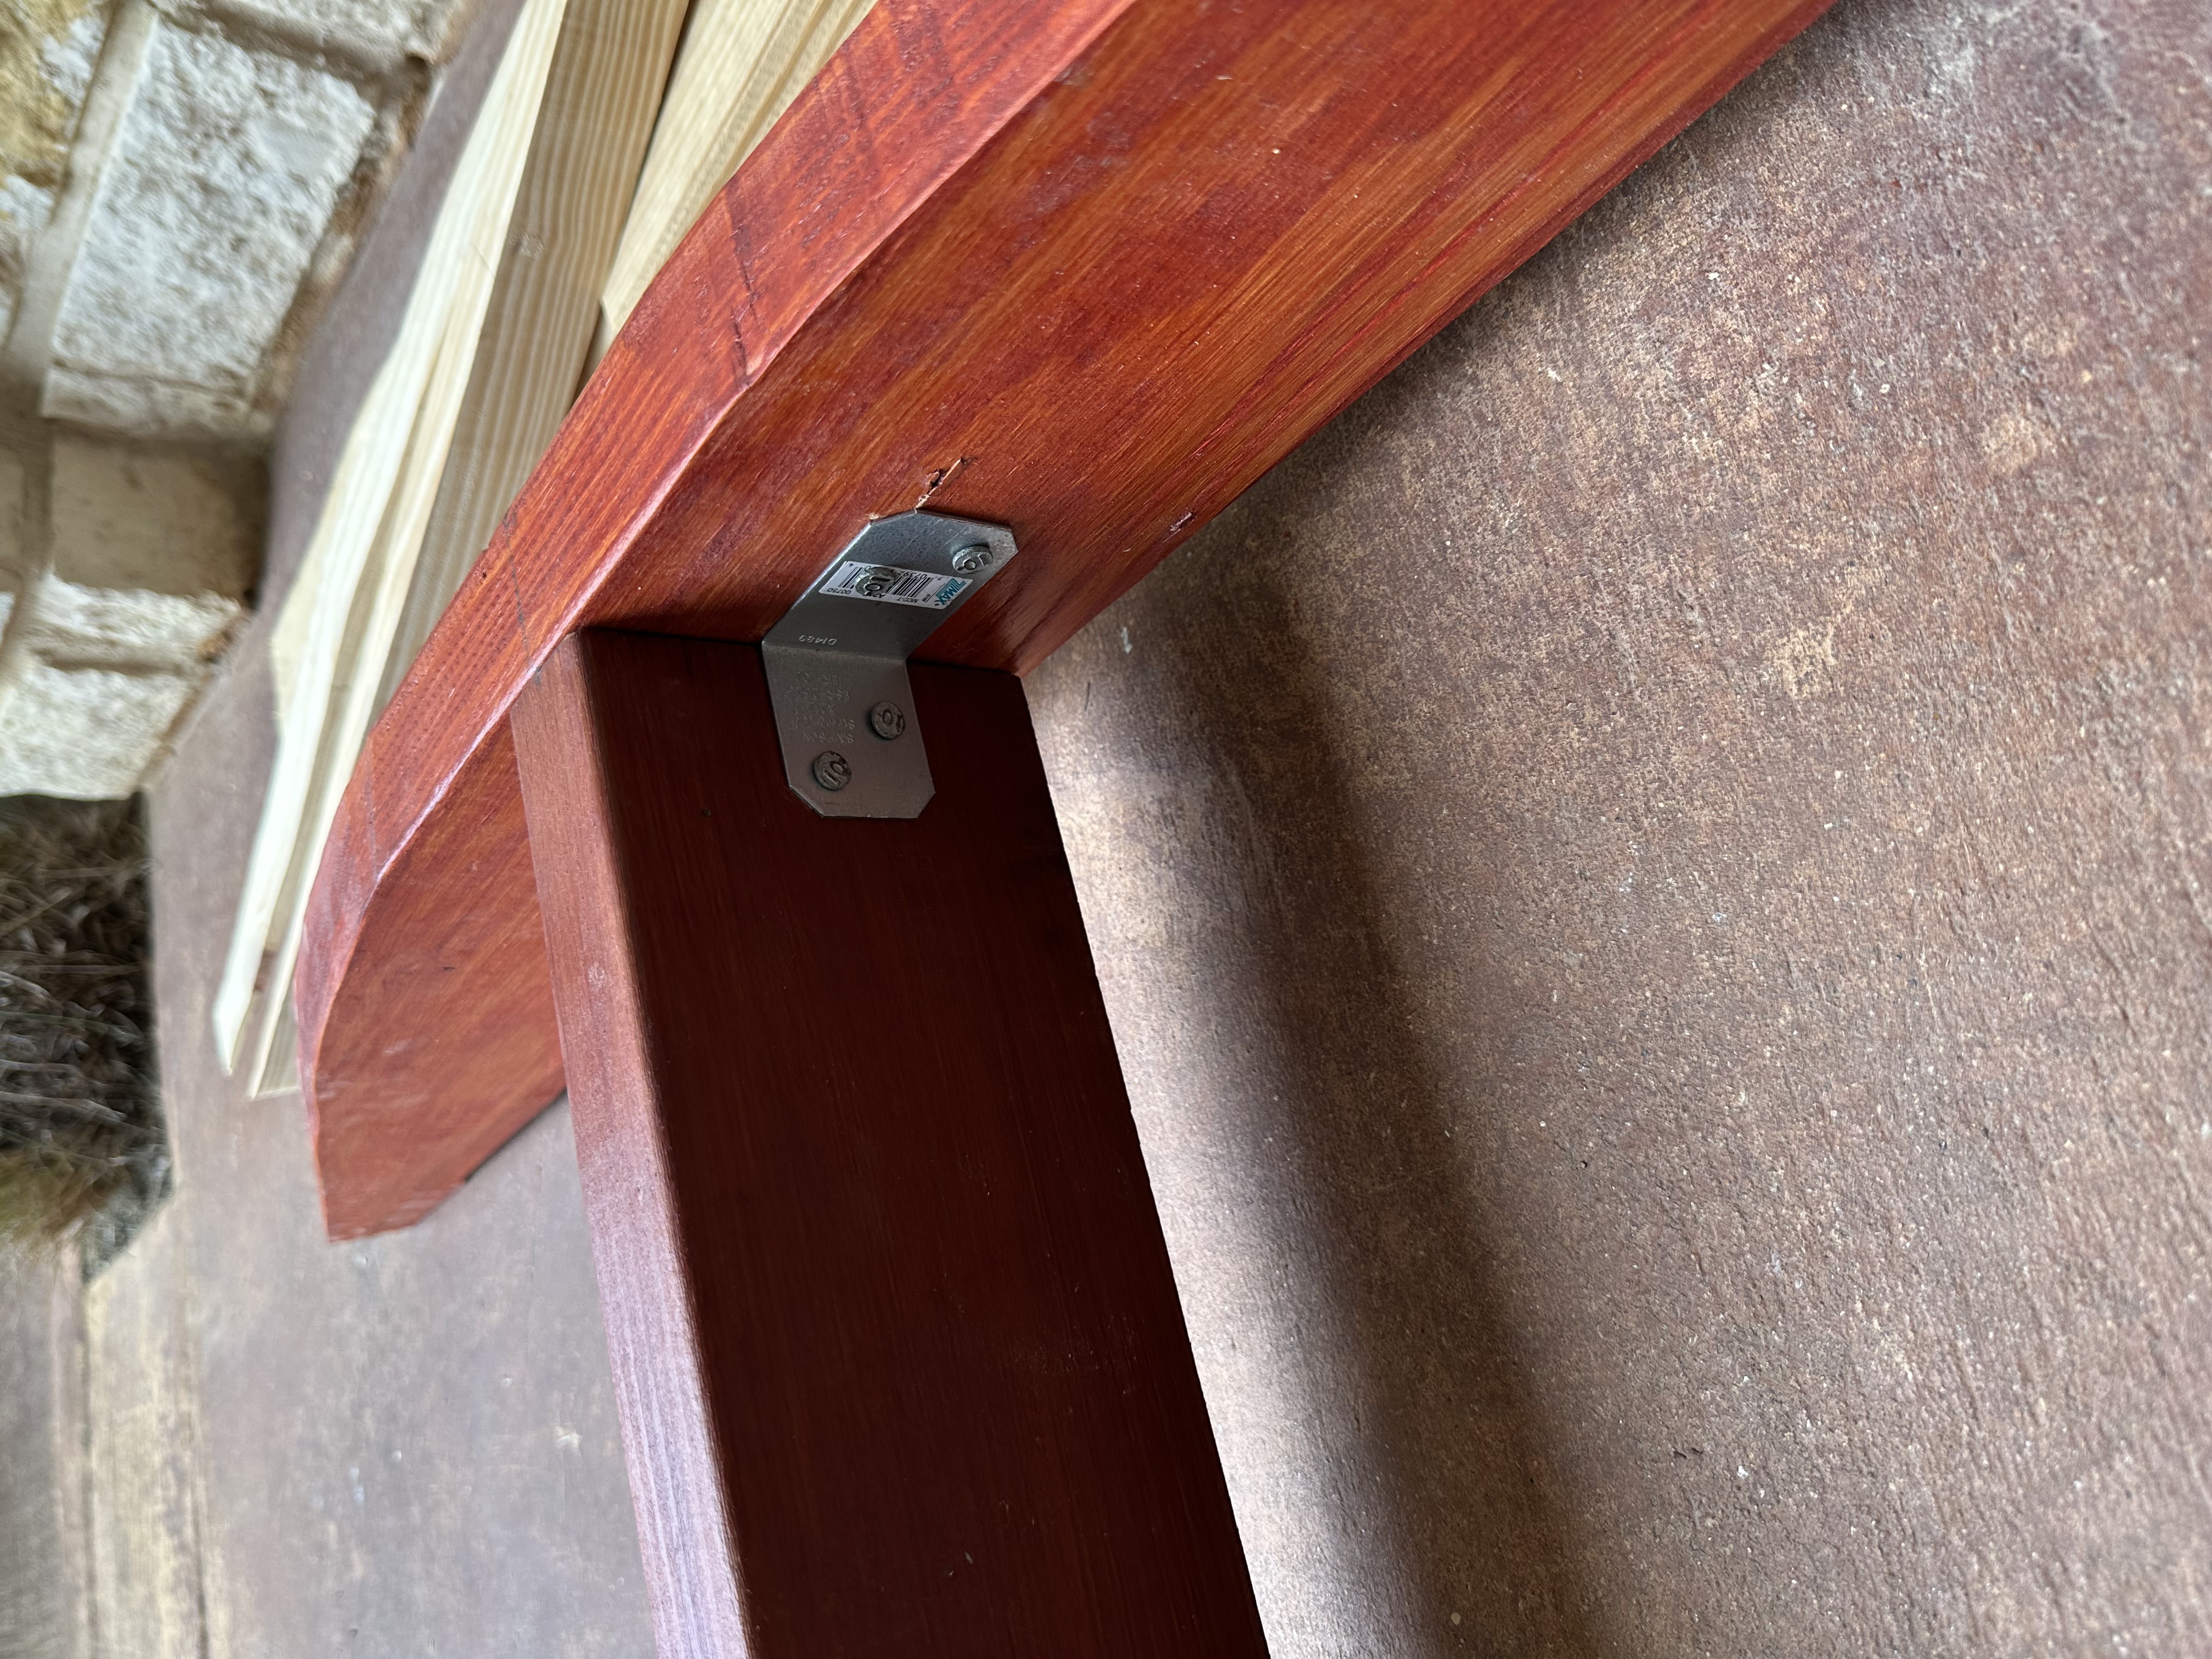
To create a precise one-inch overhang on both sides of the bridge, I marked one-inch on the boards so that when I install them onto the base, I can check if both sides are even. To secure the boards, I measure and pre-drill the holes to avoid splitting.
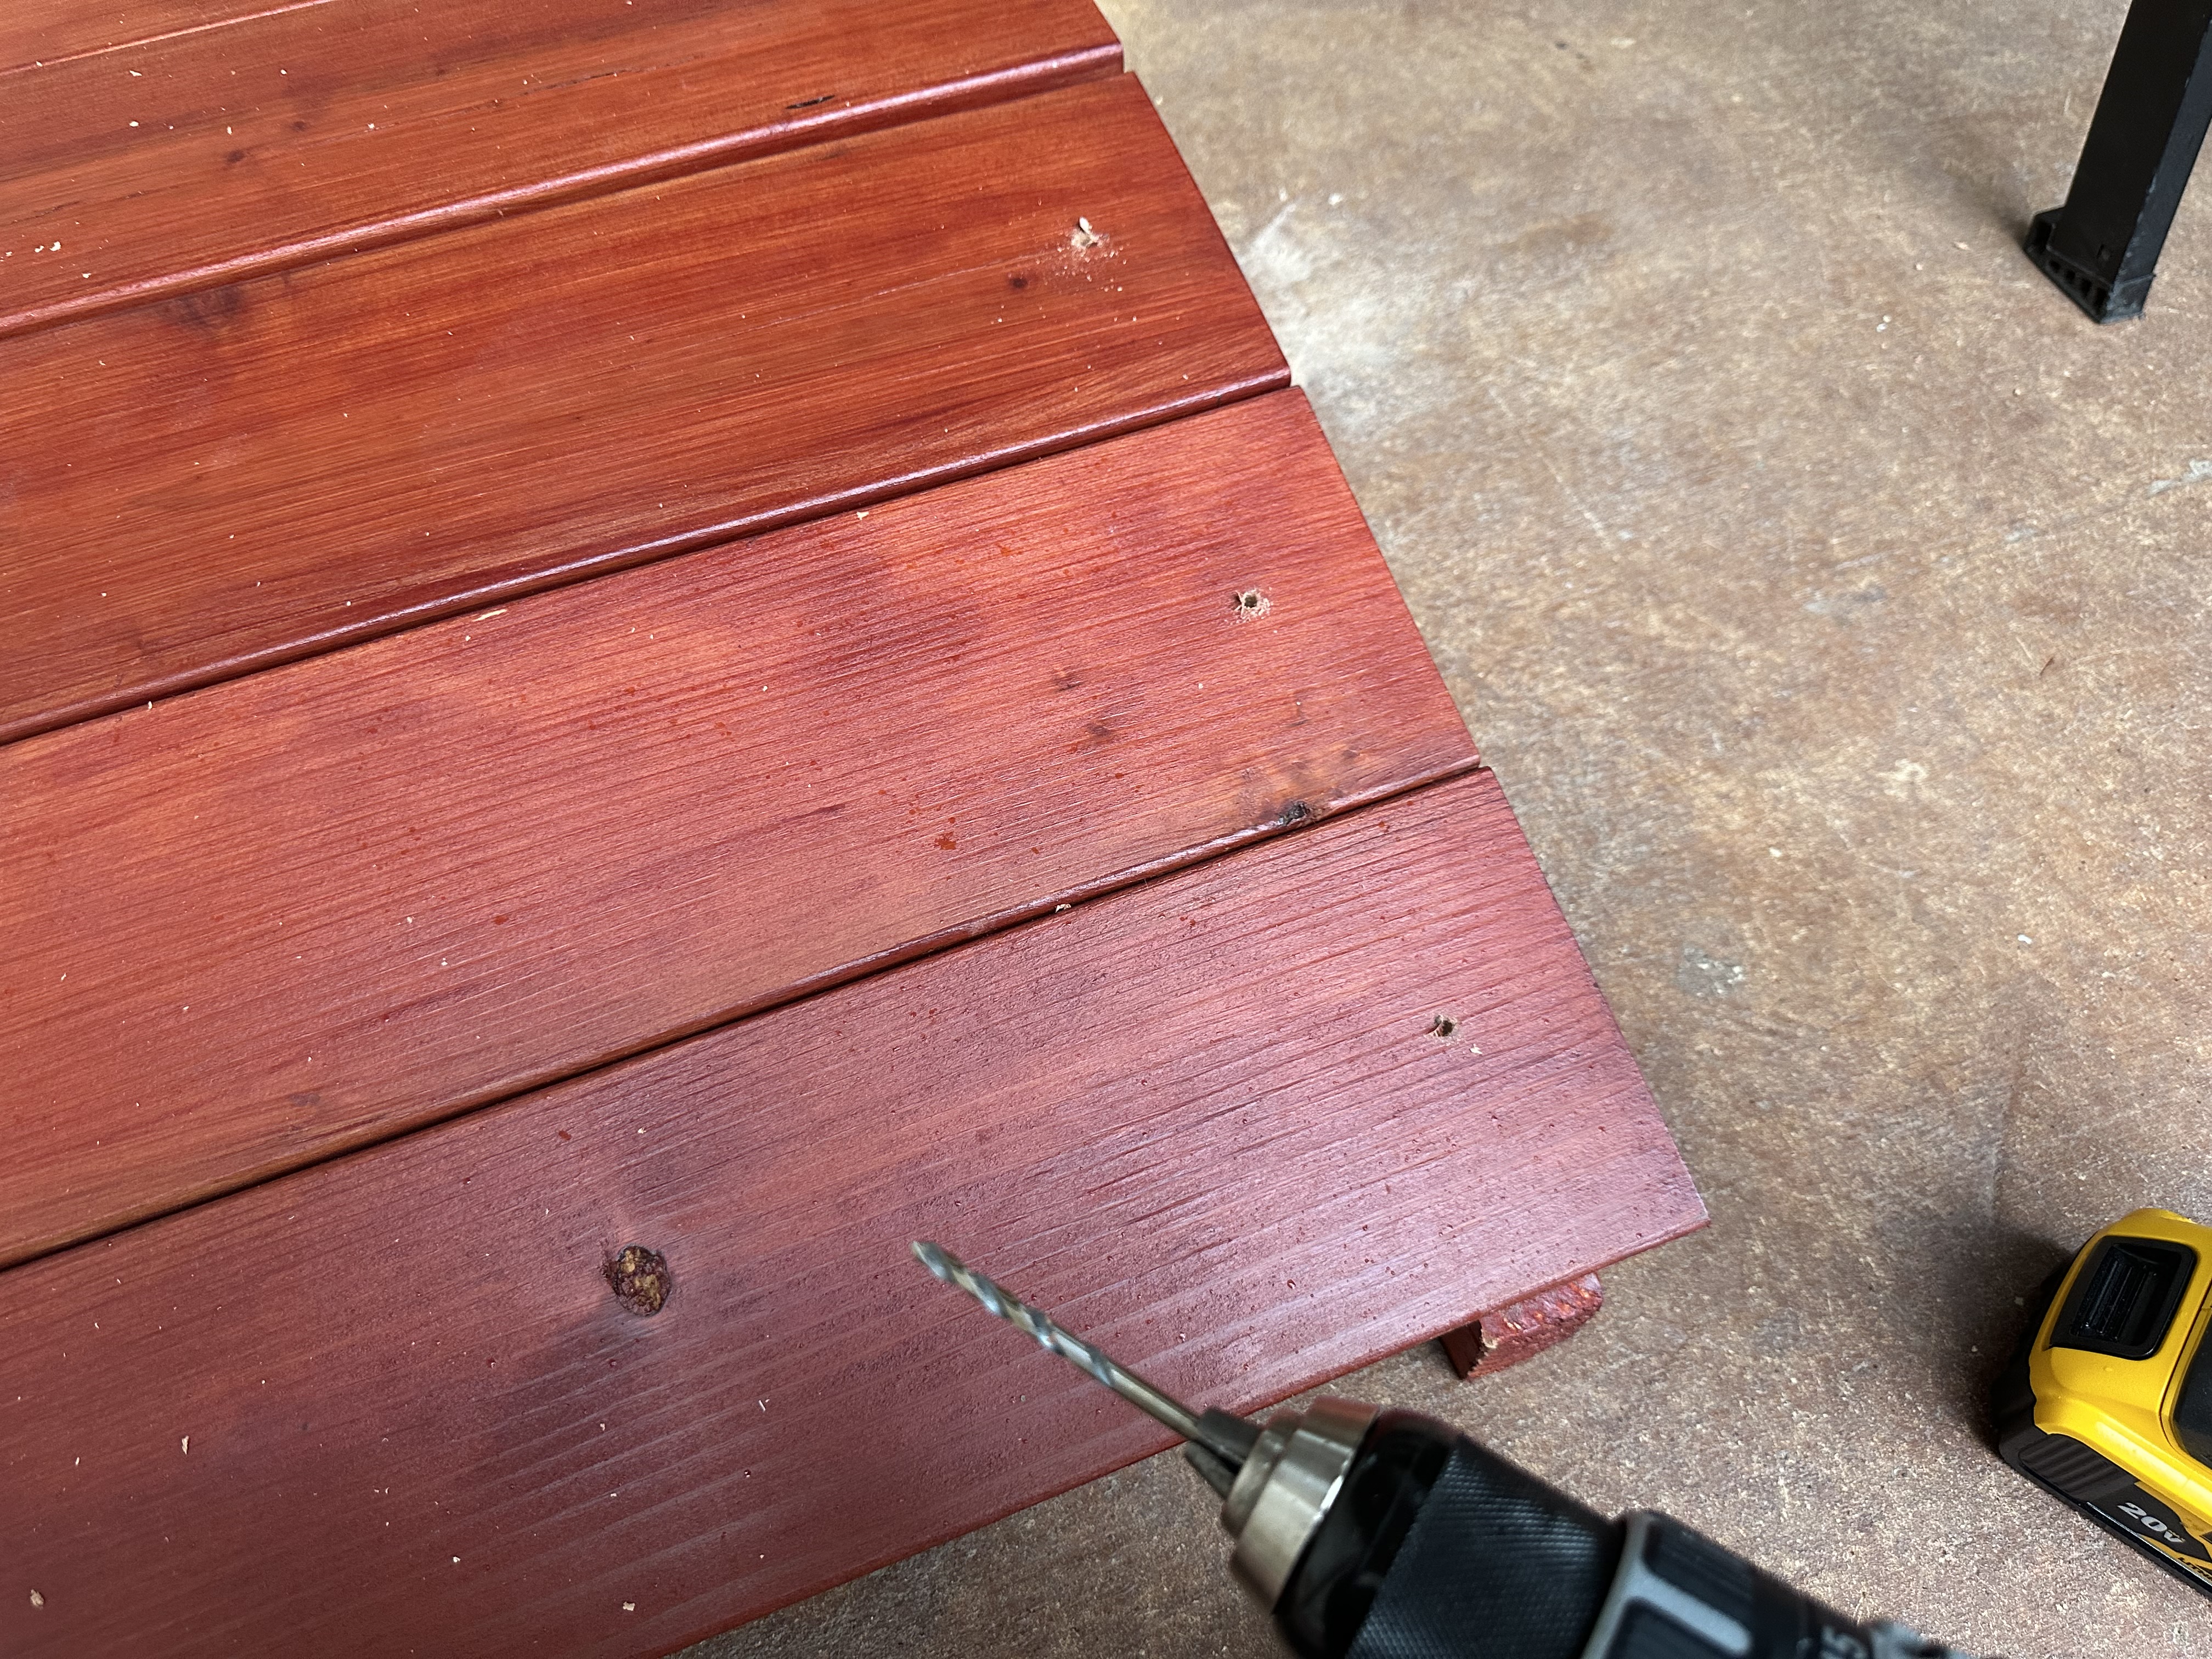
I set the impact driver’s setting to “1” so it does not overpower the screws. Once the screws are in, I change the setting to “2” so I can push the screws slightly below the wood surface to create a finished look.
Backyard Time
Check out my backyard! I’ve constructed two bridges, one before and one after the gate.
Cheers!