DIY Security Camera using an AI Vision Model
Introduction
I have always wanted to build my security camera. There are many benefits to that. First of all, data privacy is paramount to me. I prefer videos captured around my house to remain private with me. Besides, model customization is critical. I want the model to be smart enough to tell the difference between my family members and strangers. The other reason for a customized model is that I live in an area with lots of wildlife, and I would like to create a security camera that can capture footage of those lovely creatures visiting my house. :D
This blog will focus on the technologies for building a security camera, particularly the AI models and the video streaming framework for Object Detection on edge devices. In a future blog, I will discuss how to create a customized model for the security camera so it alerts me only to things I am interested in.
Choose the Hardware
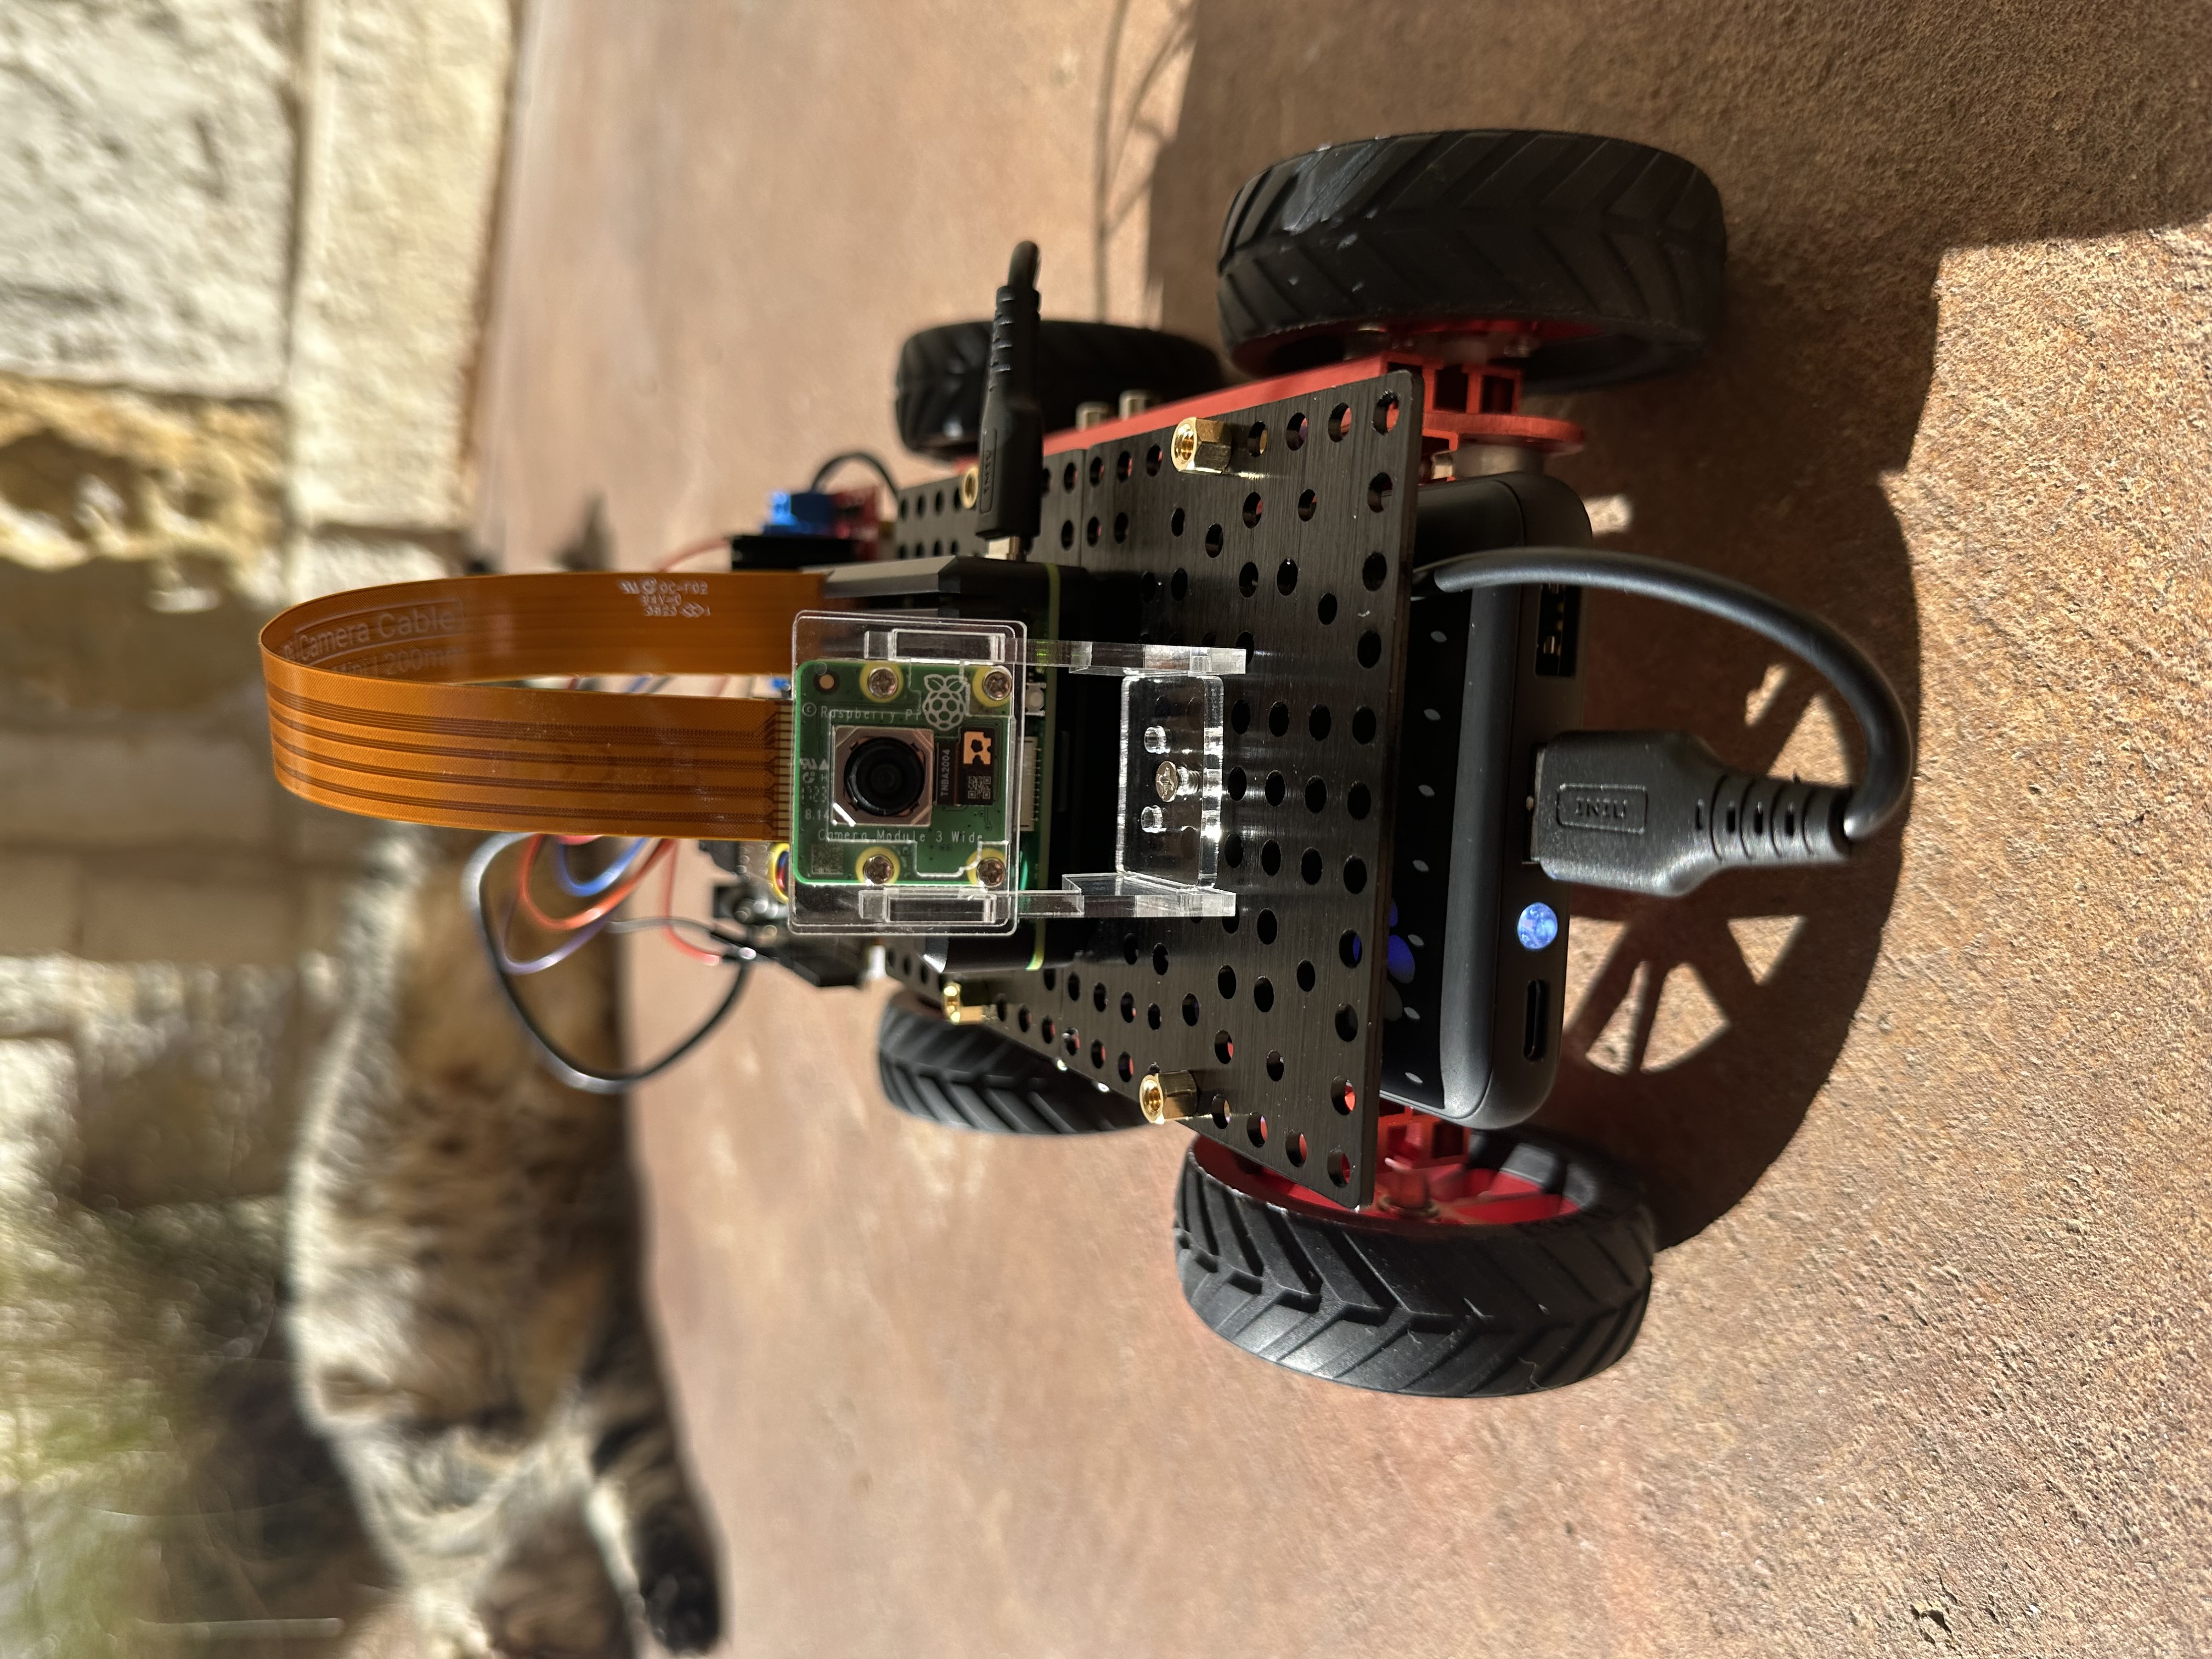
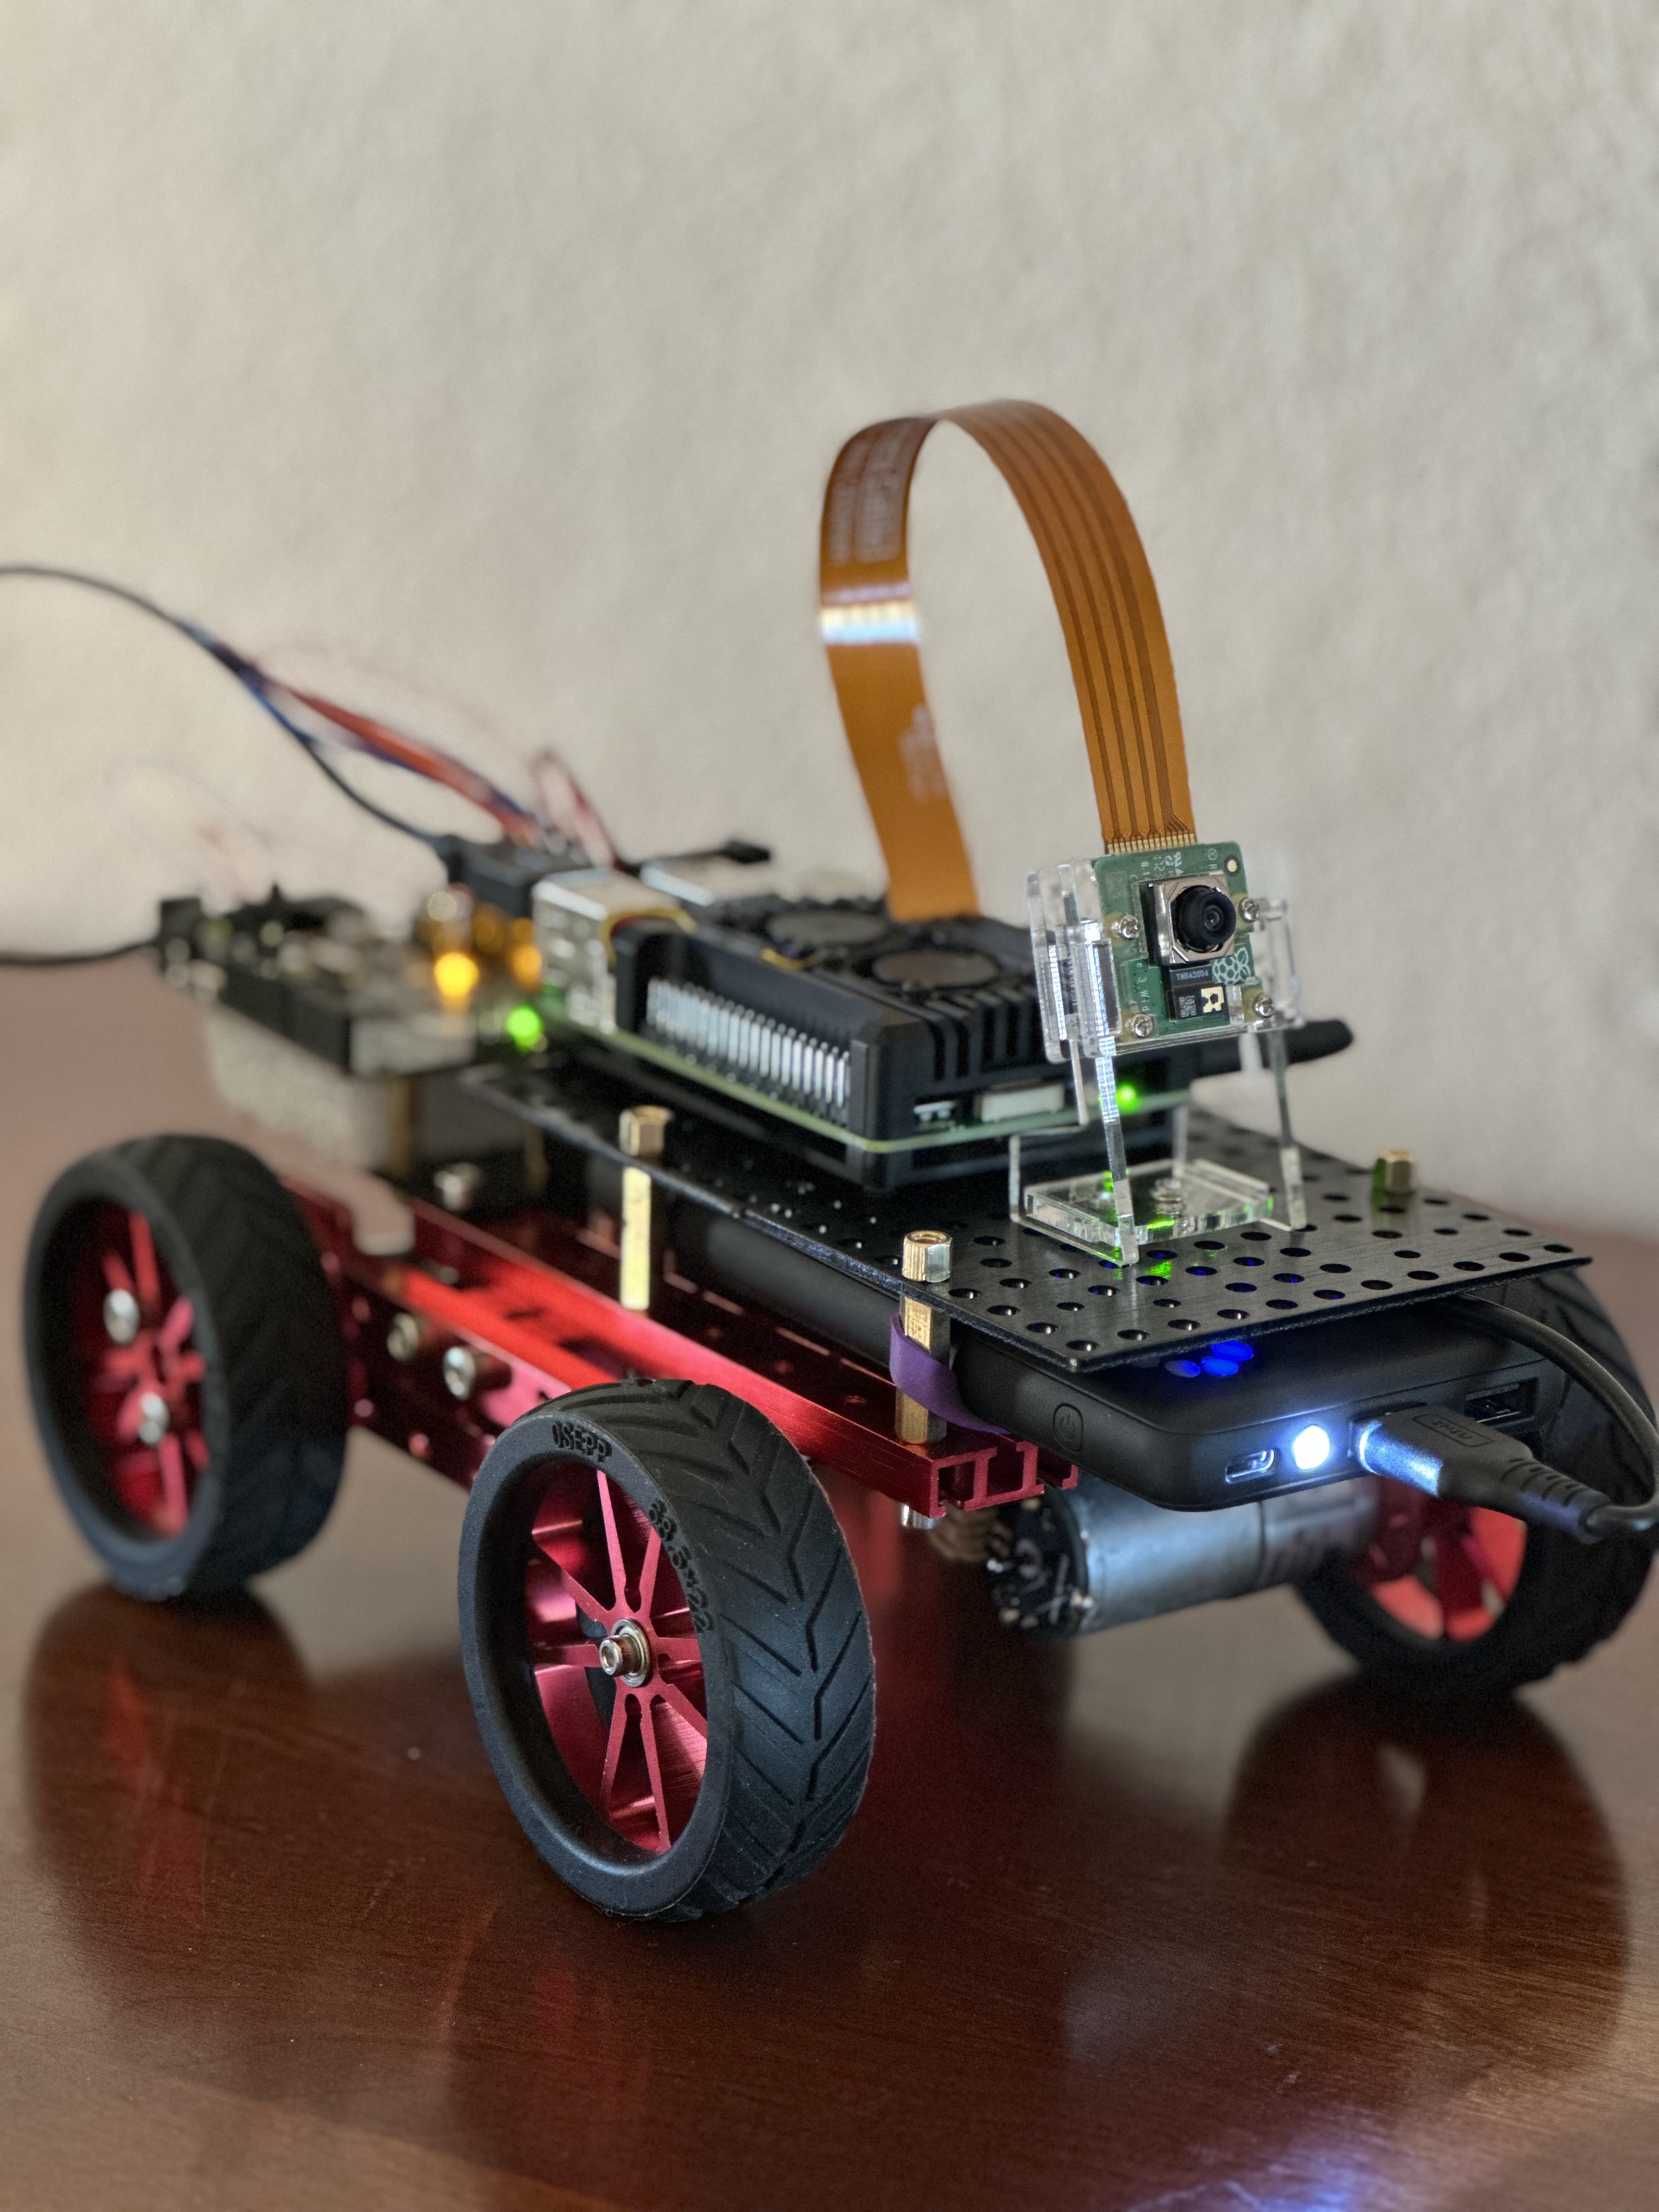
The simplest device for building a security camera is a Raspberry Pi, which is a handy little device for many edge use cases. Each Pi has at least one camera port, up to four USB ports, and 40 GPIO pins. We can use those ports and pins to extend the Pi with video cameras, microphones, speakers, or sensors. For the Object Detection application, I recommend Raspberry Pi 5 since the application uses Convolutional Neural Networks (CNN) to detect objects, which requires some computation power. Raspberry Pi runs Pi OS, a Debian Linux.
Besides Raspberry Pi, the Pi Foundation also releases four types of Pi Cameras. Two are NoIR versions, meaning No Infrared filter, which lets it see in the dark but takes odd pictures during the daylight. Two Pi cameras have a wide field of view (FoV). I like the “wide” version due to its wide angle, but it is slightly pricy compared to the Pi standard cameras. The wide-angle version is $35 vs $25 for the standard one. You can find many generic brands on Amazon if a wide angle is not critical to your use case. They are a drop-in replacement for the standard Pi Camera; some are as low as $8.
Instructions on installing the Pi camera on the Raspberry Pi can be found here.
Besides Raspberry Pi, NVIDIA Jetson Orin Nano is another popular device in the maker’s world. The Jetson Orin Nano will be an overkill for a vision-only security camera unless I plan to extend the security camera with the capability of conversation and simultaneous localization and mapping (SLAM). A walking and talking camera is cool to have. I will create a future blog to cover that. NVIDIA Jetson Orin Nano runs Ubuntu OS, which can easily support ROS2.
Choose the Technology
Tiny Model
The AI models suitable for Raspberry Pi should be quantized and fused. “Quantization” is a process of shrinking the model size and reducing latency and energy consumption. “Fuse” merges the model layers whenever possible.
Quantization prunes all unnecessary operations and uses smaller bit-width floats. For example, it uses 16-bit floats rather than the regular 32-bit floating point. This reduces the model size by half with a small accuracy drop. Quantization can go further by shrinking the model weights down to 8-bit integers. Integers consume less CPU and energy and are ideal for running on an edge device.
When the accuracy drop becomes too severe, we must calibrate the model or perform quantization-aware training with some representative dataset. This will be needed when we train a customized model, which I will detail in a future blog.
In this blog, we will consume a pre-trained and already quantized model.
AI Vision Models
There are many vision models for object detection. The popular lightweight models for edge devices are:
- YOLOv5-Nano/Tiny or YOLOv8-Nano/Tiny: Lightweight YOLO variants for real-time detection.
- MobileNet-SSD: Small and fast, well-suited for low-power devices.
- EfficientDet-Lite: Optimized for mobile and edge devices.
EfficientDet-Lite
EfficientDet is the most accurate vision model among the three when involving diverse objects. It has official TensorFlow Lite support. The lite model can be downloaded from kaggle. It is trained using the COCO dataset, a large-scale object detection, segmentation, and captioning dataset with 330K images and 1.5 million object instances.
That being said, EfficientDet is slower than YOLOv5-Tiny and MobileNet-SSD due to its more complex architecture. Therefore, it is best used in applications where inference speed is less critical than accuracy.
YOLOv5-Tiny
The YOLO model is highly optimized for real-time inference. It has superior detection accuracy, especially for small objects. It is slightly heavier and slower compared to MobileNet-SSD.
MobileNet-SSD
MobileNet-SSD is lightweight and fast. However, this model has lower accuracy compared to YOLOv5-Tiny and EfficientDet-Lite.
Model selection
In the end, which model we choose depends on the application. For the security camera, we don’t need real-time continuous object detection; instead, we need accurate detection. Once the object is detected, we start video streaming until the subject disappears. The video is streamed to a remote server for alert playback. Therefore, whether the model can accurately detect the objects of interest is critical to the application’s success.
In addition to the general application guideline, model A/B testing is another important mechanism for model selection. A/B testing can determine whether a variable change improves the model’s performance. It is widely used in Data Science beyond model technology selection.
For successful A/B testing, we must define the following requirements before conducting the test:
- Measurable metrics, i.e., F1 score,
- Acceptance criteria,
- Duration of the test,
- Test data size and data variant.
Object Detection using “YOLOv5-Tiny”
class ObjectDetectorYolo(ObjectDetector):
    def __init__(self, options: ObjectDetectorOptions = ObjectDetectorOptions()):
        self._options = options
        self._model = torch.hub.load('ultralytics/yolov5', 'yolov5s', pretrained=True)  # YOLOv5-Tiny

    def detect(self, input_image: np.ndarray) -> List[Detection]:
        # Perform object detection
        results = self._model(input_image)

        # Extract predictions (labels, confidence, coordinates)
        predictions = results.pandas().xyxy[0]  # Pandas DataFrame
        return self._postprocess(predictions)

    def _postprocess(self, predictions):
        filtered_df = predictions[predictions['confidence'] > self._options.score_threshold]
        filtered_df = filtered_df.sort_values(by='confidence', ascending=False)
        filtered_df = filtered_df.head(self._options.max_results)

        records = filtered_df.to_dict(orient='records')
        results = [
            Detection(
                bounding_box=Rect(
                    left=int(record['xmin']),
                    top=int(record['ymin']),
                    right=int(record['xmax']),
                    bottom=int(record['ymax'])
                ),
                category=Category(
                    score=record['confidence'],
                    label=record['name'],  # 0 is reserved for background
                    index=record['class']
                )
            ) for record in records
        ]

        return results
Streaming Frameworks
We need a good video streaming framework that supports Raspberry Pi to efficiently process videos on Raspberry Pi. We can then access individual frames from the video to run inference.
Since we are using a Pi camera, we can use the native “picamera2” library for video streaming. It is explicitly designed for the modern Raspberry Pi camera stack.
In Picamera2, capturing and encoding video is mostly automatic. The application only needs to define its encoder to compress the video data and where the compressed data goes. The encoding and output happen in a separate thread from the camera handling to minimize the risk of dropping camera frames. On Pi 4 and earlier devices, there is dedicated hardware for H264 and MJPEG encoding. However, on Pi 5, the codecs are implemented in software using FFmpeg libraries with similar or better performance. Source: picamera2-manual.pdf
from picamera2 import Picamera2

picam2 = Picamera2()
config = picam2.create_preview_configuration(main={"size": (width, height), "format": "BGR888"})
encoder = H264Encoder(bitrate=10000000)
picam2.configure(config)
picam2.start()

while time.time() - start_time < duration:
    frame = picam2.capture_array()
    detections = detector.detect(frame)
    if len(detections) > 0:
        picam2.start_encoder(encoder, output)
If we use a webcam, we can use the OpenCV library for video streaming.
import cv2

cap = cv2.VideoCapture(camera_id)
cap.set(cv2.CAP_PROP_FRAME_WIDTH, width)
cap.set(cv2.CAP_PROP_FRAME_HEIGHT, height)

while cap.isOpened():
    success, frame = cap.read()
    if success:
        detections = detector.detect(frame)
        if len(detections) > 0:
            fourcc = cv2.VideoWriter_fourcc(*'avc1')  # H.264 for MP4
            out = cv2.VideoWriter(output, fourcc, recording_fps, (width, height))
            out.write(frame)
Due to changes in the camera stack on newer Raspberry Pi OS versions, OpenCV’s default cv2.VideoCapture() does not support the new Pi camera stack. However, I want my application to be portable and not have to rewrite the entire streaming piece in the future when my application moves to Ubuntu.
To make the code modular and portable, I introduced the CameraManager class and implemented it for the Pi camera and webcam. This refactoring has made my streaming code cleaner and future-proof.
cm = CameraManager(camera_id=args.cameraId, width=args.frameWidth, height=args.frameHeight)
while cm.is_camera_open():
    success, frame = cm.read()
    if success:
        detections = detector.detect(frame)
        if len(detections) > 0:
            start_recording(cm, frame)
Security Alerts
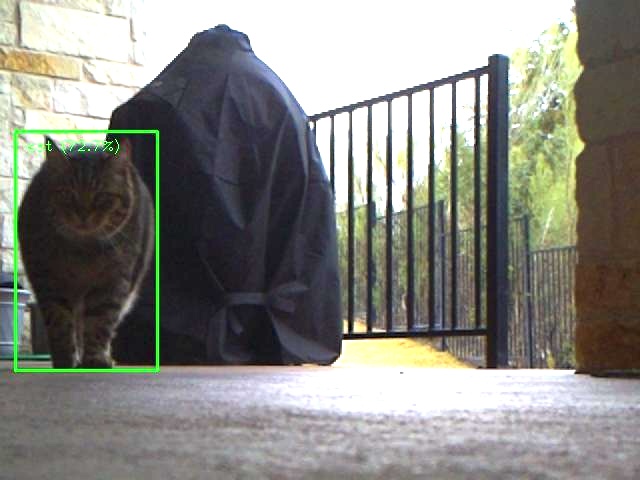
Here, the security camera spotted a wildcat came to our back deck in the morning of February 02: