Droid Vision with built-in Joystick and Keypad
Chasing my cat and watching him run around through the lens of a mobile robot is quite fun. However, there is one drawback: it is inconvenient to hold the iPhone in one hand and the remote control in the other. What if I could integrate the remote control into the Droid Vision app, allowing me to see and control the robot using just one device, with everything consolidated in the app!
This leads to Droid Vision 2.1, free from the App Store.
ROS and Rosbridge WebSocket
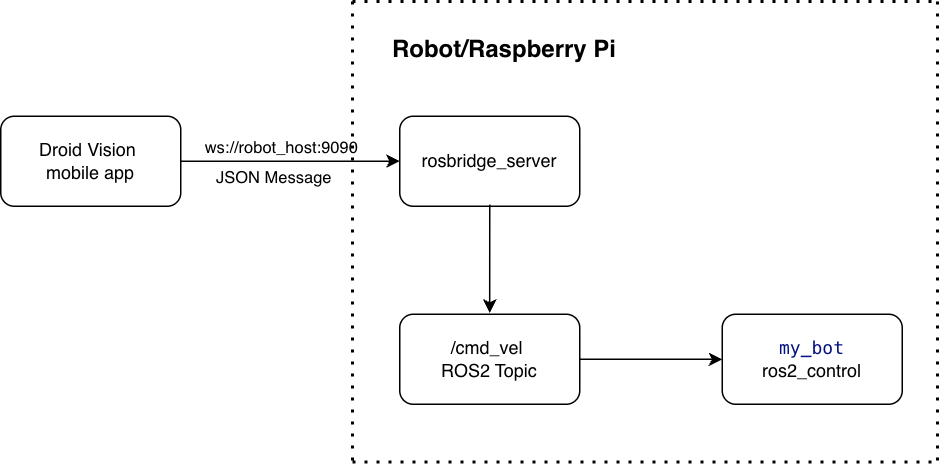
To control the robot using the Droid Vision app, I utilized Rosbridge WebSocket.
In robotics, the Robot Operating System (ROS) is the standard choice for developing robot applications. It provides software libraries and tools that enable developers to connect motors, sensors, and software seamlessly, thereby accelerating the process of creating advanced robots.
Rosbridge WebSocket is a communication interface that allows non-ROS applications, such as web or mobile apps, to interact with a ROS system using JSON messages over a WebSocket connection. It is part of the rosbridge_suite and enables bidirectional communication between ROS nodes and external applications without requiring them to be ROS-native.
This is particularly beneficial for applications that need real-time interaction with a ROS system while avoiding the complexity of ROS 2 DDS networking.
ROS 2 Docker Container
To run ROS on a Raspberry Pi, I recommend using the ROS 2 Docker container. It simplifies dependency management, making the environment portable, consistent, and shareable.
Docker is widely used in enterprise software’s microservice architecture, where each service functions as a lightweight Docker container that can be independently deployed and upgraded. A Docker container is created from a Docker image, which serves as a template defining its structure and dependencies.
The concept of using Docker for robotic applications is relatively new. I have a detailed article about it, which is RPLidar in ROS 2 Docker on Raspberry Pi.
The Dockerfile I prepared for my robot can be downloaded from here: Dockerfile and requirements.txt. The Docker image created from the Dockerfile includes all the necessary ROS2 modules, Python libraries, and source code repositories. Access to the private Git repository is granted using an SSL key.
We can build the Docker image and start the Docker container using the following commands. Building the Docker image compiles the source code and creates the bot environment.
# build the docker image "my_bot_image"
docker build -t my_bot_image .

# start the docker container from the image
docker run -it --network=host --ipc=host -v /dev:/dev \
    --device-cgroup-rule='c 188:* rmw' \
    --device-cgroup-rule='c 166:* rmw' \
    my_bot_image

# start the robot and rosbridge_server in the docker container
ros@raspi:ros2 launch my_bot robot.launch.py
ros@raspi:ros2 launch rosbridge_server rosbridge_websocket_launch.xml
With that, the Rosbridge WebSocket is open on the Raspberry Pi and can be accessed from the Droid Vision app.
Droid Vision App
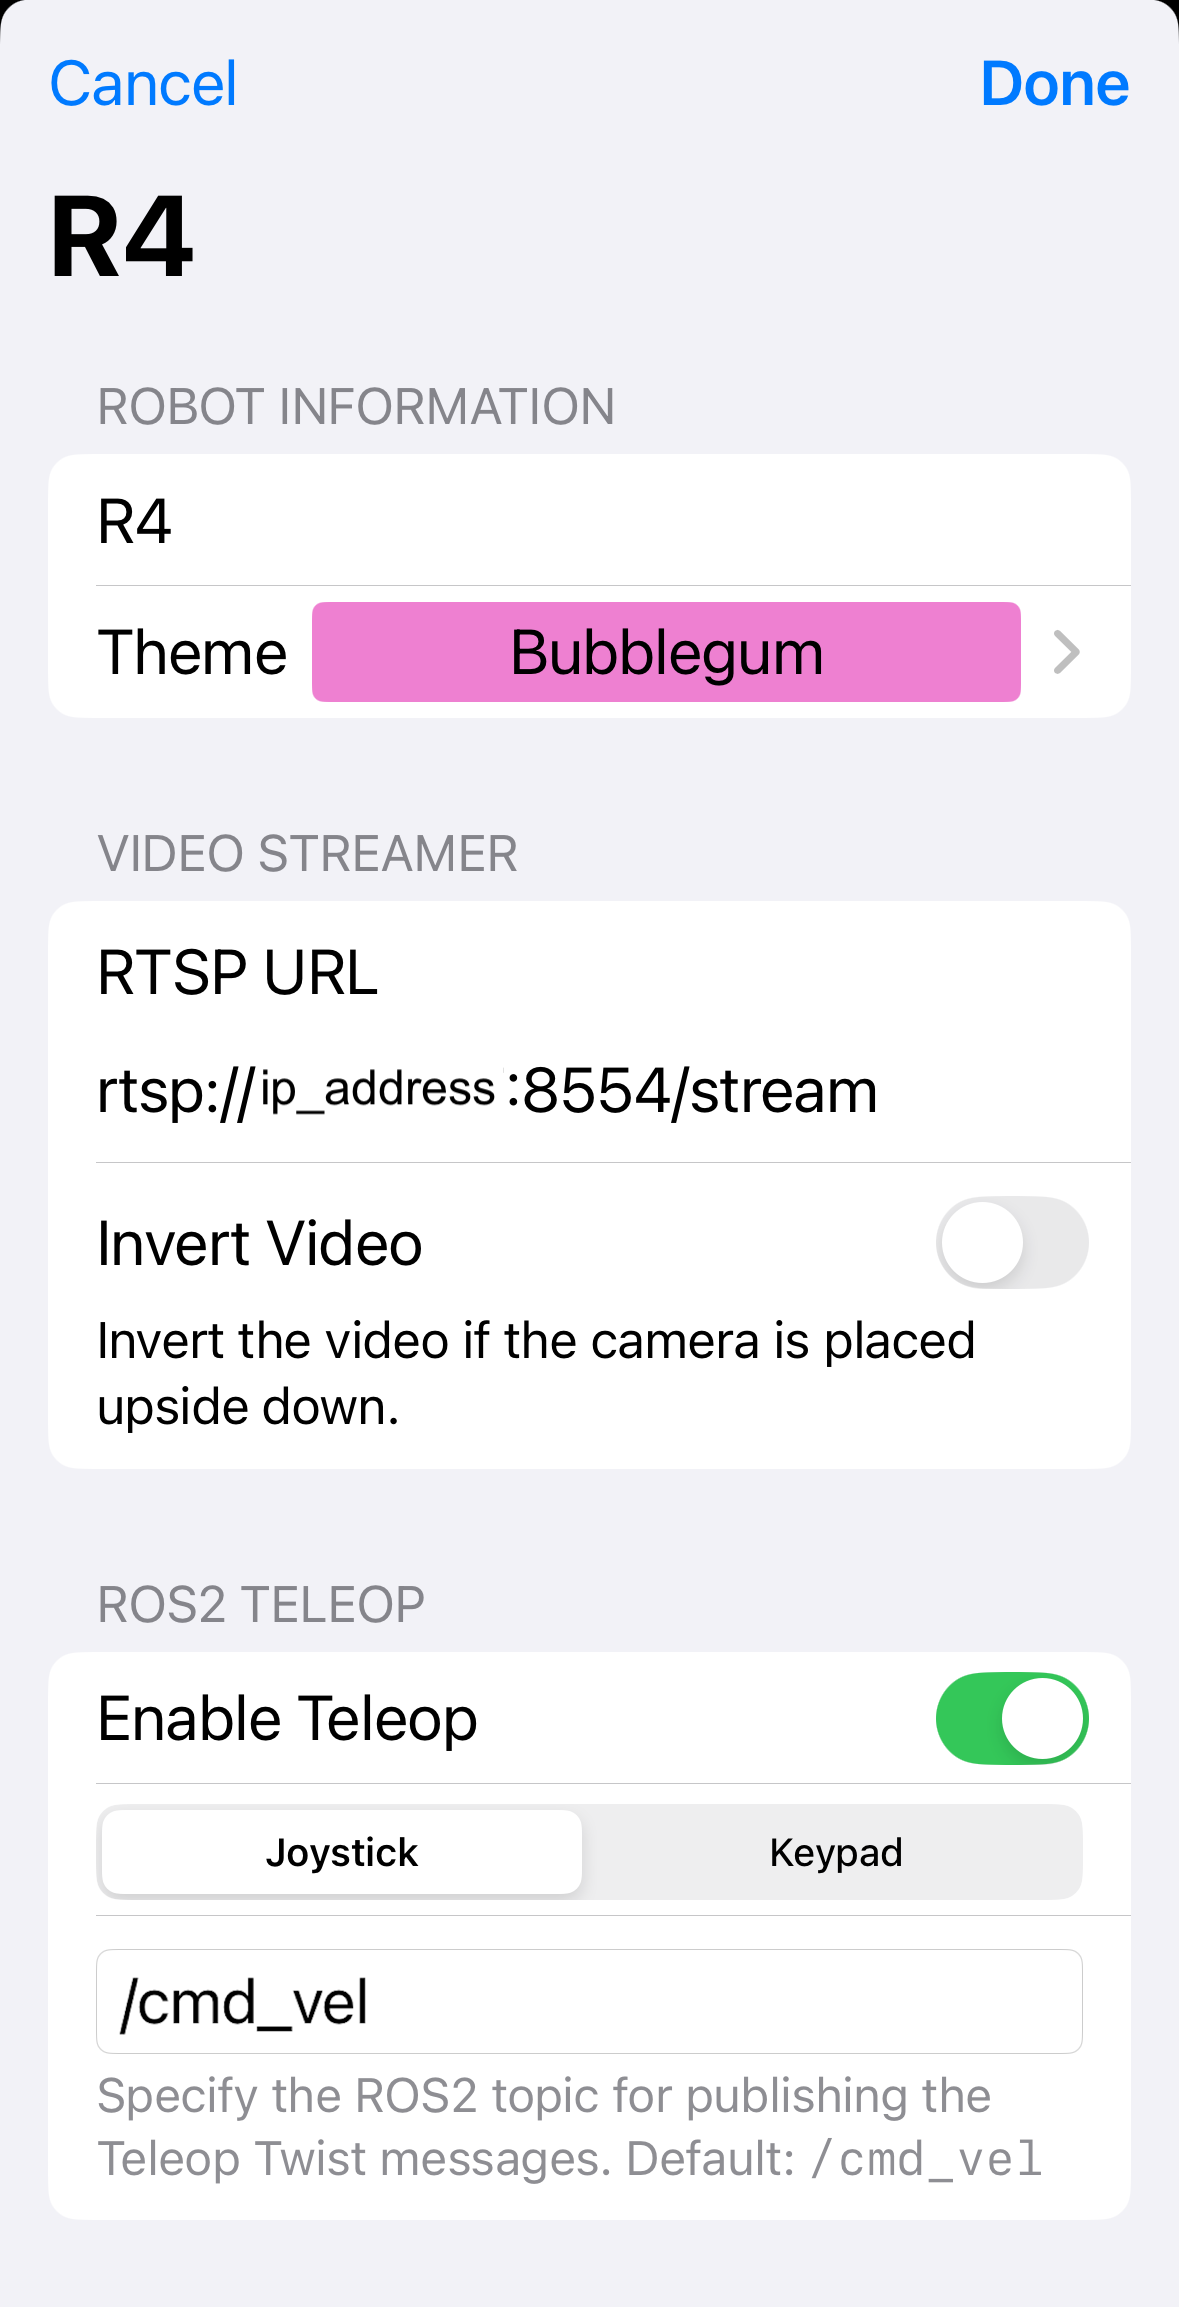
Using the joystick or keypad on the Droid Vision is straightforward. We just enable the “ROS2 Teleop” in the robot’s settings, and tap the “gamepad” icon once we are live viewing the robot.
Joystick Control
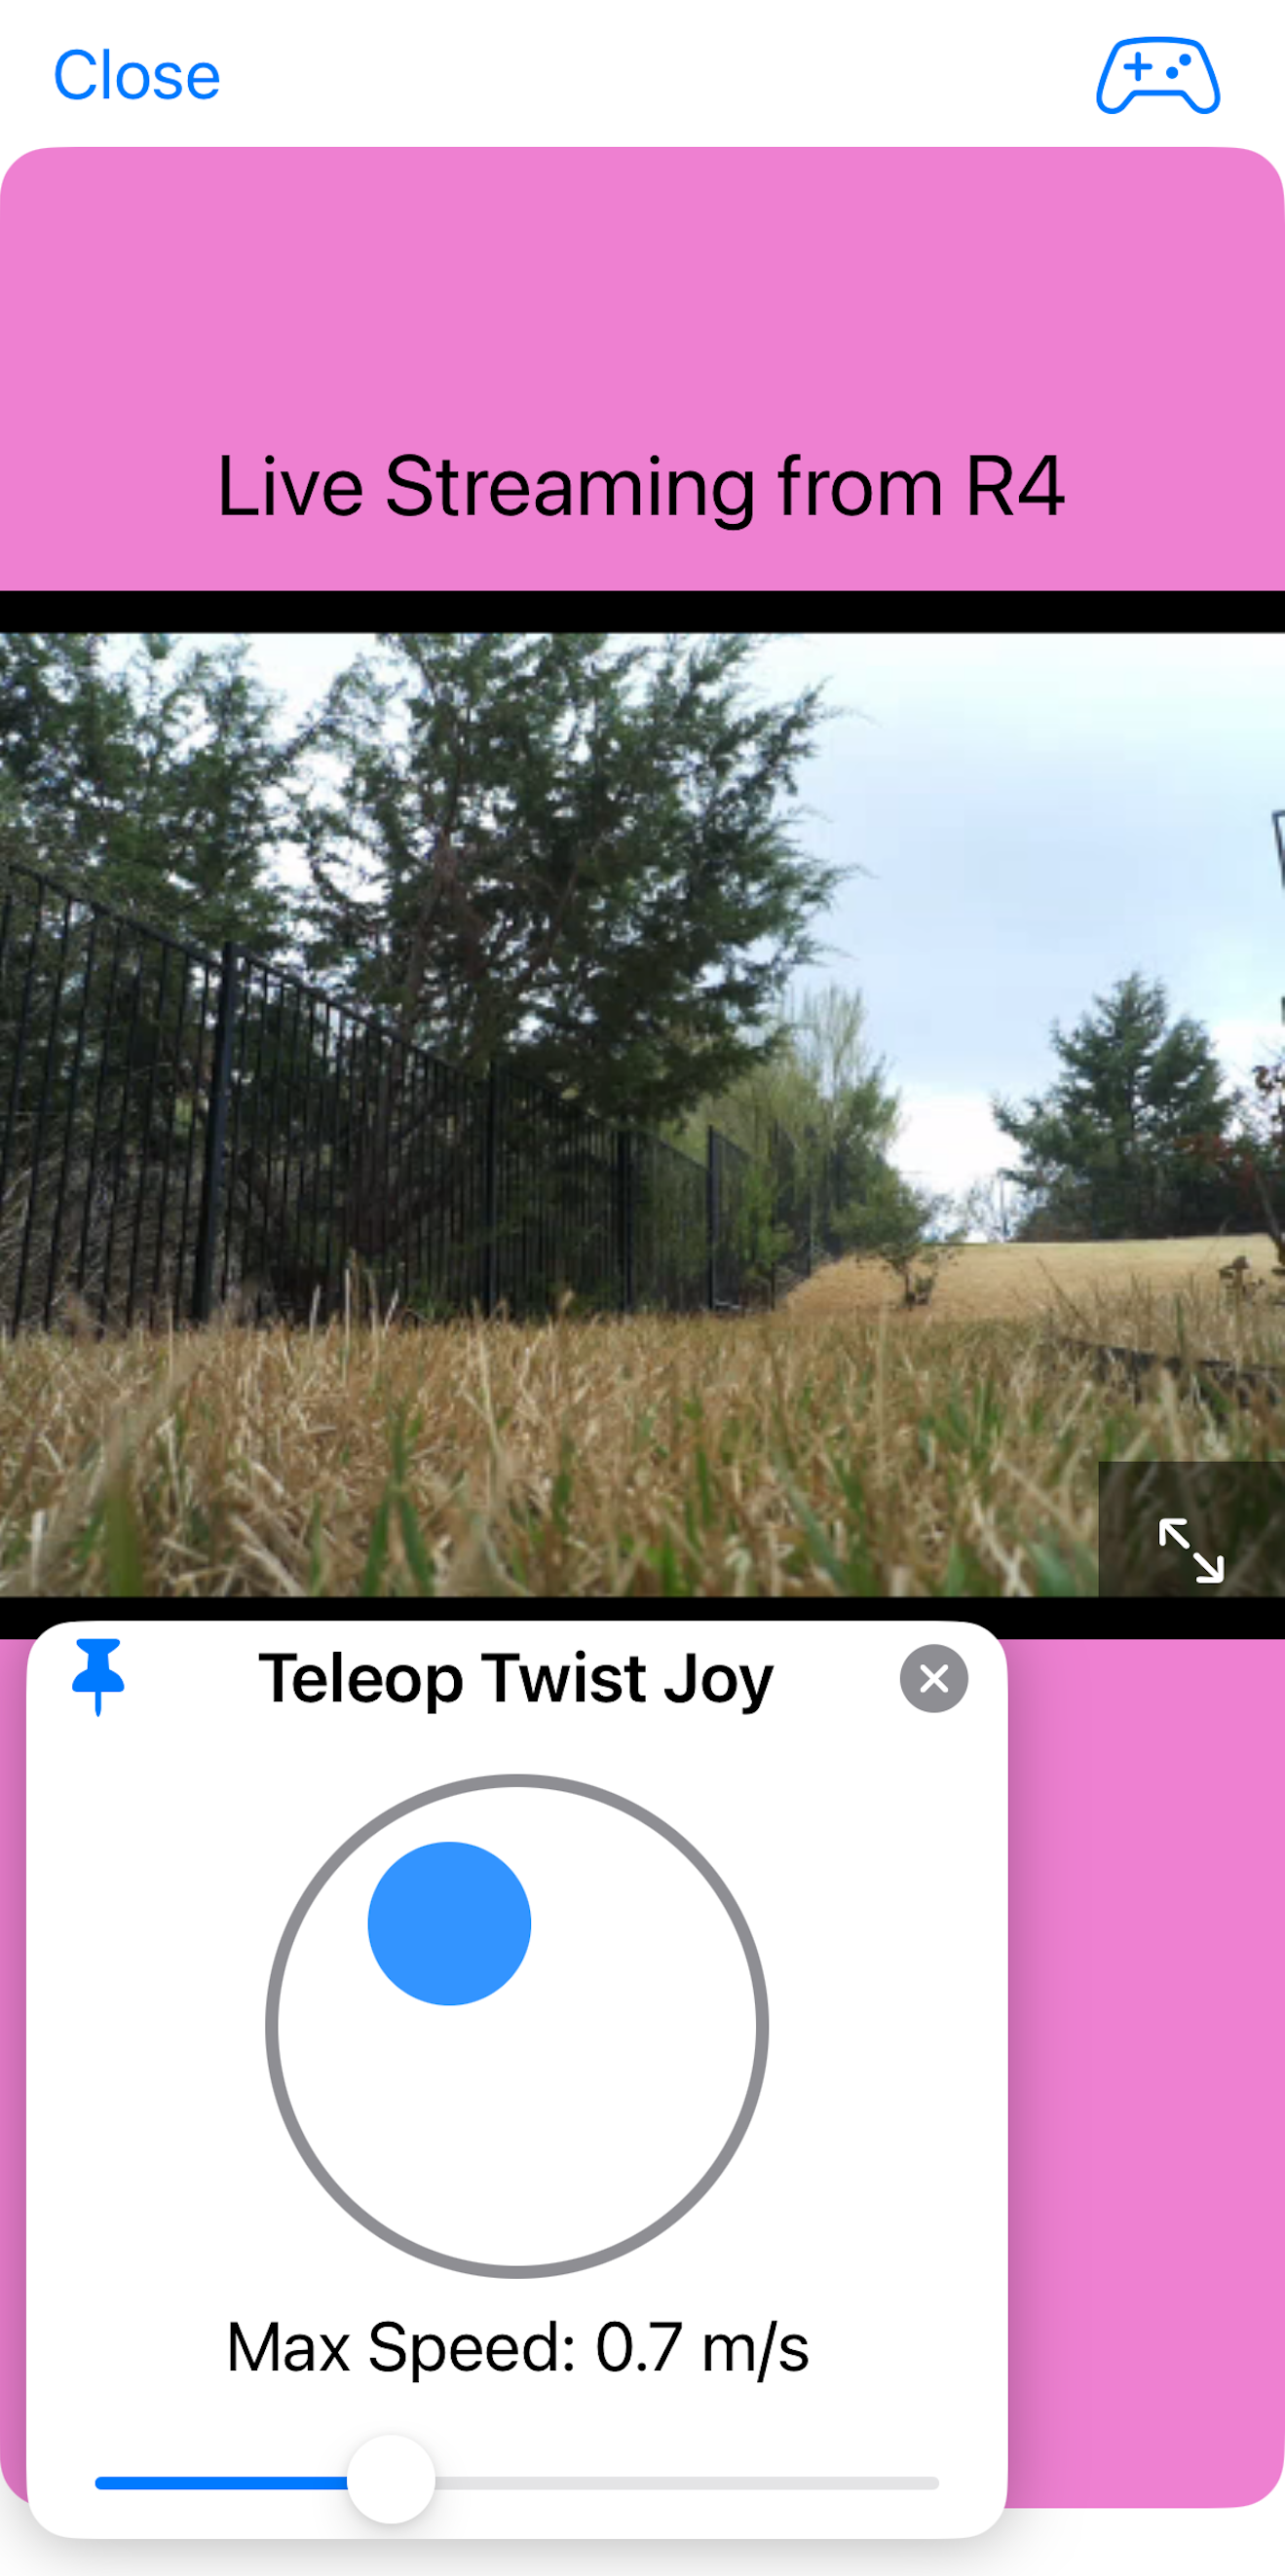
The “Joystick” is the default option for controlling the robot since it is easier to use than the “Keypad”.
The value of “ROS2 Topic” depends on your robot, but “/cmd_vel” is the default ROS topic for the robot’s velocity messages. My ROS 2 Control, Robot Control the Right Way blog shows how to configure the “controller_manager” in the robot’s launch file to use “cmd_vel” as the velocity command topic.
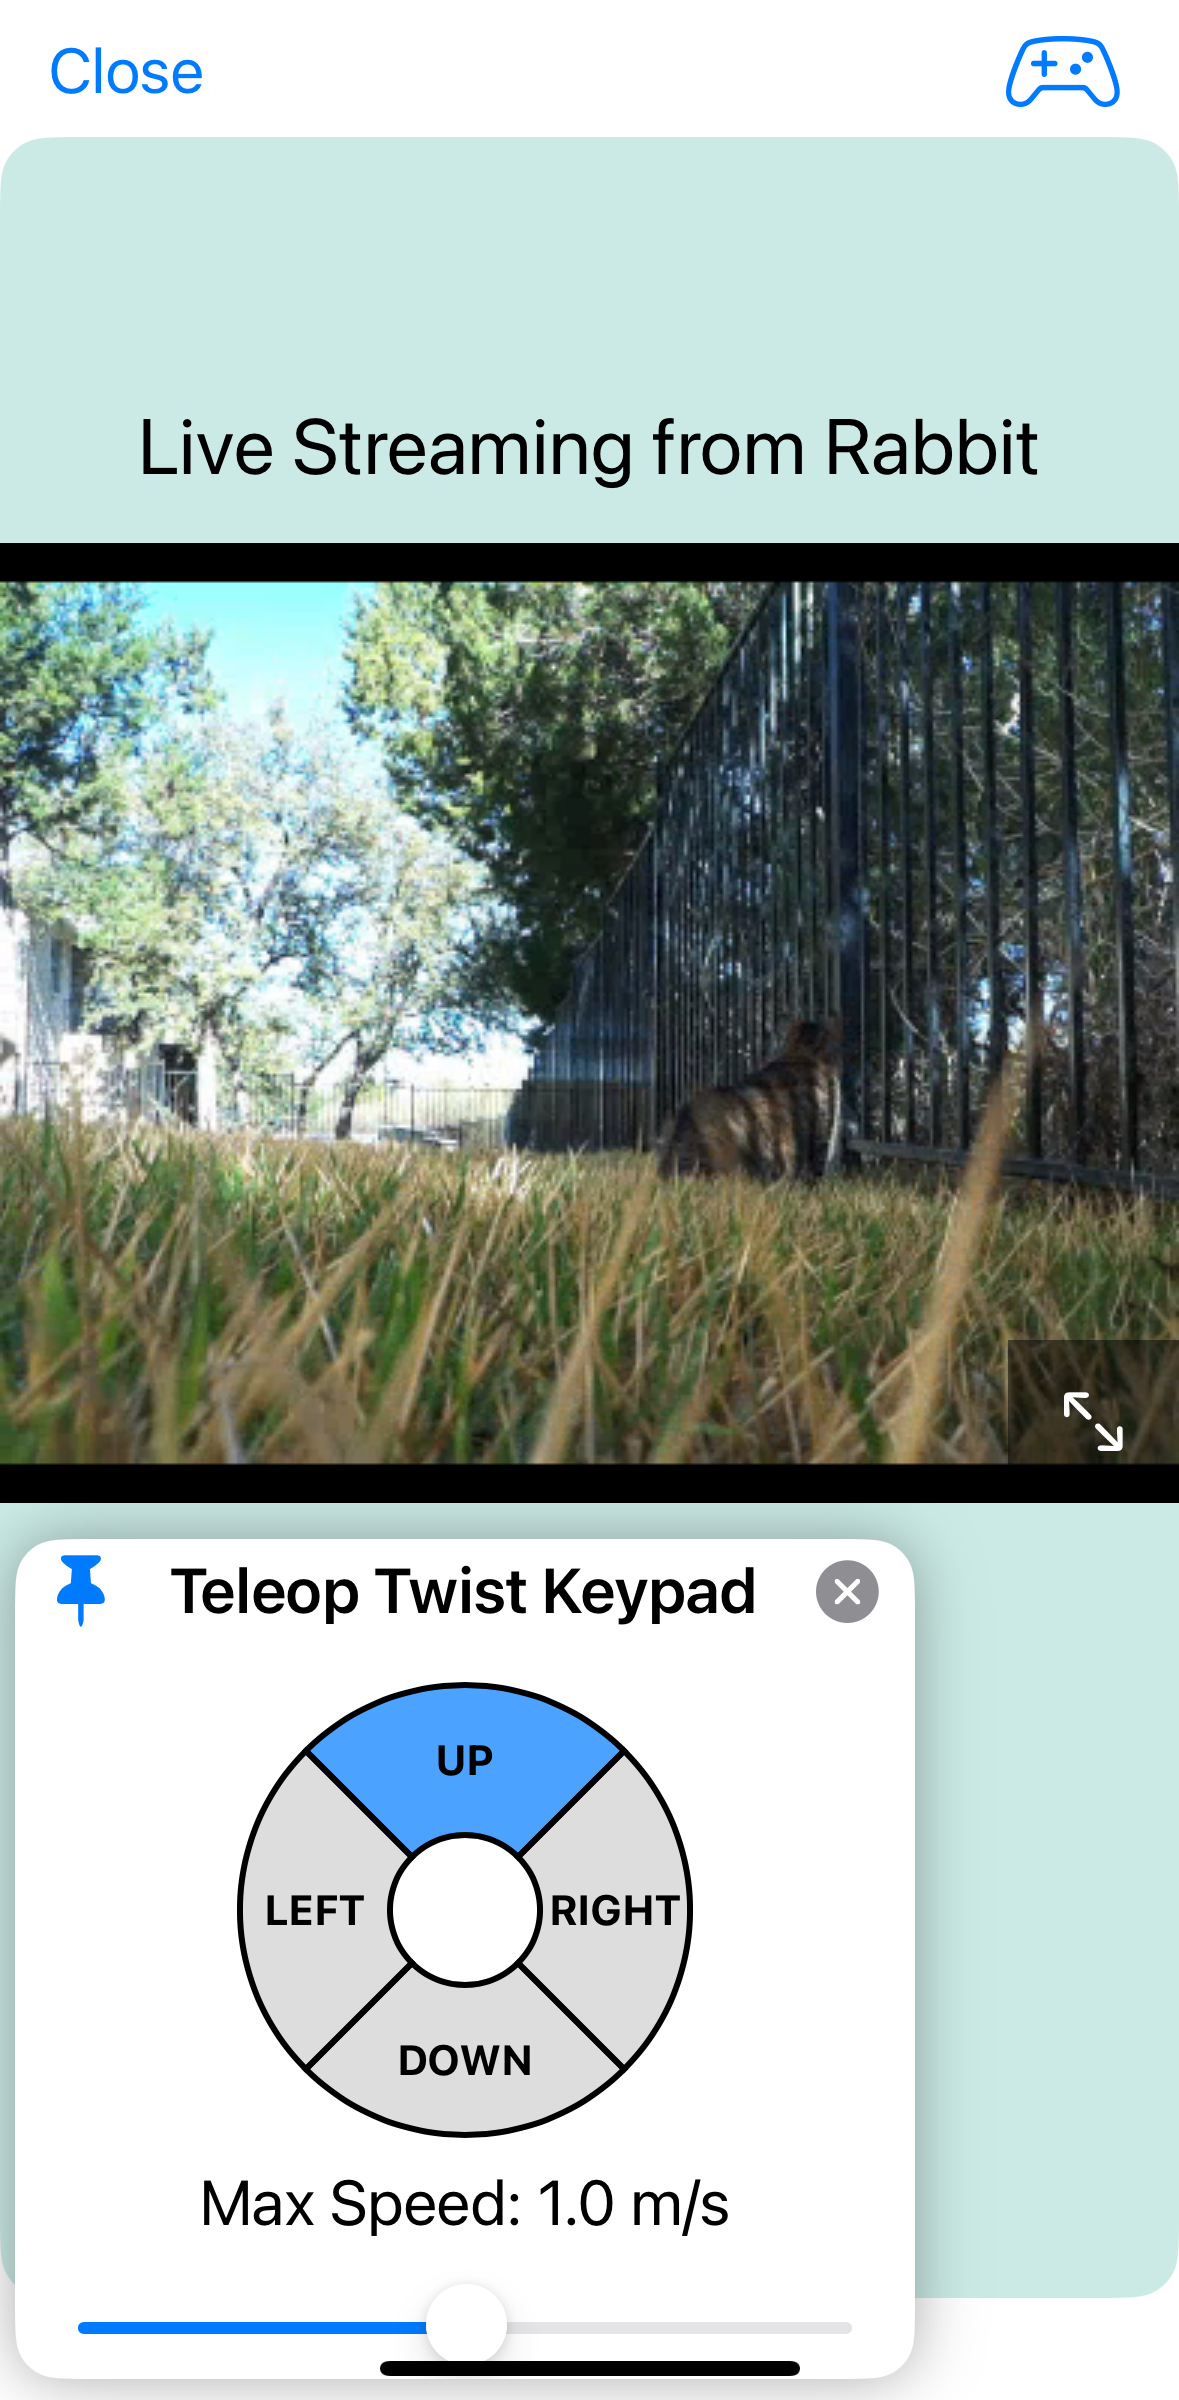
Keypad Control
If using the “Keypad”, we tap the key for the robot to go in the corresponding direction. To continuously send the same velocity messages, we press down the key, which sends the same message every 0.3 seconds.
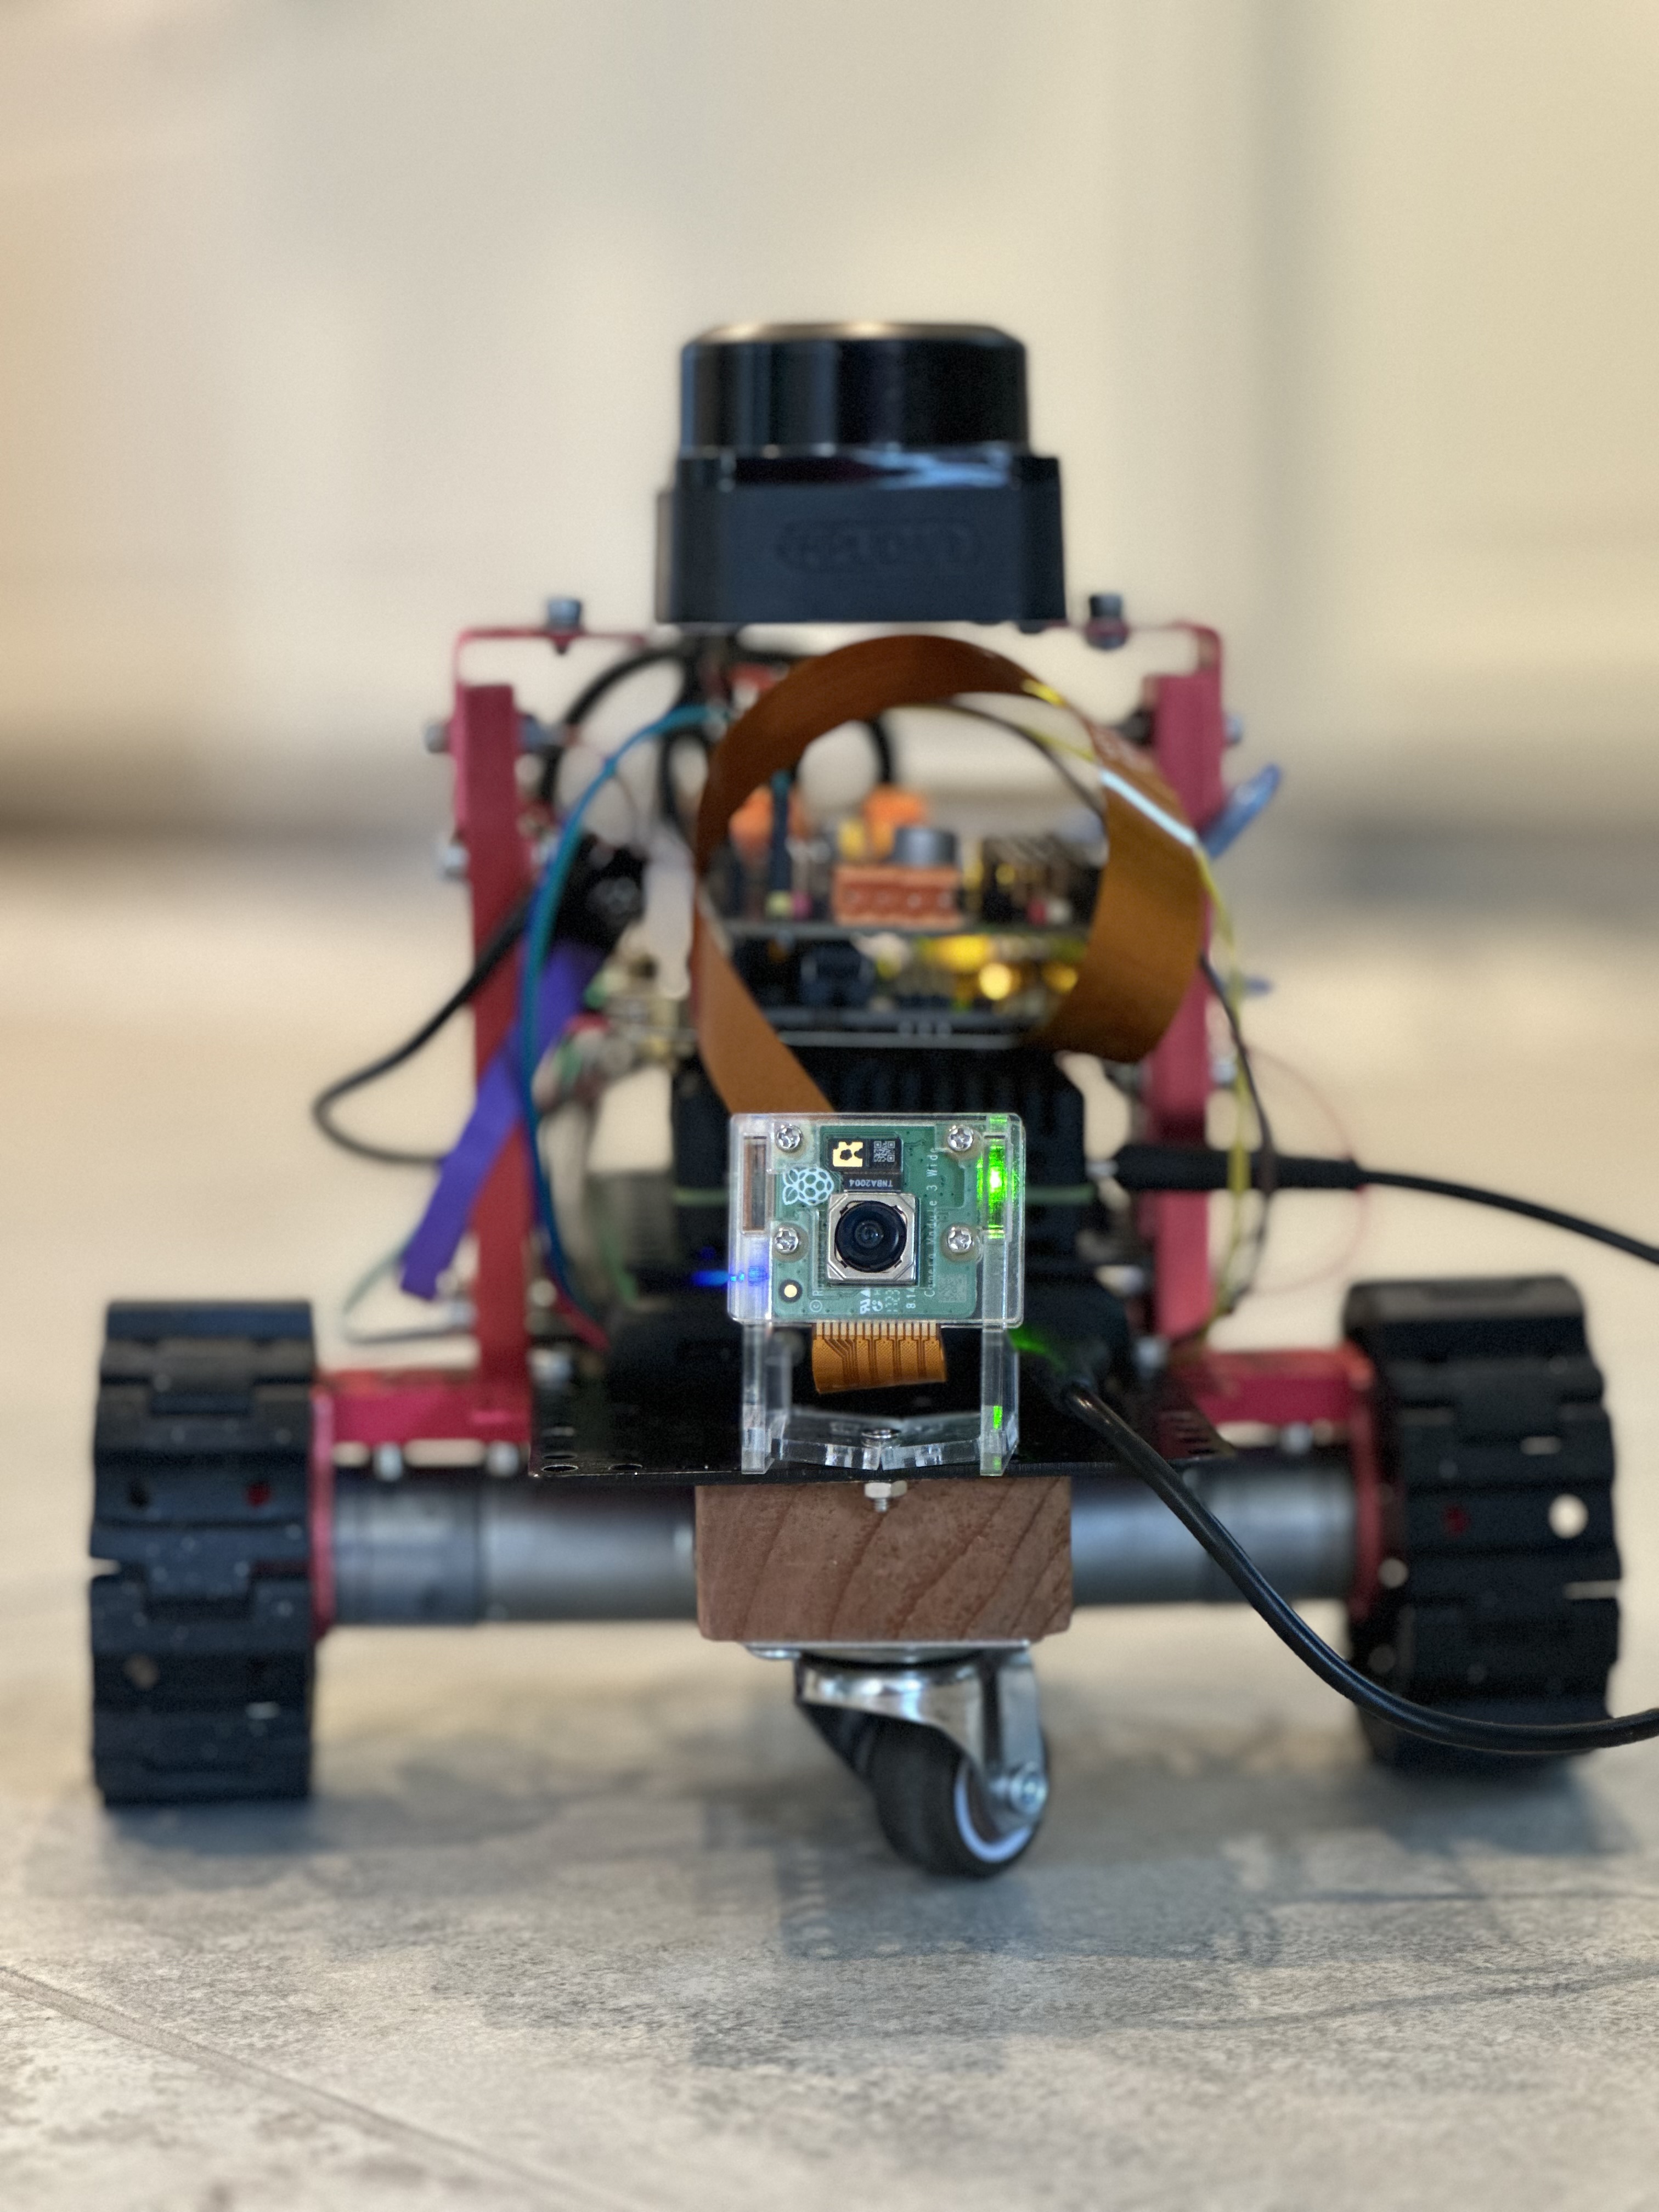
Meet Robot R4
This is a Differential Mobile Robot featuring two independently driven wheels and two caster wheels for balance. The Differential Bot moves forward or backward by spinning both wheels in the same direction, and it rotates in place by spinning the wheels in opposite directions.
Here is my robot circling the kitchen. I was controlling the robot using Droid Vision’s joystick and viewing the kitchen from the robot’s onboard camera through the Droid Vision app. The robot has a pair of sports tires, and the ground is textured tile, so the ride is a little bumpy. :)
Cheers!